What Do You Dip Dye Candles With?
What is Dip Dyeing?
Dip dyeing candles is a technique where the base of the candle is submerged into pools of colored wax to create an ombre or color gradient effect. While the origins of dip dyeing candles are unclear, it became popular in the 1990s as homemade candles grew in popularity. The technique allows for creative color combinations and designs not possible with solid colored candles (History of Dip Dye Candles). The dipping process exposes just a portion of the candle to color, leaving the rest its original hue. When the dyed wax hardens on the candle base, it creates a seamless ombre transition from one color to the next.
Dip dyeing has seen a major resurgence in recent years, especially with the growth of homemade and artisanal candle brands. The aesthetic quality and visual interest of dip dyed candles have made them popular for home decor and gifting. Social media has also fueled the trend, as the candles make for beautiful photos that inspire others to try the technique. While dip dyeing started with solid color ombre designs, creators are getting more experimental with patterns, shapes, and layering colors. The possibilities are endless for infusing candles with personalized artistry and style through dip dyeing.
Why Dip Dye Candles?
Dip dyeing candles is a creative way to customize and personalize candles. It adds beautiful and unique visual interest through ombre or blended color effects. By dipping a plain candle into colored wax, you can transform it into a colorful work of art.
Unlike painting candles, which applies color to the outside surface, dip dyeing permeates through the wax layers. This allows colors to blend softly into one another, creating an eye-catching tie-dye or ombre look.
Dip dyeing is an easy candle making technique that requires minimal supplies. All you need is a plain candle, melt wax, and dye blocks or liquid candle dye. You can combine any colors you like to make custom candles.
Dip dyed candles make great gifts, centerpieces, or decorative accents. The artistic coloring makes each candle unique. So if you’re looking for a simple way to add artistry and flair to plain candles, dip dyeing is a fun option to try.
How to Dip Dye
Dip dyeing candles is a fun craft that allows you to create beautiful ombre or colorful designs. Here are the basic steps for how to dip dye candles:
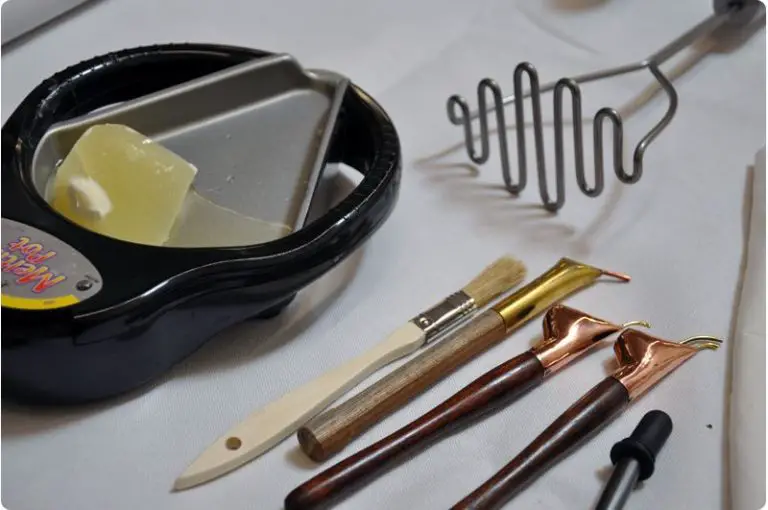
Prepare your materials. You’ll need white taper or pillar candles, wax dye blocks or liquid candle dye in your desired colors, a double boiler or crockpot to melt the wax, and parchment paper.
Prepare the candle surface. Make sure candles are clean of debris. You can wash with mild soap and water. Let dry completely before starting.
Melt your wax. Add wax dye to melted wax in your double boiler or crockpot. Stir well until dye is fully dissolved. Keep wax heated to 190-200F throughout project.
Dip the candle. Holding the wick, dip the candle in melted wax to desired depth and swirl to coat. Let dry on parchment paper before redipping.
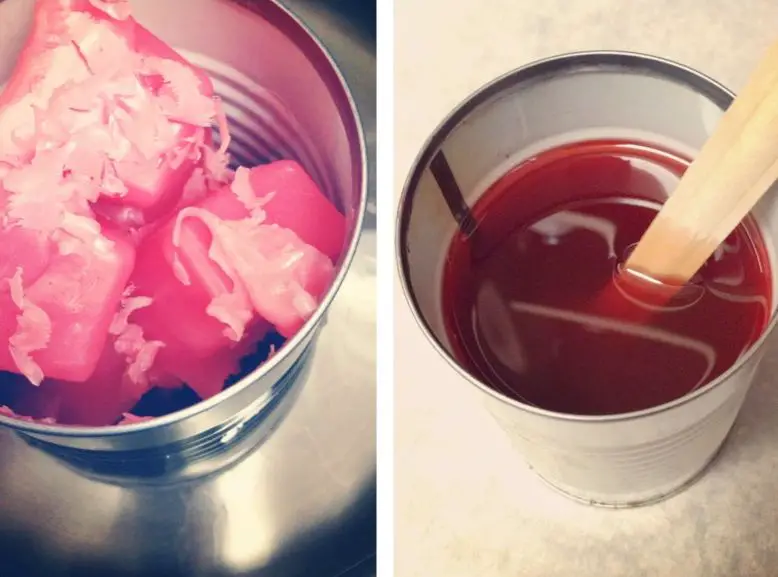
Continue dipping to achieve ombre effect. Dip deeper or in a different color. Allow to fully dry and harden between coats. Add more layers for a bolder look.
Finish by straightening the bottom and trimming wick. Display and enjoy your hand dipped candles! For more tips see this guide.
Best Practices
When dip dyeing candles, there are some best practices to follow for the highest quality results:
Use a wax with a high melting point like soy, beeswax, or paraffin wax. Lower melting point waxes like gel wax may melt in warmer environments. Prepare wicks by priming and trimming to 1⁄4” length before dipping. This allows the wax to fully coat the wick and prevents sooty burning. Use liquid candle dye rather than color blocks – liquid dyes mix easily into the wax for vibrant, even color.[1]
When layering colors, start with lighter colors first. Let each layer fully dry before dipping in the next color. Thinner layers of color give sharper transitions. Allow the final color layer to fully dry for 24 hours before burning finished candles. Following these best practices will result in stunning and safely-burning dip dyed candles.
Troubleshooting
Troubleshooting dip dyed candles is an important part of the process of candlemaking. Here are some common issues and solutions to try:
Cracking or Peeling
Cracking or peeling of the wax exterior can occur when dipping candles. This is often caused by dipping the candle when the wax is too cool and starting to harden, or not allowing enough time between dips for the wax to fully adhere and set up. Allow the wax to fully melt and remain in its ideal temperature range of 150-165°F throughout the dipping process. Also be sure to allow at least a few minutes between dips for thorough cooling and hardening of each new wax layer [1].
Wax Seepage
Wax may seep through cracks or holes in the candle if the temperature is too high or dips are too frequent. Maintain proper wax temperature and give several minutes between dips for full setup. Check for any small gaps or holes in the candle body and ensure wax is fully adhering with each layer [2].
Color Bleed
Overdipping candles can lead to color bleed, where subsequent wax layers start to dissolve and blend together. Allow adequate dry time between dips and do not overdip candles more than 4-5 times maximum.
Wick Centering
To prevent off-center wicks, hold the candle rod very steadily and lower it down into the wax vat perpendicular to the surface. Check wick centering after each dip and gently bend or reposition as needed while wax is still warm and pliable.
Inspiring Dip Dyed Candle Designs
There are many creative ways to dip dye candles to achieve stunning effects. Some popular techniques include:
Ombre
Ombre dip dyed candles fade from one color to the next in a gradient. This gives a soft, blended look. Slowly submerge just the bottom of the candle into the dye and leave it to soak upwards.
Marble
For a marble look, pour two colors of dye into a dipping container. Before the colors blend fully, dip the candle in swirling motions. The colors will wrap around each other.
Splatter
Splatter dip dyed candles have a fun, abstract style. Apply dye in flicking motions with a brush or spoon. Let the droplets and splashes create a textured, multi-colored surface.
Striped
Stripes can be made by dipping candles vertically into multiple dye colors. Space the stripes apart for a bold graphic look. Twist the candle slightly between dips for angled stripes.
Botanical Motifs
Try using stencils, stickers or lace to create patterns like flowers, leaves or geometric shapes. Carefully apply the template material before dipping in dye for a tone-on-tone look.
Safety Tips
When dip dyeing candles, it’s important to follow some basic safety tips to ensure you avoid accidents or injuries.
Proper ventilation is crucial when working with melted wax. The wax can release fumes as it heats up, so be sure to work in a well-ventilated area. Open windows or use a fan to circulate fresh air. Avoid breathing in any wax vapors directly.
Melted wax can also be extremely hot. Always use caution when dipping the candle wicks into the wax to avoid splashing or spilling. Allow dipped candles to fully cool and harden before handling further. Wear gloves or oven mitts if you need to re-dip multiple times. Avoid any skin contact with the hot wax to prevent burns.
As with any open flame, fire safety is paramount. Keep the dipping area clutter free and away from flammable materials. Have a fire extinguisher nearby. Do not leave burning candles unattended. Extinguish all candles before leaving the room. Unattended candles account for 24% of house fires (according to one reddit source).
Follow all standard candle safety rules, like keeping burning candles on fire-resistant surfaces. Take extra care with dip dyed candles, as any added materials could pose potential fire hazards if not fully cured or melted into the wax.
Supplies to Get Started
Here are the basic supplies you’ll need to get started with dip dyeing candles:
Wax
The most common waxes used for candle making are paraffin, soy, and beeswax. Paraffin wax is inexpensive and easy to work with. Soy wax is made from soybean oil and is a renewable resource. Beeswax produces beautifully fragrant candles. You can also use wax flakes or pellets.
Dyes
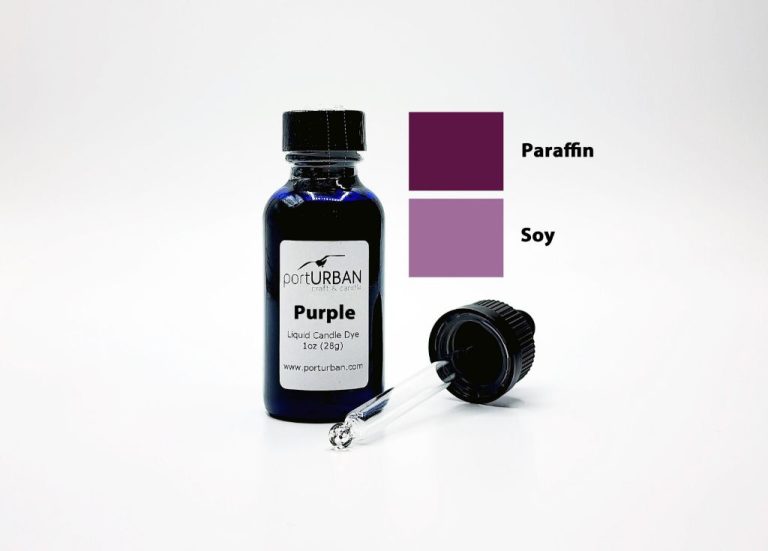
Liquid candle dyes are the best for dip dyeing. They come in a variety of colors and mix well into the melted wax. Crayon shavings or oil-based dyes can also be used.
Wicks
Make sure to get wick that is made specifically for candle making. The wick size should be proportional to your candle diameter. A larger candle needs a thicker wick so that it burns properly.
Containers
Glass, metal, or ceramic containers work well for dip dyed candles. Make sure the container is heat safe up to 180°F. The container needs to be narrow enough for the wax to adhere as you dip dye.
Thermometer
A thermometer is essential for monitoring your wax temperature. Maintaining the proper temp (180-200°F) ensures the wax adheres and releases properly as you dip.
Other Dip Dye Crafts
Dip dyeing is a popular technique not only for candles, but for various other crafts as well. Some other common items to dip dye include:
Ornaments
Glass or plastic ornaments can be dip dyed to create beautiful ombre effects. This is a great way to customize ornaments for the holiday season. Make sure to use dye safe for the ornament material.
Votives
Small votive candles are ideal for dip dyeing. Their petite size allows for precise ombre effects. According to Rit Dye, votives should be dipped halfway into the dye for best results.
Tapers
Slim taper candles make stunning dip dyed decor. Alternating dye colors along the taper creates striking stripes. Ensure tapers are fully dried before burning. As recommended by Seamwork, dip halfway and rotate to achieve even ombre.
Pillar Candles
Pillar candles look beautiful when dip dyed. Taller pillars allow for more colorful gradients. To get clean lines, dip just 1-2 inches at a time according to Delish Candles. Wider pillars can be striped or swirled too.
Frequently Asked Questions
Here are some common questions about dip dyeing candles:
What are the best dyes to use?
Liquid candle dyes or even crayons work well for dip dyeing. Some popular options are Candlescience liquid dyes, Jacquard dyes, and Crayola crayons (https://hearthandvine.com/dip-dye-candles/). The wax needs to be hot enough to melt the crayons.
How do I avoid bubbles and uneven dip lines?
Make sure your candle wax is around 175-185°F when dipping to get smooth results. Work quickly before the wax starts to cool and harden. Gently tap the candle on the side of the dipping container to release any bubbles (https://www.crafts-beautiful.com/blog/diy-dip-dye-candles).
Can I redip a candle multiple times?
Yes, you can dip dye a candle multiple times to create ombre effects. Make sure the wax has a chance to partially harden between dips. The key is working while the wax is still warm and pliable.
How do I get crisp lines between colors?
Allow the wax to cool and harden for at least 10-15 minutes between dipping into different dye colors. This helps create a clean break between the layers of colored wax.
What if the dye bleeds or mixes together?
If you don’t allow the wax to cool adequately between dips, the colors may bleed together. Work quickly but let each layer harden before adding another color. Candle wax crayons tend to bleed less than liquid dyes.

