What Can I Dye Wax With?
Wax dyeing is a textile dyeing process that involves applying melted wax to fabric to create a resist pattern, then dyeing the fabric. The waxed areas repel the dye, revealing the undyed fabric underneath when the wax is removed.
Wax resist dyeing dates back centuries, with early examples found in Egypt, Africa, and China. It became popular in Europe during the 17th and 18th centuries to decorate fabrics and garments. Traditional batik techniques from Indonesia also rely on wax resists.
Today, crafters use wax dyeing to add colorful designs to fabric and finished textile projects. Common techniques include batik, where wax is applied with a tjanting tool, and crayon resist, where crayons are used to draw designs. Low-temp melted wax works best. Fiber-reactive, acid, and disperse dyes are commonly used to dye the exposed fabric.
Types of Wax for Dyeing
When dyeing fabric, the most common types of wax used are beeswax, soy wax, and paraffin wax. Each has their own properties that affect how they interact with dye.
Beeswax is a natural wax made by honey bees. It has a low melting point between 144-147°F which makes it easy to melt and apply. Beeswax allows dyes to deeply penetrate fabric. It also washes out easier than other waxes.[1]
Soy wax is made from hydrogenated soybean oil. It melts at temperatures between 135-145°F. Soy wax creates a medium dye barrier, allowing some dye penetration while still resisting dye in other areas. It washes out fairly easily with laundering and ironing.[2]
Paraffin wax is a petroleum byproduct made from refined oil. It has a melting point between 115-180°F. Paraffin creates a strong dye barrier for crisp resist patterns. However, it can be more difficult to fully wash out of fabric compared to natural waxes.
For achieving deep, saturated colors; beeswax and soy wax tend to allow dyes to absorb better into fabric. Paraffin wax is preferred when seeking very defined, precise patterns and dye blocking.
Dyes
There are several types of dyes that can be used to color wax for dyeing and other craft projects:
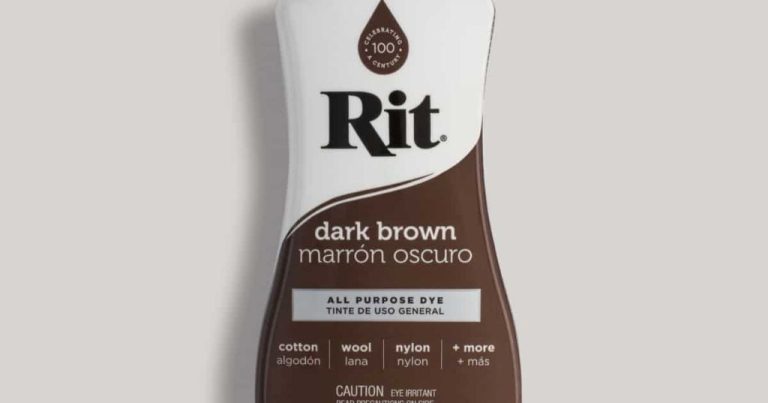
Food coloring – This is probably the most readily available and affordable option. Standard liquid food coloring can be added directly to melted wax to create bright colors like red, blue, green, etc. Gel food coloring will also work. Just be aware that food coloring will fade over time if exposed to light.
Liquid watercolors – Watercolors intended for paints can dye wax as well. They provide more color options than standard food dye. Like food coloring, they can fade over time. A little goes a long way, so start with small amounts.
https://yellowdyes.com/dyes-wax-printing-supplier-india/
Acid dyes – These synthetic dyes are designed specifically for dyeing fabric, silk, and wool. They work well for wax and create very vibrant, intense colors. The dye powder must be dissolved into liquid first before adding to the wax. Acid dyes are colorfast and lightfast.
Disperse dyes – Another type of synthetic dye used for fabrics. Disperse dyes color wax with bright hues that resist fading. The dye powder must be dissolved first before mixing into melted wax. Provides great colorfastness.
Natural dyes – Dyes extracted from flowers, plants, vegetables, and other natural materials can color wax with lovely organic hues. Common sources are turmeric, berries, avocado pits, onion skins, etc. Natural dyes produce softer, more muted tones compared to synthetic dyes. Lightfastness varies.
Techniques
There are several key techniques for dyeing wax:
Melted Wax
One of the most common techniques is using melted wax. This involves heating up beeswax or paraffin wax until it liquefies. Then, the melted wax is applied to the fabric or surface using a tjanting tool, brush, or other applicator. The wax cools and hardens, creating a resist. When the fabric is later dyed, the wax-coated areas repel the dye. This produces a negative batik effect. Sources: Textile Art in White and Blue
Cold Wax
Cold wax dyeing involves using wax that is solid at room temperature. The wax is rubbed onto the fabric to create a resist. Crayons or solid wax blocks are often used. Cold wax dyeing allows for coloring directly on the surface without heating anything. It’s a simpler technique but doesn’t provide the fine details of hot wax.
Batik Wax Resist
Traditional batik involves drawing patterns on fabric using a wax resist. It was developed in Indonesia but used worldwide. A tjanting tool is traditionally used to apply melted wax in specific designs. After dyeing and drying, the wax is removed to reveal the pattern. Batik allows for intricate, multilayered designs.
Encaustic Painting
Encaustic painting uses heated beeswax combined with colored pigments. The molten paint is applied to a surface in layers. As it cools, the wax solidifies. Additional layers can be added for depth. Tools like heat guns allow manipulating the wax to blend or remove colors. Encaustic provides a unique luminous effect.
Tools Needed
To dye wax, you’ll need some basic tools and supplies. The essential tools include:
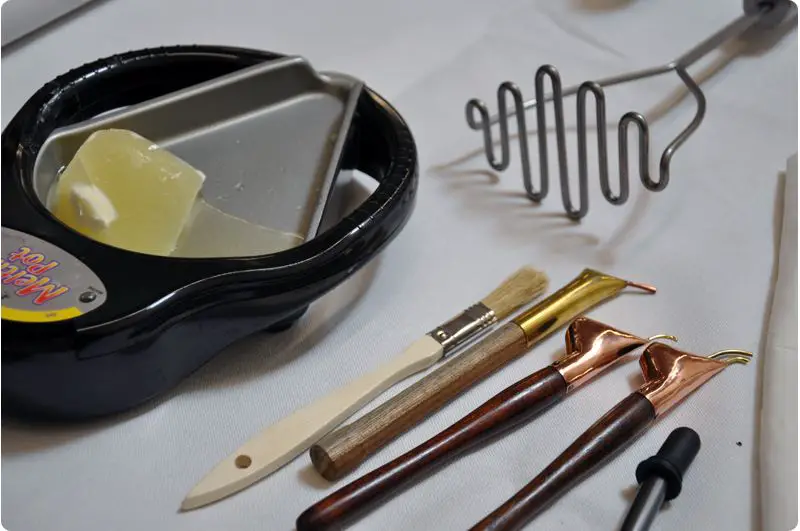
- Wax melter – You’ll need some type of wax melter or double boiler to melt the wax so it can absorb the dye. This allows you to combine the wax and dye mixture together.
- Paintbrushes – Paintbrushes, sponge brushes, or foam brushes allow you to apply the dye onto the wax surface. Look for brushes designed for wax work.
- Containers – You’ll need containers to melt the wax in as well as hold the dye mixtures. Glass or metal containers work best.
- Painting surface – This provides a work surface for melting wax and applying dye. Silicone mats, wax paper, or foil are options.
Having these basic tools readily available will make it easier to get started dyeing wax using a variety of techniques and projects. Quality tools lead to better results.
Safety
When working with wax and dyes, proper safety precautions should be taken to avoid potential hazards. According to Pro Chemical and Dye, overheating wax can produce harmful vapors and pose a fire risk. Here are some guidelines for staying safe:
- Work in a well-ventilated area to allow wax vapors and fumes from dyes to dissipate.
- Avoid ingesting wax or dyes, as some can be toxic if consumed.
- Use care when melting wax to avoid burns. Heated wax can remain hot after removal from a heat source.
- Wear gloves when handling dyes or wax to prevent skin irritation.
- Read and follow all safety recommendations from dye or wax manufacturers.
Taking proper precautions when working with wax and dyes allows the artist to focus on the creative process while minimizing health risks.
Cleaning and Sealing
When working with dyed wax, removing wax residue and properly sealing finished pieces is important. Here are some tips for cleaning up after wax dyeing projects:
To remove dried wax from surfaces, let any spilled wax completely harden first. Then try using an old plastic card or blunt scraper to chip off pieces of dried wax. Go slowly to avoid damaging the underlying surface. For stubborn wax on surfaces like carpet or furniture, try freezing it with ice cubes before scraping. According to The Spruce, you can also try gently heating the wax with a hairdryer to liquefy it for easier removal.
To get wax out of fabric or clothing, first let it harden. Then use a dull knife or spoon to “scrape” and lift away as much wax as possible before laundering the item. Applying an ice cube to the wax stain before scraping can help harden the wax faster. Just be careful not to damage delicate fabrics. For details see the guide at Grove Collaborative: How to Get Wax Off Clothes, Carpets & More.
Once a dyed wax project is complete, sealing it will help preserve the finish. Use a sealant like a spray acrylic sealer or brush-on polyurethane to protect the wax from handling and help prevent color transfer. Fully cured sealants will also provide protection from UV light which can fade some wax dyes over time. Allow sealants to dry completely as directed before handling finished pieces.
When not in use, store dyed wax pieces covered in a cool, dry location away from direct light to help preserve the colors. Consider wrapping pieces in acid-free tissue or unprinted newsprint for extra protection.
Advanced Techniques
Batik artists use advanced techniques like layering colors, creating crackle effects, and image transfers to create more complex and visually interesting designs. According to Dharma Trading, batik masters employ a process of repeated waxing and dyeing to layer colors and achieve a final result that showcases their mastery of color mixing and overdyeing.
Crackle effects can be achieved by layering the wax resist in certain ways. As described by A Beautiful Mess, you can create a crackled pattern by applying a layer of wax, dyeing the fabric, applying another layer of wax on top, and dyeing again. The second layer of wax will crack and create organic cracks when the fabric is dyed for the second time.
Image transfers involve using photocopies or printouts to apply an image to the fabric before dyeing. As explained in the Encyclopedia Britannica, the paper image adheres to the wax and acts as a resist when the fabric is dyed. The end result is an image transferred onto the dyed fabric. This adds more diversity and customization to batik designs.
By mastering advanced techniques like layering colors, producing crackle effects, and image transfers, batik artists can create intricate fabrics full of depth, texture, and visual interest.
Example Projects
Looking for step-by-step tutorials for wax dyeing projects? Here are some beginner, intermediate, and advanced projects to try.
Beginner
If you’re just starting out with wax dyeing, try these simple projects first:
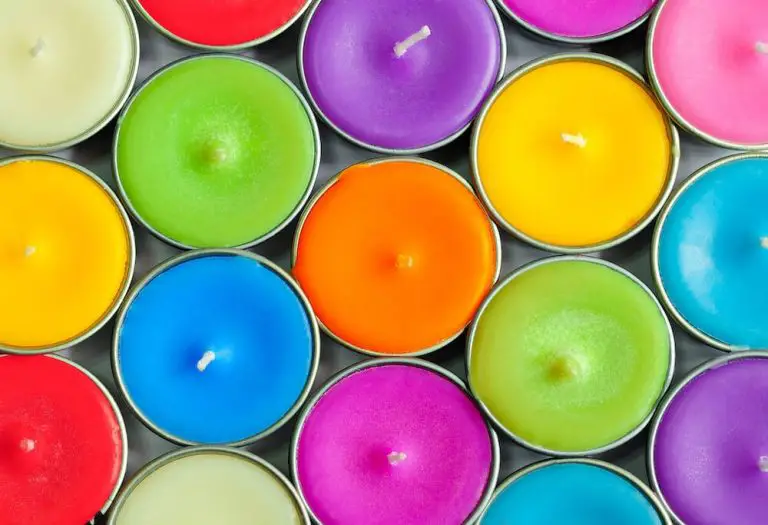
- Dye a basic candle – Melt plain wax and add dye to create a solid color candle. Start with a small votive or tealight.
- Ombre candle – Alternate pouring small amounts of differently colored wax to create an ombre effect.
- Striped candle – Pour alternating stripes of colored wax into a mold.
Intermediate
Once you’ve mastered the basics, try your hand at these more advanced techniques:
- Marble candle – Pour multiple colors at once and swirl with a skewer for a marbleized look.
- Geode candle – Paint the inside of a glass container with wax dye before pouring in plain wax to create a “geode” effect.
- Leaf candle – Press dried leaves or flowers into the wax while it’s still warm for natural embellishments.
Advanced
Take your wax dyeing to the next level with these intricate projects:
- Layered palette knife painting – Use a palette knife to layer different colors of dyed wax for a painting-like effect.
- Intricate carving – Sculpt detailed designs into the surface of plain or colored wax.
- Botanical embedded candle – Carefully press delicate flowers, leaves, and herbs into wax to fully embed them.
For step-by-step instructions and tips on these projects and more, check out tutorial videos from experts like [My Candle Making](https://www.mycandlemaking.com/candle-making-adelaide/). Get creative and have fun with wax dyeing!
Getting Creative
When dyeing your own wax designs, it opens up endless possibilities for creativity. Here are some tips on how to experiment with your own designs:
Focus on simple yet striking patterns and shapes. Geometric designs like circles, lines, and dots make great starting points (Batik Instructions from Earth Guild).
Look to nature and cultural designs for inspiration. Elements from nature like plants, animals, and landscapes can inspire beautiful batik work.
Use wax to make intricate textures. You can make dotted, striped, wavy, and other patterns by dripping, splattering, and drawing with the wax.
Combine colors thoughtfully. Plan out your dye colors and where they will overlap. Contrasting and complementary colors often look best together.
Reuse your wax between rounds of dyeing. This saves wax and allows you to easily align new layers.
Keep good records of your wax layers and dye colors. This will help you replicate the design.
Make small test pieces first. Experiment on small swatches until you perfect your design.
Don’t worry about perfection. The handmade look of batik is part of its beauty and appeal.
Remove wax fully between dye rounds. Any residual wax will block absorption of the next dye.
Rinse thoroughly after dyeing. Leftover dye can muddy your next round of colors.
Heat setting your finished piece will help set the dyes (A Step-By-Step Guide to Batik in the Classroom).