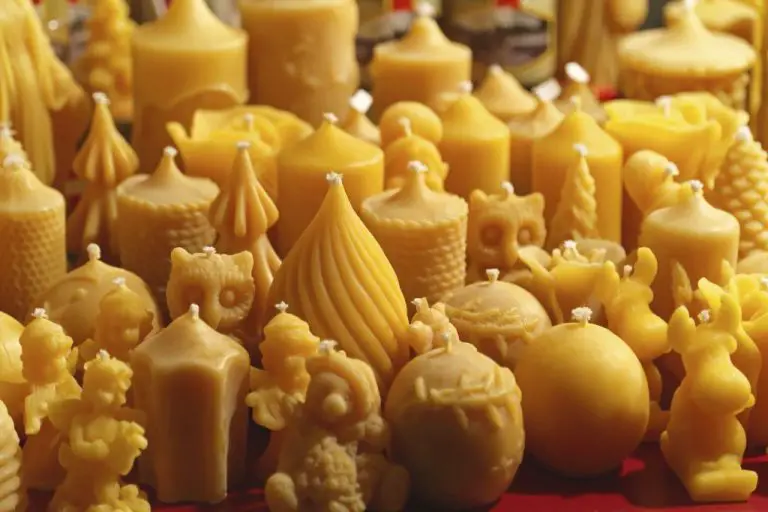
Can You Turn Candles Into Wax Melts?
Wax melts, also known as tart melts or wax tarts, are small cubes or shapes of scented wax that are warmed to release fragrance. They are made from soy wax or paraffin wax and infused with essential oils and fragrances.
Wax melts have become extremely popular in recent years as an alternative to scented candles. When warmed on a wax warmer, tart melts release fragrance without having an open flame. This makes them safer and easier to use than traditional candles.
Wax melts allow you to switch up scents easily as they are single use. You can also blend fragrances by warming multiple cubes at once. The popularity of wax melts has grown thanks to their convenience, affordability, and wide range of amazing scents available.
Many people are now wondering if they can save money by converting old candles into wax tarts at home. This allows you to repurpose candle wax and create custom scents. The process is relatively simple and can be done with items you already have at home.
Candle to Wax Melt Conversion Process
Converting candles into wax melts is a simple process that can be done at home. Here are the basic steps:
Remove candle wicks – Before chopping up candles, make sure to trim and remove all wicks. This prevents wick pieces from getting into your melted wax.
Chop candles into small pieces – Break down candles into smaller chunks, about 1-2 inches in size. This allows the wax to melt faster. Avoid shredding or grating candles which can be messy.
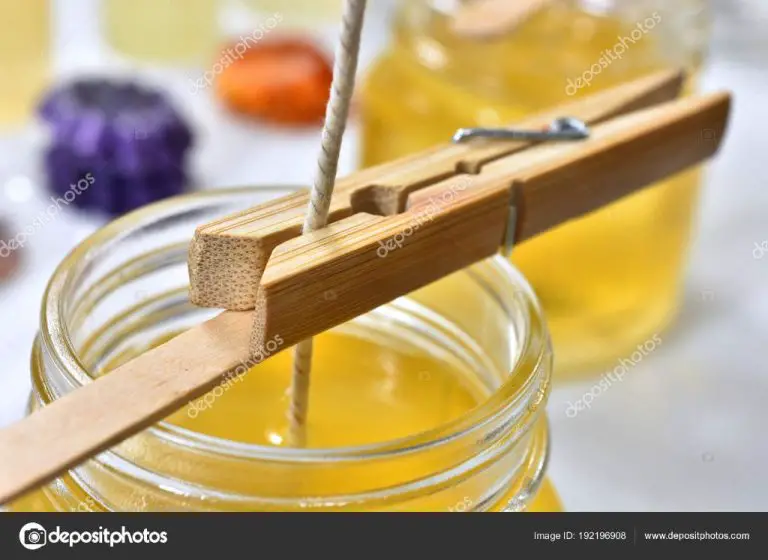
Melt candles in double boiler or crockpot – Place your candle pieces in a glass bowl or measuring cup and set it over a pot of simmering water to create a double boiler effect. The steam will slowly melt the wax. A crockpot works too. Melt on low heat.
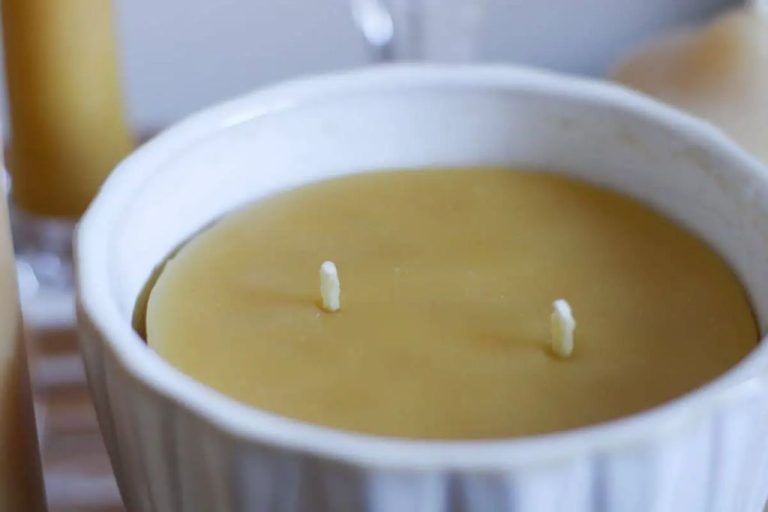
Strain melted wax into silicone molds or jars – Once fully melted, carefully pour the liquid wax through a wire mesh strainer to catch any wick pieces or debris. Then pour the strained wax into silicone molds or jars to set up and harden.
Advantages of Turning Candles into Wax Melts
Turning old candles into wax melts has several advantages. For starters, it’s a great way to upcycle candles that have lost their scent instead of just throwing them away. You can give new life to partially used candles by converting them into wax melts.
Additionally, making your own wax melts allows you to customize the scents completely. You can mix and match fragrance oils to create unique aroma combinations that suit your personal preferences.
Finally, converting candles into wax melts can save you money in the long run. Store-bought wax melts can be expensive over time. Doing it yourself at home with supplies you likely already have is an affordable alternative.
Candle Wax Types
The type of wax you use can significantly impact the quality and performance of your homemade wax melts. Here are some of the most common candle waxes and their key properties:
Paraffin Wax
Paraffin wax is derived from petroleum. It’s relatively inexpensive and makes up the majority of store-bought candles. Paraffin has a low melting point and releases fragrance well. However, it can produce more soot than natural waxes when burning. Paraffin can also shrink or bend when exposed to high temperatures.
Soy Wax
Soy wax is made from hydrogenated soybean oil. It’s a renewable and environmentally-friendly natural wax. Soy wax blends well with essential oils and has excellent scent retention. It has a lower melting point than paraffin, so soy wax melts release fragrance at lower temperatures. Soy can be prone to frosting on the surface.
Beeswax
Beeswax is a natural wax produced by honey bees. It has a sweet, honey-like scent. Beeswax has excellent fragrance retention and burn properties. It’s compatible with essential oils but can be more expensive than other waxes. Beeswax has a very high melt point, so it may not melt as readily in wax warmers compared to paraffin or soy.
Fragrance Oils
When making your own wax melts at home, using fragrance oils is key for adding wonderful scents. There are many types of fragrance oils to choose from including floral, fruity, bakery, spicy, and clean scents. Popular options include lavender, vanilla, lemon, jasmine, cinnamon, and more.
In general, use about 1 ounce of fragrance oil per 1 pound of wax. This produces nicely scented wax without being overpowering. However, you can adjust the amount to suit your preferences. Start with less if you want more subtle scents.
High quality fragrance oils made specifically for candle and wax melt making can be purchased online or at craft stores. Avoid using fragrance oils meant for other purposes like massage oils or soaps, as they may not be formulated to withstand high temperatures. Stick to candle and wax melt suppliers for the best results.
Molds
You’ll need to choose what type of molds you want to use for pouring your wax melts. Two popular options are silicone molds and tins.
Silicone molds come in all sorts of fun shapes like flowers, seashells, hearts, and more. They are flexible and make removing the finished wax melts easy. Silicone molds allow you to get creative with the melt designs.
Metal tins and clamshells result in standard circular wax melt shapes. However, they are sturdier than silicone molds for storage and travel. Tins easily fit into wax warmers too. Clamshell designs allow the melted wax to pool in the bottom cavity.
Consider the size and shape molds you want. Smaller wax melt molds like mini-flowers take up less space in warmers. Larger shapes allow more wax to melt at once for stronger fragrance. Experiment to see what works best for your needs.
Storing and Curing
Proper storage and curing is an important step to ensure your homemade wax melts maintain their quality and scent. After pouring your wax melts into molds and allowing them to fully set, usually about 24-48 hours, they are ready to be removed from the molds.
Before using your freshly made wax melts, it’s recommended to let them cure for 1-2 weeks. This curing time allows the wax and fragrance oil to fully bind together, resulting in optimal scent throw and performance. Curing wax melts allows the fragrance to stabilize within the wax so it performs consistently melt after melt.
During the curing process, store your wax melts in an airtight glass or plastic container. Glass jars or plastic clamshells work well for storing multiple melts while allowing the fragrance to properly cure. Make sure the container has an air-tight seal to prevent the scent from diminishing over time. Store your wax melt container in a cool, dry place away from direct light during the curing process.
Properly cured and stored, homemade wax melts can last 6 months to a year before the scent starts to fade. Just make sure to keep them in an airtight container in a cool, dark place. With the right storage and curing, you can enjoy your homemade wax melts for many months!
Wax Melt Warmers
Wax melts require a wax warmer to heat and diffuse the fragrance from the wax. You have two main options for warmers – electric or candle.
Electric Warmers
Electric warmers plug into an outlet and use a low-watt bulb or plate to gently warm the wax. They often have interchangeable tops and come in lots of styles. Electric warmers make it easy to control the heat and some have auto shut-off features.
Candle Warmers
Candle warmers use the existing heat from a tealight or votive candle to melt the wax. They are safe and don’t require an outlet. Candle warmers come in ceramic styles or feature a metal plate above a tealight. The warmer reflects the candle heat upwards to melt the wax.
Safety Tips
Follow these tips for safe wax melting:
- Don’t overload the warmer or add too much wax at once.
- Keep wicks trimmed to 1⁄4 inch for candle warmers.
- Always supervise melting wax and never leave a burner unattended.
- Place warmers on a stable, heat-resistant surface away from drafty areas.
- Clean up any wax spills immediately to prevent sticking.
- Allow melted wax to fully harden before handling or removing from warmer.
With some precautions, wax warmers are a safe way to enjoy your homemade wax melts!
Using Your DIY Wax Melts
Once you’ve made your own wax melts, you’ll be excited to start using them! Here are some tips to get the best results from your homemade wax melts:
The burn time for DIY wax melts can vary depending on the wax type and fragrance oil used. Soy wax and vegetable wax melts typically last 4-6 hours when melted in a wax warmer. Paraffin wax melts may burn slightly longer, around 6-8 hours. To extend burn times, avoid using more than 5-7% fragrance oil in your homemade wax melt recipe.
Make sure to use an electric or candle wax warmer designed specifically for melting wax. Tea light warmers work well for wax melts. Place a wax melt cube in the center of the warmer dish. Keep the wax melt away from the sides so it doesn’t adhere to the dish. Turn the warmer on a low-medium setting. The wax will slowly melt and fill the room with fragrance.
Never leave melting wax unattended. Turn the warmer off once the wax fully melts. Try mixing and matching different wax melt scents to create your own personalized fragrance blends. Enjoy experimenting with different wax and fragrance pairings. With some practice, you’ll be making amazing homemade wax melts in no time!
Conclusion
Turning candles into wax melts is a relatively simple process that allows you to recycle used candles and create custom scented wax melts on your own. By grating or chopping candles, melting the wax on low heat, adding fragrance oils if desired, pouring the wax into silicone molds, and allowing time to cure, you can make wax melts with your favorite scents.
Be creative and try mixing candle waxes or layering multiple scents when making your own wax melts. Experiment with adding dried flowers, coffee grounds, spices, or essential oils to create unique aromatic melts. The possibilities are endless when you make your own DIY wax melts!