How Do You Change The Color Of A Wax Candle?
Changing the color of candles can be a fun and creative craft project. With a few simple materials, you can easily dye plain wax candles to create beautiful colored candles to give as gifts or decorate your home. Experimenting with candle colors allows you to make customized candles that match your style and space.
Gather Materials
To get started changing the color of your wax candles, you will need to gather the following materials:
Wax – The most common waxes used for candle making are paraffin, soy, beeswax, and coconut wax. Paraffin wax is inexpensive and easily accepts dyes. Soy wax is natural and eco-friendly. Beeswax has a lovely honey aroma. Coconut wax makes nicely fragranced candles. Choose the type of wax based on your preference and budget. CandleWic and CandleMakingSupplies.net offer a wide selection of waxes.
Dyes – Candle dyes are used to add vibrant colors to wax. Liquid dyes work best for achieving deep, rich hues. You’ll need to select dyes that are compatible with your wax type. Most dyes can be mixed to create custom colors.
Wicks – Wicks draw wax up as the candle burns. Match your wick size and type to the wax, container, and desired burn rate. Popular options include cotton, paper, zinc core, and wooden wicks. CandleMakingSupplies.net has helpful wick selection charts.
Fragrance Oils – Use fragrance oils to add appealing scents to your candles. Floral, food, herbal, and spice oil varieties allow for many enticing aromas. Make sure oils are formulated for candle making. Add oils at around 5-10% by wax weight.
Containers – Choose containers made of glass, metal or heat resistant materials. Match the diameter to your wick size. Make sure containers have at least 1/2 inch of headspace for the wax pool.
Prepare the Wax
The first step in changing the color of wax candles is to prepare the solid wax for dyeing by melting it down into liquid form. It’s best to start with wax that comes in chunks or pellets, rather than blocks of wax. Breaking the wax into smaller pieces helps it melt faster and more evenly.
To melt wax, you’ll need a double boiler. This consists of one pot with water in it that you’ll heat on the stove, and another heat-safe pot or container that sits on top of the first pot to hold the wax. The double boiler allows the wax to melt gently and evenly, without scorching.
Fill the bottom pot with a couple inches of water and heat it until the water simmers. Place your wax chunks or pellets into the top pot or container. As the water heats up, the wax will start to melt. Stir the wax occasionally as it melts to help it liquefy faster. Once the wax has fully melted into liquid form, it’s ready for adding dye.
For specific instructions, see “How to Melt Candle Wax” on Supplies for Candles (https://suppliesforcandles.co.uk/candle-college/best-ways-to-melt-candle-wax).
Add Dye
Adding dye is arguably the most fun part of making colored candles. You can add liquid dye or blocks of dye to candle wax to achieve your desired color.
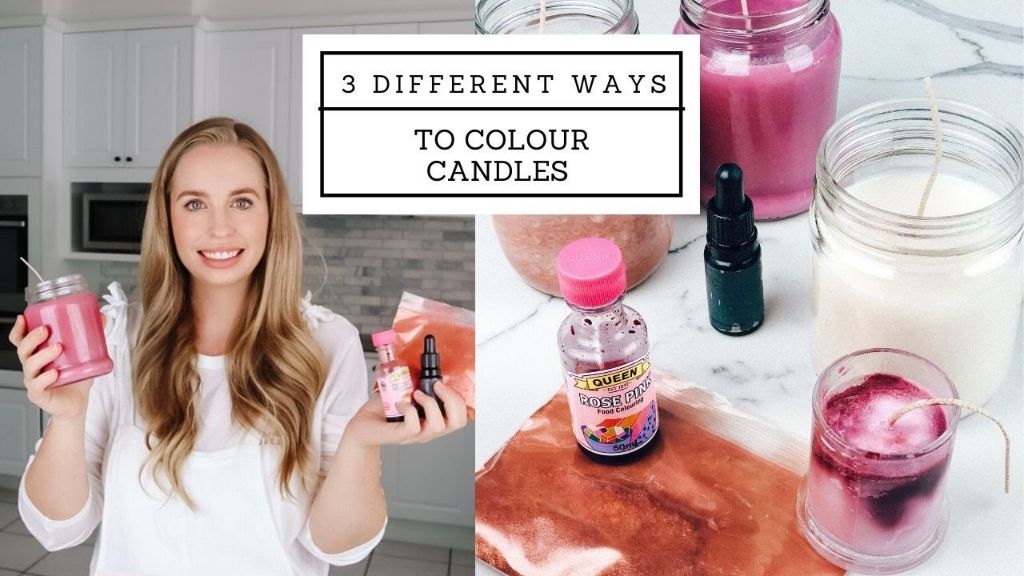
Liquid dyes come in small bottles and allow you to carefully control the exact hue you want. A little bit of liquid dye goes a long way, so start with just a drop or two. Mix the dye into the melted wax thoroughly before adding more. It’s easier to make a candle darker than to lighten it up. Refer to the manufacturer’s instructions for recommendations on how much to use. A good liquid dye brand is CandleScience Liquid Candle Dye.
Dye blocks or crayons are another option for coloring candles. They can simply be shaved or grated into the wax. The dye will melt and incorporate as the wax is heated. Dye blocks allow you to achieve bright, vibrant colors without the mess of liquid dyes. A highly-rated dye block set is the Roizefar Candle Dye Blocks.
No matter which type of dye you use, stir the wax vigorously each time you add color. This helps disperse the dye evenly and avoid streaking. Continue mixing for at least 5 minutes after adding dye to fully incorporate the color. Properly mixing will lead to rich, uniform candle colors.
Add Fragrance
The scent is an essential part of any candle. You can experiment with different ratios for your preferred combination of fragrances. Some commonly used fragrances in candles are vanilla, lavender, cinnamon, and pine1. Choose a light, clean scent if you want the dye color to really pop. Stir in drops of essential oils or fragrance — a good starting point is 1 ounce of fragrance per pound of wax. Blended fragrances work well for a sophisticated scent. You may need to test out a few different amounts to find the right fragrance strength for your preferences.
Prepare Wicks
One of the most important aspects of making quality candles is using the proper wick size. The wick size impacts burn time, wax pool diameter, hot/cool throws, soot levels, and more. Generally, larger candle diameters require larger wick sizes to create an even melt pool. However, even for the same diameter candle, factors like wax type, fragrance load, and additives can impact ideal wick size. This is why testing is critical.
When preparing wicks, it’s important to cut them to fit the height of the container, leaving a small amount of excess wick to anchor at the bottom. This anchoring helps center the wick and prevents it from drifting to the sides as the wax melts. The wick should be trimmed to 1/4″ above the top of the container to prevent extensive mushrooming as the candle burns. Properly sizing and anchoring the wick are simple but vital steps in candle making.
For guidance on recommended wick sizes, consult manufacturer charts for the specific wax, wick, and vessel being used. Keep detailed notes during testing to optimize wick selection. With the right testing and adjustments, beautiful and functional candles can be created.
Pour Candles
Pouring the wax into candle containers is one of the most important steps. It requires care and precision to get a good result. Make sure to heat the wax to the proper temperature before pouring. Most wax melts between 135-165°F before being ready to pour (check manufacturer recommendations). Heat the wax in a double boiler or specialized melting pitcher. Carefully pour the wax into each container, leaving a little room at the top for the wick and finishing later. Pour slowly and steadily in the center of the container to prevent bubbles. Let the wax cool slightly between pours so layers adhere properly. Avoid pouring too quickly or allowing wax to overflow the container. Work carefully, and pour patiently to achieve the best looking finished candle.
As expert candle maker Emma Leilani says, “Pour high and slow when filling candle vessels with wax to prevent air bubbles” (source). Slow, careful pouring is essential for professional quality candles.
Cool and Set
After the candles are poured into molds, it is important to let them sit undisturbed as they harden and cool. According to Lone Star Candle Supply, “Container candles should sit undisturbed for at least 18-24 hours before being moved.” This cooling time allows the wax to completely set and the candles to release themselves from the molds.
Candles that are disturbed or moved too early may end up with defects like cracks, sinkholes, or lean. A Facebook post by Aco Candle Co. shows a timelapse of a candle cooling over 2 hours. They mention that the cooling process is neat to watch as the wax transitions from liquid to solid.
Some tips for proper cooling include avoiding drafts or direct sunlight which could cause uneven cooling. It’s also recommended to allow candles to cool at room temperature. Using a water bath or chilling molds in the refrigerator can significantly speed up cooling times as mentioned on Shamrock Affiliations. However, too quick of cooling may lead to cracking issues.
Finish Candles
After the candles have cooled and set completely, the final step is finishing them before use. Here are some tips for finishing homemade candles:
Trim the wicks to 1⁄4 inch before burning to prevent excess smoke and promote an even burn. Use wick trimmers or small scissors to neatly trim the wicks.
Add labels or decorative touches like stickers, fabric, raffia, beads, etc. Get creative with decorating ideas. Labels can identify the candle scent or personalize them as gifts.
Consider rubbing candles with a dryer sheet before gifting to remove any surface wax or debris and give a smooth finish. Gently polish the sides with a microfiber cloth.
Package or display the finished candles until ready to use. Store out of direct sunlight and heat to preserve the color, fragrance, and burn quality.
Enjoy
After all your hard work, it’s time to enjoy the fruits of your labor. Light your candle and take in the sight, sound, and smell of your creation. Be sure to follow basic candle safety – keep the candle away from flammable surfaces and out of reach from children and pets. Never leave a burning candle unattended. Extinguish the flame if it gets too close to the side or top of the container. With proper care and precautions, you can relax and delight in your homemade candle.
Reflect on the candle making process as you enjoy your candle. Note what worked well and what you could improve next time. Candle making is an art that takes practice. Even imperfect homemade candles have their own special charm. The more candles you make, the more comfortable you’ll become with the process. Soon you’ll become adept at blending colors, scents, and designs. For now, be proud of completing your first candle and creating something beautiful with your own two hands. Well done!