How To Make A Floating Candle With Flowers?
A floating candle is a candle that floats on water inside a glass vase or bowl. They are designed to float gently on the water’s surface and provide a soothing ambiance from the flickering flame. Floating candles create a magical mood with their dancing flames and are popular for decorating dining room tables, backyard pools, weddings, and other events. They offer an elegant alternative to traditional candles.
There are many reasons one may want to make their own floating candles:
- Cost savings – Making them yourself is less expensive than buying pre-made floating candles.
- Customization – You can pick your own vase/bowl, flowers, and candle sizes/styles when making them.
- Creative outlet – It allows you to express your creativity and make each candle unique.
- Gifting – Handmade floating candles make great gifts for any occasion.
- Better quality ingredients – You control the wax, wick, and flower quality when making your own.
The ambiance and visual interest floating candles provide make them worth the effort to create your own beautiful designs. This guide will walk through the process step-by-step.
Materials Needed
To make a floating candle flower centerpiece, you will need the following materials:
-
Glass bowl, vase, or other clear container: This will be the base that holds the flowers and candles. Choose a bowl, vase, or other container that is made of glass or another transparent material so the candles will be visible.
-
Candles: Use votive candles, tealight candles, or specially made floating candles. Make sure they are short enough to fit in your container.
-
Flowers: Fresh flowers or high quality silk flowers work well. Choose flowers that lay flat or droop over the edge of the container.
-
Water: Fresh flowers will need water to stay hydrated. Fill the container partially with water before adding the flowers.
-
Decorations (optional): Consider adding decorative elements like gems, glitter, leaves, flower petals, etc. to enhance the look.
Gather these basic supplies before getting started on your floating candle flower centerpiece.
Selecting Flowers
When selecting flowers for a floating candle centerpiece, choose blooms that will complement the container and decor. Opt for flowers in colors that align with your color palette or theme. For example, soft pastel flowers can create a romantic or vintage feel while bright bold colors may fit a modern or tropical design.
You’ll also want to choose hardy flowers that can last for a period of time floating in water. Good options include roses, carnations, gerbera daisies, chrysanthemums, and alstroemeria. Stay away from more delicate flowers like lilies which will degrade quickly in water.
Aim for smaller, daintier blooms rather than large statement flowers. Smaller flowers allow you to artfully arrange them around candles floating on the water surface. Large blooms may appear too clunky and overwhelm the design.
Arranging the Flowers
The key to arranging flowers for a floating candle centerpiece is to have just the blooms visible above the water line. To achieve this, you’ll want to cut the stems fairly short and remove most if not all leaves from the stems so they don’t rot in the water (https://za.pinterest.com/Hettiegmail/submerged-flowers-with-floating-candles/).
Cut each flower stem at an angle with floral shears or a sharp knife to maximize water intake. Remove all leaves and trim the stems to the desired heights based on the container depth. For an eclectic look, cut different flowers to varying heights.
To keep the blooms grouped together attractively, use floral tape or wire to bind stems as needed. Position the flowers artfully in the vase, alternating blooms and colors for visual interest. Allow a bit of space between blooms for the candles.
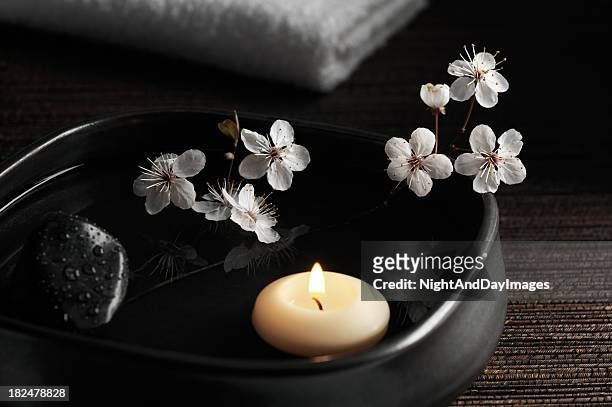
Adding Candles
Once the flowers are arranged, it’s time to add the floating candles. This is an important design step, as the placement of the candles can really enhance the overall look.
Place the candle(s) in the center of the arrangement or arrange them creatively throughout the flowers. Make sure they fit securely in the container and won’t tip over easily. Consider using candles of varying heights to create visual interest.
Votive candles work well for floating arrangements, as they are small and lightweight. Tea lights also work. For larger containers, pillar candles of different heights can make a dramatic statement. Play around with the candle placement until you find a look you love.
Be mindful of the type of container used – glass and metal conduct heat better than plastic or ceramic. Monitor the water temperature as the candles burn to prevent the flowers from wilting.
Now your floating candle arrangement is really starting to take shape! The candles will create a beautiful, romantic glow when lit.
Filling the Container
Once you have arranged the flowers and candles to your liking in the container, it’s time to add the water. Pour water into the container, leaving 1-2 inches at the top so the flowers have room to float. According to the Easy Floating Floral Arrangement DIY tutorial on A Beautiful Mess, “Fill the bowl with water, leaving 1-2 inches at the top” (1). The water level is important to allow the flowers to sit nicely on top.
You can also add optional decorations to the water if desired, such as gems or glitter to give it some sparkle underneath the flowers. Just pour these into the water before adding the flower arrangement.
The key is that the flowers should float lightly on top of the water once it’s added to the container. As A Beautiful Mess notes, “The flower will float on top of the water” (1). This creates the floating effect for the floral arrangement.
Sources:
(1) https://abeautifulmess.com/easy-floating-floral-arrangement-diy/
Lighting the Candles
Perhaps the most crucial step when creating floating candles with flowers is properly lighting the candles. According to this Quick Candles article, it’s important to gently place the candle into the water by holding onto the wick. This ensures the wick stays dry and lights properly. Once the candle is floating, carefully light the wick with a lighter or match. Avoid dripping wax into the water.
After lighting, do a final check of the flower placement and arrangement. Gently adjust any flowers that need tweaking. The Creative Candles blog notes that part of the beauty of floating candles is the ability to freely arrange and rearrange the flowers as desired before finally lighting the candles.
Displaying
When displaying your floating candle centerpiece, it’s important to take safety precautions. Choose a location away from high traffic areas in your home to prevent the candles from being knocked over accidentally. Experts recommend keeping floating candles at least 12 inches from any flammable objects or materials such as curtains or wall hangings (CollectiveCandles.com). Drafts and air currents can cause rapid, uneven burning so display your floating candle centerpiece in an area protected from HVAC vents or open doors and windows (BeverlyHillsCandle.com).
Never leave a burning candle unattended. It’s crucial to monitor your floating candles at all times while the wicks are lit. Extinguish the flames before leaving the room and refrain from going to sleep or leaving your home with the candles still burning (WaxLyrical.com). Take extra care if displaying your floating candle centerpiece around children or pets.
Maintenance
To keep your floating candle display looking fresh, you’ll need to perform some regular maintenance. Here are a few tips:
Refill the water as needed. As the candles float, they will displace some of the water. Check the water level every few days and top it off so the candles continue floating properly. Use distilled or filtered water to help prevent buildup and algae growth.
Replace flowers when wilted. The cut flowers will eventually start to wilt, fade, and fall apart. Swap them out for fresh blooms every 7-10 days to maintain the beauty of your display.
Have extra candles ready to swap out. The floating candles will burn down after several hours. Keep extra candles on hand that you can light and add to the display as needed. This will allow you to maintain the candlelight ambiance.
With just a little effort, you can keep your floating flower candle display looking magical for weeks. Just refill, refresh, and relight as needed. For more tips, see this helpful guide on caring for candles.
Inspiration
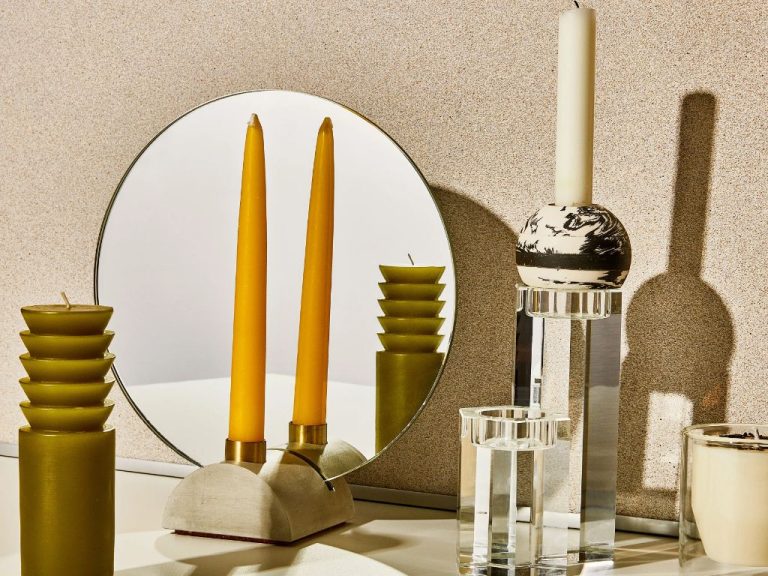
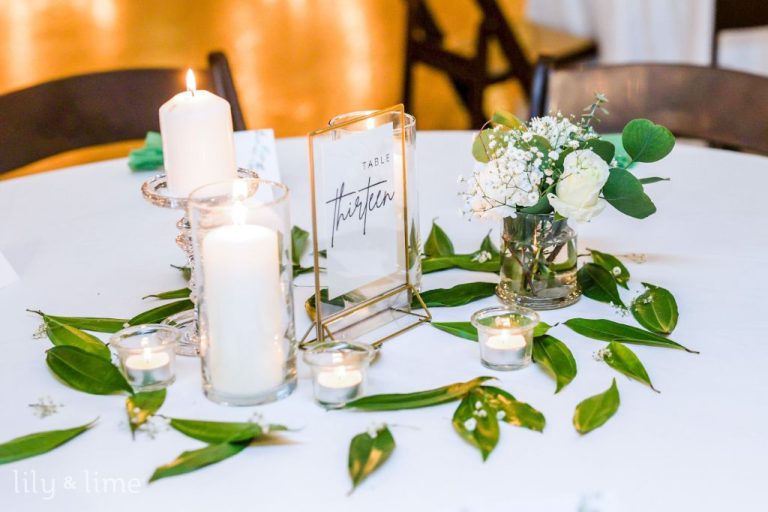
Gathering inspiration can help spark new ideas for your floating candle centerpieces. Browse photos online or in decor magazines to find eye-catching examples. Here are some inspirational images of beautifully designed floating candles:
Consider using different types of flowers like lilies, roses, carnations, daisies, or wildflowers. The variety of colors, shapes, and textures can create visual interest. Experiment with different container shapes like bowls, vases, jars, or cylinders. Arrange the candles in clusters, lines, or circles for unique effects. Let your creativity shine through these floating candle projects!