Can I Draw On A Candle?
What is Candle Drawing?
Candle drawing is the art of drawing or painting on candles. It involves using wax crayons, oil pastels, markers or paint to create designs, patterns and pictures directly onto the surface of candles. Candles provide a unique canvas for creative expression with their versatile cylindrical shape and smooth, waxy surface.
The practice of decorating candles with artistic designs has been done for centuries, but candle drawing emerged as its own art form in the late 20th century. As homemade candles became popular craft items, artists realized the creative potential of candles as an art medium. Candle drawing allows artists to combine the warm, cozy qualities of candles with personal artistic designs.
From simple patterns to intricate landscapes, candle drawing allows complete artistic freedom. The finished candle drawings can be burned to enjoy or displayed as art objects. As a medium, candles enable artists to create dazzling original works and explore their creativity in a new format.
Candle Drawing Supplies
Candle drawing requires just a few simple supplies. The most important element is the candle itself. For drawing purposes, pillar candles or tube candles work better than taper candles. The flat sides provide a nice even surface for drawing. Pillar candles come in a variety of sizes from small votives to large columns. The surface area you wish to draw on will determine the size of candle you select.
Standard number 2 pencils are ideal for candle drawing. The soft lead allows you to achieve a good variety of lines, from light sketching to deeper shading. Charcoal pencils are another excellent option, as they create rich blacks on the candle surface. Colored pencils add a vibrant dimension to candle art. Water-soluble wax crayons and oil pastels also work well for candle drawing.
Candle Drawing Techniques
Candle drawing requires some essential techniques to create beautiful artwork. Proper preparation of the candle surface and using the right stroke techniques are key skills to master. Here are some of the main candle drawing techniques to know:
Lighting and Preparing the Candle
The first step is properly lighting the candle and letting some wax pool slightly to create a workable surface. Light the candle and let it burn for a few minutes until a shallow pool of melted wax forms on top. Blow out the flame before drawing. The wax should be warm and pliable, but not too hot or runny.
Applying Medium to Candle Surface
Use a medium like oil pastels, crayons, or colored pencils to draw on the candle. Oil pastels work especially well. Apply your medium lightly at first in small strokes or circular motions. Too much pressure can remove the melted wax.
Stroke Techniques
Try different stroke techniques to achieve various artistic effects. Short, wispy strokes create shading and textures. Bold, continuous lines convey energy and movement. Cross-hatching with layers of diagonal lines builds up depth and complexity. Contour lines follow the candle’s shape to map its curves and edges.
Experiment with mark-making approaches like stippling, scumbling, or blending colors. Let the warmth of the candle melt and mix the drawing medium for unique effects. Varying your stroke techniques will allow for lots of creative flexibility and visual interest.
Creating Candle Drawings
Candle drawing allows for a high degree of creativity and personal expression. Here are some tips for creating your own unique candle drawings:
Sketching compositions
Start by lightly sketching the composition with a pencil. Consider the placement of the candle(s), and how the flames and wax drips will interact with the surrounding space. Sketching first makes it easier to refine the composition before adding details.
Adding details and textures
Once you have the basic composition mapped out, start adding finer details and textures. Use cross-hatching, stippling, or other techniques to show the texture of the wax. Add highlights and shadows to give form to the candles. Sketch in the movements of the flame to convey a sense of light.
Blending and shading
Soften your sketch lines and blend tones using a blending stump, tissue, cotton swab, or your finger. Build up the shadows and highlights to create the illusion of round, three-dimensional candles. Add variations in tone and texture to make the drawing more realistic. Deepen the shadows around the base of the flame to give it a natural glow.
With practice and experimentation, you’ll develop your own unique style for creating candle drawings full of life and personality.
Troubleshooting Candle Drawing
Candle drawing can sometimes run into issues like wax tears, smudges, and melted wax. Here are some tips for troubleshooting common candle drawing problems:
Preventing Wax Tears
Wax tears happen when the wax adheres too strongly to the paper. To prevent tears, use thicker paper like watercolor paper rather than thin copy paper. Also avoid pressing too hard when drawing, as more pressure can lead to tears. Let layers dry between applications and draw lightly.
Fixing Smudges
Smudges are common with pressed wax drawings. To fix them, allow the drawing time to fully dry and harden. Then gently go over any smudged areas with a clean cotton swab to pick up any excess pigment or wax. Avoid over-rubbing or you may remove the wax entirely.
Managing Melted Wax
Candle wax can melt quickly with body heat. To prevent excess melting, do not place hands directly on the drawing surface and hold candles upright while drawing. If wax does melt, let it fully dry and harden again. Then use a craft knife to gently scrape away any unwanted melted wax buildup.
Storing and Displaying Candle Art
Candle drawings and artworks are uniquely fragile, requiring careful storage and display methods to protect and preserve the finished pieces. Here are some tips for keeping your candle art safe:
Protecting Unfinished Drawings
While working on a candle drawing, take steps to prevent damage between sessions. Store the candle upright in a sturdy holder or stand. Choose an area away from heat, sunlight, and busy spaces that could lead to accidental bumps or spills. Cover the candle with a glass dome, overturned bowl, or acrylic box to keep dust off the surface.
Work in progress drawings are best stored at a consistent temperature between sessions. Avoid letting the candle freeze or overheat, which can cause wax to slump, crack, or peel. Gentle airflow can help prevent issues like “blooming,” where moisture causes a powdery white film on candle wax surfaces.
Framing and Mounting Finished Art
For displaying completed candle art, frame pieces under glass or acrylic to protect the soft wax surface. Acid-free mat boards and UV filtering glazing will help prevent fading. Choose deep frames to accommodate the candle’s thickness without compressing or touching the art. Secure the candle at the bottom only, allowing the top to move freely if wax expands in warm conditions.
Many artists pour a thin coating of polymer resin over the finished drawing to lock in the design before framing. Another option is framing between two panes with a spacer, keeping the art suspended safely between glass. Take care with lighting to avoid heat buildup that could warp the wax.
Inspiring Candle Drawings
Candle drawing opens up a world of creative possibilities. Artists can draw intricate floral designs, landscape scenes, abstract patterns, and more using candles as their canvas. Here are some inspiring examples of candle drawing styles and subjects:
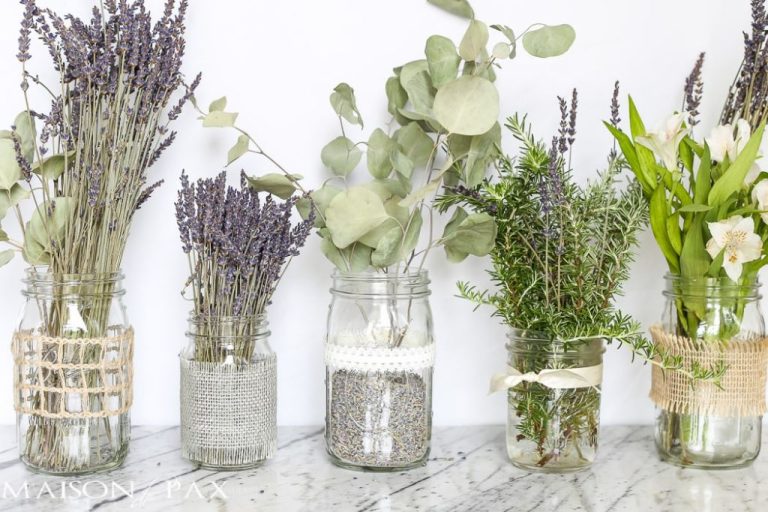
Botanical Candle Drawings: Many candle artists use flowers, leaves, vines, and other plant life as their subject matter. Delicate petals, swirling vines, and detailed botanical illustrations glow beautifully when drawn on candles. Botanical candle drawings bring the outdoors in.
Landscape Candle Drawings: Dramatic seascapes, mountain vistas, and other landscapes look magnificent when illustrated on candles. The textures and colors of the wax complement sweeping scenic views. Landscape candle drawings are mini escapes.
Patterned Candle Drawings: From polka dots to paisley and everything in between, patterns add visual intrigue to candle drawings. Repeating shapes, lines, and motifs make candle surfaces shimmer. Patterned candle drawings entrance the eye.
Portrait Candle Drawings: Candle portraitures feature detailed drawings of people’s faces. This requires excellent control and precision but results in stunning dimensional portraits. Portrait candle drawings make artistic gifts.
Animal Candle Drawings: Our furry and feathered friends come to life through candle art. Life-like renderings of pets, wildlife, and farm animals connect us to nature. Animal candle drawings are heartwarming.
The styles are endless, from modern abstract designs to traditional decorative motifs. Candle drawing unleashes creativity, producing one-of-a-kind artworks with visual appeal.
Candle Drawing Tips
If you’re new to candle drawing, there are a few tips that can help you get started on the right foot according to experienced candle artists.
Use the Right Candles
Not all candles are ideal for drawing. Artists recommend using unscented pillar candles made from paraffin wax. These create the smoothest surface for drawing. Avoid candles with dyes or fragrances as they can sometimes repel the color.
Start with Sketching
Lightly sketch out your design with a pencil before drawing with colored pencils or pens. This allows you to work out the composition and details before committing to color.
Apply Medium Pressure
Don’t scratch the surface, but don’t be too gentle either. Use medium pressure with your drawing implements to get the color to adhere correctly.
Work Quickly
The wax surface can start melting fast under the heat of your hand. Work swiftly and take breaks to allow the wax to re-harden.
Protect Finished Art
Display your finished candle drawings under glass or laminate them to prevent smearing and preserve the artwork.
Creative Uses for Drawn Candles
Candle drawings make for wonderful homemade gifts. With just a candle, some drawing tools, and a bit of creativity, you can create personalized candle art for your loved ones. Drawn candles allow you to add a personal touch and meaning behind your gift. For instance, you can draw scenes, symbols, or words that have significance to you and the gift recipient. Hand-drawn candle art shows your time, thought, and effort in a way store-bought gifts cannot.
Selling your handmade candle drawings is another great way to make use of your artwork. With the rise of craft marketplaces like Etsy, independent artists have an easier time than ever showcasing their creations to a wide audience of buyers. Candle drawings make for affordable yet special art pieces that many customers enjoy. You can even create themed collections of candle art, like floral candles or holiday candles. When selling online, make sure to take high quality photographs and write descriptions that convey the uniqueness of each hand-drawn candle.
The Appeal of Candle Drawing
Candle drawing has become an increasingly popular artistic hobby over the years for a variety of reasons. Many find the therapeutic benefits of the medium to be a major part of its appeal. The act of slowly and deliberately drawing on the surface of a candle can induce a relaxation response and help calm the mind. It provides a creative outlet and a way to practice mindfulness. The warmth and softness of the candle wax itself can also be soothing.
The uniqueness of the candle drawing medium adds to its intrigue. It’s not a surface that most people would think to draw on, and the impermanent nature of the artwork makes for an intriguing creative challenge. Once the candle is lit, the drawing will slowly transform and disappear as the wax melts away. This inspires the artist to appreciate the ephemeral beauty of the work while it lasts. The interactive nature of candle drawing also appeals to many, as the artwork transforms and evolves when the candle is lit.
Overall, candle drawing allows artists to experiment with a novel medium and achieve satisfying results with simple supplies. The creative possibilities combined with the therapeutic, mindful nature of the practice explain its rising popularity as an artistic hobby.