How Many Wicks Do I Need For A 4 Inch Candle?
Proper wicking is one of the most important factors in creating a high quality, long burning candle. The wick serves as the fuel delivery system, drawing wax up to the flame and allowing for an even, consistent burn. Without the right wick, candles can tunnel, smoke, produce an uneven flame, or even self-extinguish. Wicks come in different materials, widths and lengths depending on the candle’s size and wax blend. Selecting an appropriately sized wick will maximize burn time and fragrance release while minimizing issues like soot and mushrooming. This guide covers everything from wick basics to troubleshooting common problems to help you achieve candlemaking success.
What Are Candle Wicks?
Candle wicks are an essential component in candles. They are the string-like material that runs through the center of a candle and brings the melted wax up to the wick so it can burn. Most modern candle wicks are made of braided cotton threads that have been specially treated to help control the burn rate and reduce mushrooming (when the tip of the wick curls over after burning).
According to sources like https://www.tradeindia.com/question-answer/what-is-the-difference-between-wood-wicks-cotton-wicks/, cotton has been the preferred candle wicking material for a long time. The cotton threads are tightly braided together, and often have additives like zinc cores or special wax coatings to make them more rigid and help manage the flame.
Other common wick materials include wood, paper, and fiberglass. But braided cotton continues to be one of the most popular choices due to its versatility, performance, and cost-effectiveness.
Wick Width Recommendations
The width of the wick you need depends on the diameter of your candle. As a general rule, larger candle diameters need wider wicks that are made up of more plies. This allows for proper melt pool size and burn time.
For example, candles with a diameter of 1-2 inches typically use a single ply wick. Candles 2-3 inches in diameter use a double ply wick, while 3-4 inch candles need a triple ply wick. According to CandleScience, going up one full ply for every additional inch of candle diameter is a good guideline.
Some standard wick width recommendations based on candle diameter are:
- 1-2 inches: single ply wick
- 2-3 inches: double ply wick
- 3-4 inches: triple ply wick
- 4-5 inches: quadruple ply wick
Wider container candles may require multiple wicks rather than just a wider single wick. Having multiple wicks helps ensure even burning across the surface of large diameter candles.
Wicks for 4 Inch Candles
For a 4 inch diameter candle, you will typically want to use 2 wicks. Using multiple wicks helps ensure even burning across the entire candle surface. With a single wick in the center, the wax around the outer edges wouldn’t melt properly.
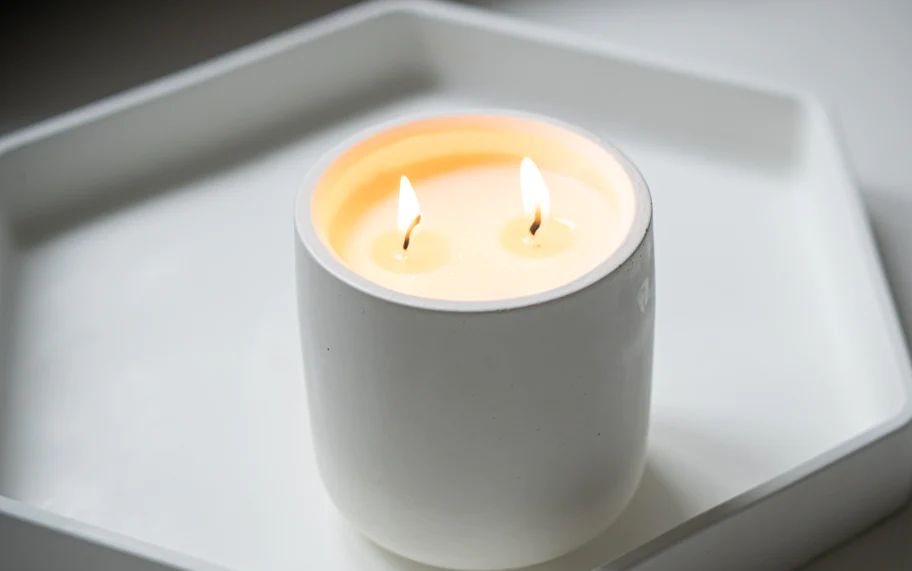
Two wicks spaced a couple inches apart is ideal for a 4 inch candle. This provides enough wick coverage for the melt pool while still allowing plenty of space between the wicks.
Some candle makers recommend using 3 wicks for very large 4 inch candles, over 3 inches tall. Three wicks can help prevent tunneling in extra tall 4 inch candles. However, 2 wicks is sufficient for most standard sized 4 inch jar or tin candles under 3 inches tall.
The most common wick sizes used for a typical 4 inch candle are CD wicks or ECO wicks. But you can consult a candle making wick chart to determine the best wick type and size based on your exact candle dimensions and wax type.
Positioning Wicks in 4 Inch Candles
When positioning wicks in a 4 inch candle, it’s recommended to space them equally apart and on opposite sides of the container. For example, if using 2 wicks, place one wick at 12 o’clock and the other at 6 o’clock. If using 3 wicks, position them at 12, 4, and 8 o’clock. And for 4 wicks, place them at 12, 3, 6, and 9 o’clock.
Spacing the wicks equally around the container allows for even melting and burning. Putting wicks directly across from each other prevents tunneling, where wax on one side melts faster than the other. The equal distribution also helps prevent soot buildup in one area.
Some key tips when positioning wicks in a 4 inch candle:
- Maintain at least 1 inch between wicks.
- Keep wicks 1/2 inch from the edge.
- Secure wicks firmly straight up and centered.
- Consider the type of wax and fragrance when determining wick spacing.
With the right number and placement of wicks, you can achieve the best performance from your 4 inch candle.
Trimming Your Candle Wicks
Properly trimming your candle wicks is an important part of candle maintenance and safety. According to Martha Stewart, you should trim your wick before each use to “prolong the life of your candle and allow for the cleanest burn possible” (source). When you trim the wick, aim for a length between 1/4-1/2 inch.
Trimming helps remove the charred part of the wick, which promotes an even burn and prevents smoking issues. If the wick gets too long, it can create excess soot or cause the flame to get too large. On the other hand, trimming the wick too short can lead to tunneling, poor melt pool circulation, or the wick drowning in wax.
To trim the wick, let the wax fully harden and use a wick trimmer, small scissors, or nail clippers. Make straight cuts and avoid leaving ragged edges. Trim before each burn, or every 4 hours of burn time, for optimal results (source). With regular trimming, you’ll enjoy a cleaner burn and longer candle life.
Wick Maintenance
Proper wick maintenance is crucial for optimal candle performance and longevity.[1] As the candle burns, black carbon particles (soot) can build up on the wick, preventing the wick from drawing up wax properly. This can lead to poor wax pooling, tunneling, and an irregular flame. To prevent soot buildup, it’s recommended to periodically straighten and center candle wicks as the wax pool develops.[2]
Use metal wick dippers or tweezers to gently straighten wicks and remove any excess fragrance oil, wick trimmings, or debris from the melted wax pool. Wicks can be centered by carefully repositioning them in the hot wax. Periodically straightening and centering the wick every few hours while the candle is lit will allow for proper capillary action and prevent sooting issues.
It’s also crucial to trim wicks to 1⁄4 inch before each lighting to avoid excessive sooting and promote an even burn. Always be sure to extinguish candles fully before performing any wick maintenance or trimming. Proper wick care will keep your candle burning clean and strong from the first to the final light.
Troubleshooting
If your candle is not burning properly, there are a few troubleshooting tips to try. Two common issues are sooting and tunneling.
Sooting occurs when the wick is too large for the wax pool, causing the flame to generate more soot than the flame can consume. This results in black smoke and soot building up on the candle glass and walls. To prevent sooting, use a smaller wick or trim the existing wick a bit shorter. You can also pour off the wax pool to expose more of the wick before relighting if significant soot has built up (source).
Tunneling happens when the wax melts unevenly, creating a hole or tunnel in the wax pool as the wick burns down. This is often caused by a wick that is too small for the particular wax and candle dimensions. Switch to a larger wick or double up on wicks to increase melting power. You can also try pouring out the wax, inserting a heat source briefly to melt the sides and bottom, then repouring the wax to eliminate tunnels (source).
Proper wick sizing and maintenance are key to preventing common candle issues. Always test wicks before fully committing to a certain wick size in a new candle design. Trim wicks to 1⁄4” before each burn to reduce excess soot and maintain an ideal melt pool.
Safety Considerations
When burning candles, it is extremely important to practice proper safety precautions. According to the National Fire Protection Association (NFPA), candles are the cause of over 7,000 home fires each year in the United States (https://www.nfpa.org/education-and-research/home-fire-safety/candles). Follow these tips to burn candles safely:
Always supervise burning candles. Never leave a burning candle unattended. Extinguish candles before leaving a room and make sure they are completely out before going to bed.
Keep candles away from drafts, vents, ceiling fans, and air currents. This will prevent the flame from getting too large or blowing over into flammable materials.
Burn candles in sturdy fireproof holders that are big enough to collect dripping wax. Place on an uncluttered surface.
Keep candles at least 12 inches from anything that can burn, including curtains, décor, clothing, and people.
Do not burn candles near pets or small children. Keep wicks trimmed to 1⁄4 inch to avoid smoking and excessive dripping.
Consider using battery-operated flameless candles, which provide the ambiance without the danger of open flames.
Take proper precautions and candles can be safely enjoyed. But always remember – fire safety first when burning candles!
Conclusion
In summary, choosing the right wick is crucial for properly burning 4 inch candles. The width of the wick must match the diameter of the candle, with most 4 inch candles requiring 2-4 wicks that are between .020”-.035” wide. Positioning wicks slightly off-center allows for complete melt pools and prevents tunneling. Remember to trim wicks to 1⁄4” before each burn to prevent smoking and promote clean burning. With the right maintenance and care, wicks will provide a safe and high-quality burn every time.
Having the proper wick lay is paramount. Wicks that are too small will drown and struggle to stay lit, while wicks that are too large will smoke and get overly hot. The information provided here will ensure your 4 inch candles have balanced flames that fully liquefy the wax to fill the vessel. Well-wicked candles will burn cleanly down to the bottom of the container to fully release their fragrance. Now that you understand the intricacies of wicking 4 inch candles, you can confidently create perfect candles each time.