How Do You Use A Wick Candle Maker?
A wick candle maker is a person who creates candles by pouring melted wax around a wick. According to Collins Dictionary, a candle is “a stick of hard wax with a piece of string called a wick through the middle.” The wick is essential as it provides the flame when the candle is lit. Making candles with a wick allows the candle to burn in a controlled manner. The candle maker pours melted wax into a mold and embeds a wick into the wax before it hardens. Once cooled and hardened, the finished candle can be lit by lighting the wick.
Safety Tips
When making candles, it’s important to take proper safety precautions. According to Northwood Candle Supply, you should wear protective equipment like goggles, gloves, and an apron or old clothes to avoid burns. Tie back long hair and avoid wearing loose clothing that could catch fire. Work in a well-ventilated area since fumes can be strong. Keep a fire extinguisher on hand and avoid distractions. Never leave a burning stove or wax unattended. Make sure kids and pets are kept at a safe distance from your workspace.
Materials Needed
To make candles using the wick method, you will need the following supplies:
- Wax – The most common types used are paraffin, soy, and beeswax. Make sure to use wax specifically formulated for candle making
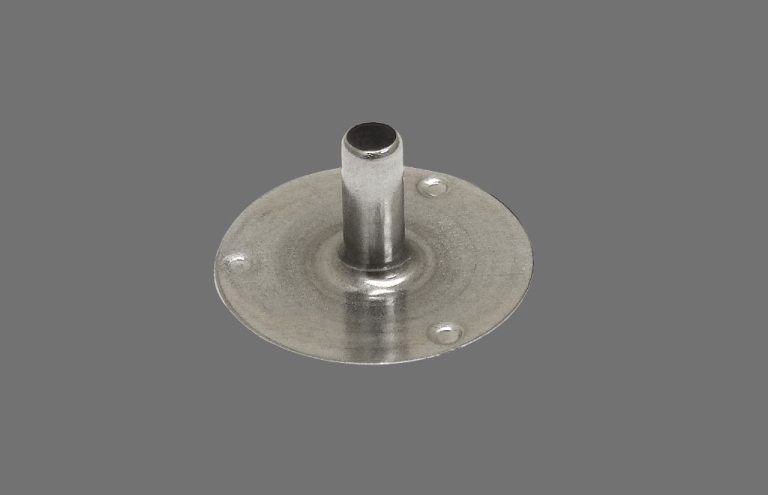
(https://candles.org/elements-of-a-candle/wax/). - Wicks – Pre-tabbed wicks work best. Choose an appropriate wick diameter and type for the wax and candle shape
(https://suppliesforcandles.co.uk/candle-college/how-to-make-a-candle-wick). - Mold – This can be any heat-safe container like glass or metal. Make sure it’s a little wider than your desired candle width.
- Double boiler – This allows you to melt wax gently. Alternatively, you can use a pot inside another pot with water.
- Thermometer – To monitor wax temperature during melting and pouring.
- Pouring pot – Used to pour the wax into the mold.
- Spoon – For skimming and stirring wax.
Optional items include fragrance, dye blocks, and adhesive for attaching wicks.
Preparing the Wax
Properly preparing the wax is one of the most important steps in candle making. There are several key things to keep in mind:
First, you’ll need to melt the wax. Use a double boiler or a slow cooker to gently melt the wax to the proper pouring temperature, which is generally between 150-165°F. Avoid overheating the wax, as this can cause discoloration or loss of scent. Monitor the temperature closely with a thermometer.
Next, you can add fragrance if desired. Use candle or soap fragrances, not essential oils, and follow the usage rates recommended. Typically 1-2 ounces of fragrance oil per pound of wax is standard. Stir thoroughly to incorporate.
Finally, before pouring, make sure your wax is fully melted and free of debris. Maintaining the proper pouring temperature, around 150-165°F, will also ensure the wax has the proper viscosity for even pouring and ideal surface finish.
Preparing the Wick
Properly preparing the wick is an important step when making wick candles. The wick size, centering, and trimming all impact how the finished candle will burn.
Select a wick size appropriate for the diameter of the candle mold. The wick should be wide enough to support the melted wax pool but not so wide that it drowns in wax and snuffs out the flame. A good rule of thumb is to use a wick approximately 1/3 the diameter of the candle mold.
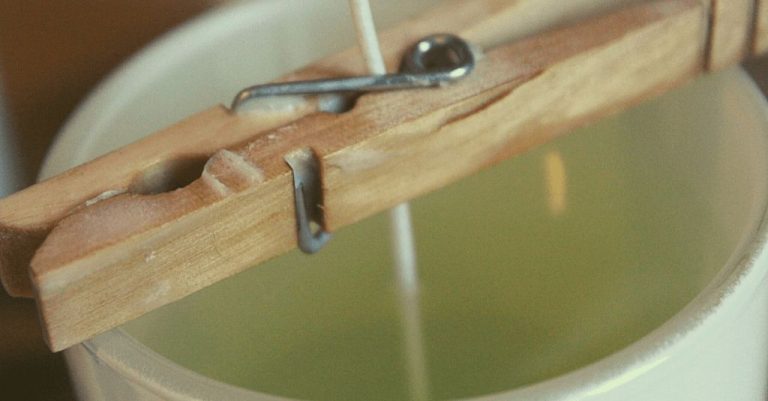
Make sure the wick is centered in the mold before pouring in wax. Hold it taut and tie it to a pencil or chopstick placed over the top of the container to keep the wick straight and in the middle as the wax hardens. Centering ensures an even burn and prevents tunneling.
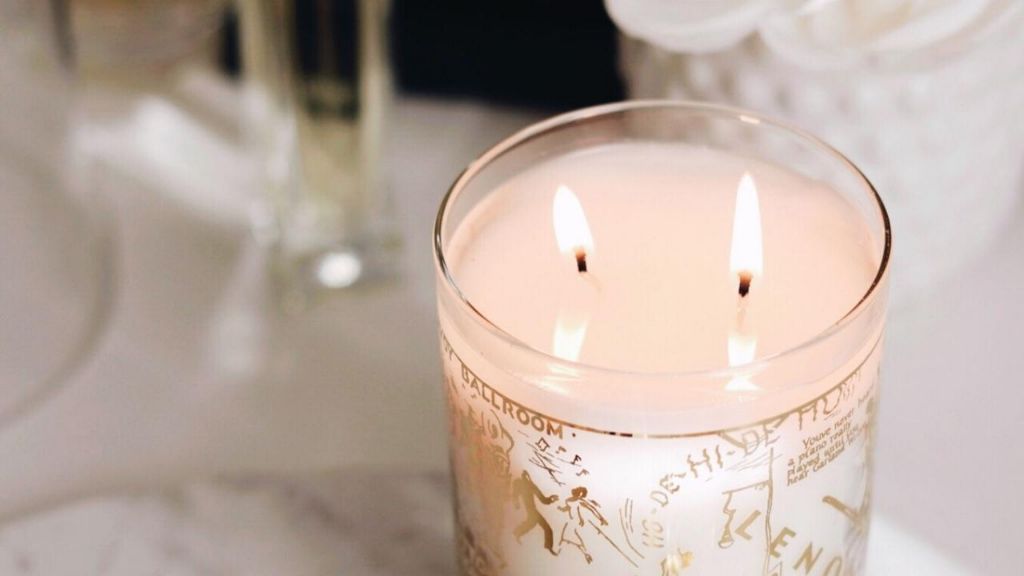
Once the candle is cooled and hardened, use scissors to trim the wick to 1⁄4-inch length. Trimming the wick helps prevent smoking and promotes a strong flame. The wick can be trimmed again each time before lighting to maximize performance.
Proper wick sizing, centering, and trimming results in candles that burn evenly from edge to edge without creating excess smoke or going out too quickly. Taking the time to prepare the wick makes a noticeable difference in the finished candle.
Preparing the Mold
To make a wick candle, it’s important to properly prepare the candle mold before pouring in the wax. First, make sure to select an appropriate mold material like silicone, aluminum, or glass that can withstand hot wax being poured into it. Silicone molds are a popular choice as they are flexible and easy to remove the finished candle from.
Before pouring wax into the mold, you need to prepare the surface so the candle releases easily after cooling. This is done by coating the inside of the mold with a thin layer of oil, petroleum jelly, or mold release spray (Hot Pink Pineapples). Avoid using water-based lubricants like vegetable oil that can react poorly with the wax. Thoroughly coat all inner surfaces of the mold.
Next, secure the wick in place so it stands upright when you pour wax into the mold. Place wick stickers or glue dots inside the mold cavity, then press the base of the wick onto these adhesives to hold it in position. The wick should be centered and straight. Leave the excess wick hanging over the top of the mold so you can later trim it.
Now the candle mold is prepped and ready for hot wax to be poured in to create the candle shape. Taking the time to properly prepare the mold will help ensure clean release and prevent defects in the finished candle.
Pouring the Wax
Once your wax is completely melted and the proper temperature, it’s time to carefully pour it into the prepared candle mold. Soy wax should be poured between 135-145°F to ensure proper pouring viscosity and cooling. If the wax is too hot, it may cause bubbles or sink holes; too cold and it could set up too quickly before filling the mold.
Hold the wax pouring container close to the top of the mold so the stream flows cleanly into the mold without splashing or dripping down the sides. Tilt and rotate the mold gently to evenly coat all sides. Leave about 1/4 inch of space at the top for the finished candle to have a smooth, level surface. Let the candle sit for a few minutes so the top level settles.
Some techniques for clean pouring include using a spouted pouring pot, resting chopsticks over the top of the mold to help guide in the pour, and very slowly tilting the mold back and forth to distribute the wax. Take care not to agitate or splash the wax too much to prevent bubbles. Allow the candle to fully set up before moving the mold at all. Refer to proper soy wax pouring temperatures from the manufacturer or this guide for more details.
Cooling and Curing
Once the candle wax has been poured into the mold, it needs time to cool and cure properly for best results. Cooling allows the wax to harden and take shape. Curing is the process by which the crystals in the wax continue to form and stabilize over time.
Aim for a cooling time of at least 12 hours before handling the freshly poured candle. Allow the candle to cool undisturbed during this time, away from drafts or direct sunlight. Do not put the lid back on the candle mold immediately – this can lead to sweating and moisture buildup. Let the candle rest with the mold open until the wax has firmed up and is no longer warm to the touch.
After cooling comes curing. For optimal performance, a general guideline is to allow soy wax candles 1-2 weeks curing time and paraffin candles 2-4 weeks. Curing makes the wax more dense and rigid, allowing the candle to burn longer and cleaner. Avoid burning a candle until it has cured completely.
During the curing process, you may periodically tighten the wick and re-center it if needed. Some makers prefer curing with the lid off so any remaining moisture can evaporate, while others cure with the lid on to retain fragrance. Test burn the candle after full curing before deciding if final trimming of the wick is required.
Unmolding
Knowing when to unmold your candle is an important part of the process. typically you’ll want to wait at least 24 hours before removing the candle from the mold so it has time to fully set up and cure. Rushing the process can cause the candle to break or lose its shape.
When you’re ready to unmold, start by holding the mold upside down so gravity can help release the candle. Lightly tap the bottom of the mold while rotating it to help loosen the sides of the candle. Be gentle, as excessive force can cause the candle to crack or break. Some candle makers recommend placing the mold in the freezer for an hour before unmolding which can help contraction remove the candle from the mold more easily.
If the candle doesn’t release from the mold with light tapping, you may need to carefully pry it out using a thin knife or spatula around the edges. Take care not to gouge or scratch the mold. If you’re using a flexible silicone mold, gently bending and twisting the mold can help pop the candle out.
Some people like to use candle mold releases or silicone sprays, but this isn’t always necessary. The key is being patient and giving the candle time to cure before attempting to unmold it.
Sources:
https://www.wikihow.com/Remove-a-Candle-from-a-Mold
Finishing Touches
Once the candle has fully cured and cooled, there are a few finishing touches to complete your homemade wick candle:
Trimming the Wick
Use scissors or nail clippers to trim the wick to 1⁄4 inch before lighting. This helps control the flame size and prevent excess smoking when the candle is burned. The wick should be trimmed each time before lighting the candle.
Labeling
Add a sticker, hang tag, or label with fragrance and safety information. Decorative labels can provide helpful details and make the candle an attractive gift. Be sure to include warnings to keep the lit candle away from flammable objects and not leave it burning unattended.
Decorating
If desired, you can decorate the outside of the container with ribbon, raffia, flowers, etc. Avoid decorating the top around the wick, as this can interfere with proper burning. Use hot glue to affix decorations to glass containers. Get creative with colors and embellishments to make your homemade candle unique.
With a properly trimmed wick, fragrance label, and decorative accents, your homemade wick candle will be ready to gift or enjoy yourself!

