How Do You Make Wax Melts For Warmers?
Wax melts, also known as tart wax or wax tarts, are small pieces of scented wax that are warmed to release fragrance. They are made of soy wax, paraffin wax, or a blend, and come in a wide variety of fragrances. Wax melts are used in wax warmers to scent and fragrance your home. The melts slowly melt when heated, turning from a solid to a liquid, which allows the aroma to escape. As the wax cools and hardens again, the fragrance diminishes.
The beauty of making your own wax melts at home is that you can customize them exactly to your liking. You can choose your preferred wax type, fragrances, colors, shapes, and containers. Homemade wax melts allow you to control the ingredient quality, avoid chemicals found in commercial melts, and create personalized scents. They also make great gifts! The process of making wax melts is relatively simple and only requires a few key ingredients and materials. With a little time and effort, you’ll be making customized wax melts to keep your home smelling amazing.
Crafting DIY wax melts allows you to control the strength of the fragrance. Many store-bought melts use minimal fragrance to keep costs down. Making them yourself means you can add as much or as little scent as you desire. Homemade wax melts also tend to retain their fragrance longer after being warmed. In addition, making your own allows you to use natural ingredients and avoid unwanted chemicals found in some commercial melts.
Ingredients Needed
The main ingredients you’ll need to make wax melts for warmers are:
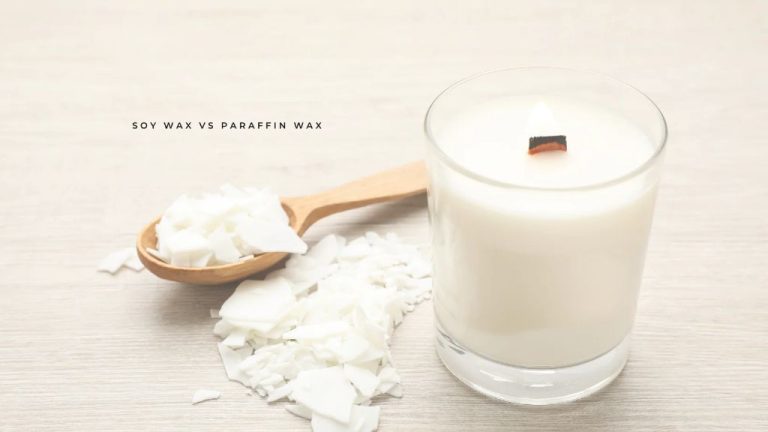
- Wax – The most common types used are soy wax, paraffin wax, and beeswax. Soy wax is natural and biodegradable. Paraffin wax is derived from petroleum. Beeswax is all-natural from honeycombs.
- Fragrance oils – These oil-based scents are formulated to be mixed with wax. Do not use essential oils, as they are not safe to burn.
- Dyes/Colorants (optional) – Liquid dyes or color blocks can be added to create colorful melts. Use dyes made for candle/wax crafting.
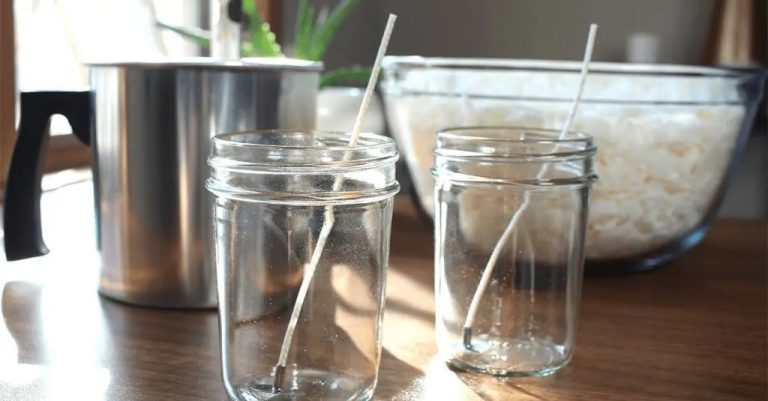
- Containers/Molds – Silicone molds or metal tart tins to pour the melted wax into. Make sure molds are heat safe up to 170°F.
Gather Equipment
Before you begin making wax melts, you’ll need to gather some basic equipment. The most essential item is a double boiler or crockpot for melting the wax. A double boiler allows you to heat the wax gently and indirectly by using steam from boiling water. If using a crockpot, be sure to fill it with water before adding your wax so it melts slowly.
You’ll also need:
- A pouring pot, pitcher, or pyrex measuring cup for pouring the melted wax into molds or containers
- A thermometer to monitor the temperature of the melted wax
- Stirring utensils such as a spoon, spatula, or whisk
- Silicone molds, tins, or other small containers to pour the wax into for shaping
Having all the necessary equipment assembled ahead of time will make the process smooth and efficient.
Prepare Workspace
Before beginning the wax melting process, it is important to properly prepare your workspace. This involves a few key steps:
First, lay out all of your ingredients and equipment within easy reach. This includes the wax, fragrance oils, dye blocks, pouring pots, molds or containers, thermometer, stirring sticks, and anything else you will need. Having everything organized ahead of time makes the process smoother.
Next, cover your work surfaces. Lay down wax paper, parchment paper, or silicone baking mats to protect your counters and make cleanup easier. You may want to cover larger areas around your workspace as well to prevent spills and drips.
Finally, make sure your pouring containers, molds, or tins are ready to go. Group them together near your melting pot so they are accessible when it comes time to pour the wax. Any containers should be clean and dry before pouring the wax into them.
Taking the time to properly prepare your workspace helps set you up for success when making wax melts!
Melt Wax
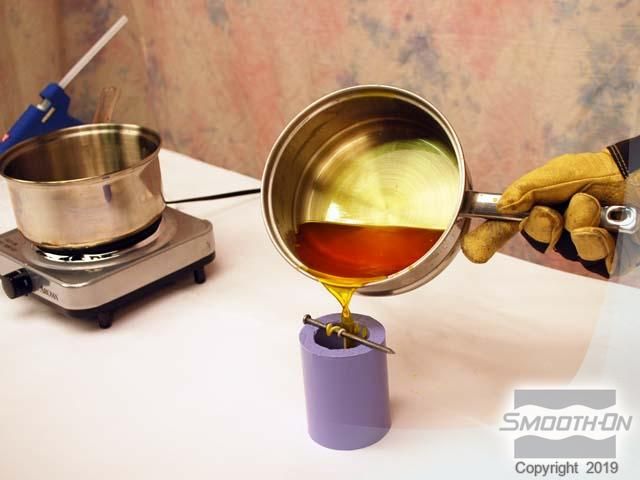
Once the wax is measured out, it’s time to melt it down so it can be mixed with fragrance and colorants. The easiest way to melt wax for wax melts is to use a double boiler or crockpot method.
To use the double boiler method, place the wax in a heat safe container or pitcher. Create a double boiler by placing this container over a saucepan with a few inches of water. Heat the water over medium heat until the wax has fully melted. Make sure the bottom of the container doesn’t touch the water.
For the crockpot method, add the wax to the crockpot and set it to low heat. Allow the wax to melt slowly, stirring occasionally to help it melt evenly. The crockpot method takes longer but requires less monitoring.
As the wax melts, stir it gently every 5-10 minutes. Do not let the wax come to a boil. Melting at a low temperature helps preserve the integrity of the wax and avoids discoloration. Once fully melted, remove the wax from the heat source.
Add Fragrance & Dye
Once the wax is fully melted, it’s time to add fragrance and dye to give your wax melts scent and color. Be sure to add the fragrance and dye when the wax is still melted – this ensures they will blend thoroughly throughout the wax. The general recommendation is to use 1-2 ounces of fragrance oil per 1 pound of wax. Start with 1 ounce first, stir thoroughly, then smell the wax to determine if you’d like a stronger scent. Add more fragrance oil in small increments, stirring continually, until you reach the desired fragrance strength.
For dye, liquid or block dyes specifically made for candle/wax work best. Start with a small amount – as little as a couple of drops per 1 pound of wax. Stir thoroughly to distribute the color evenly. Add more dye gradually if you want a darker shade. Similar to fragrance, go slowly with the dye to prevent over-coloring. Stir continuously as you add fragrance and dye to incorporate them fully into the melted wax. Once scented and colored to your liking, the wax is ready to be poured into containers or molds!
Pour into Containers
Once the wax has fully melted and you’ve added any desired scents or dyes, the next step is to carefully pour the liquid wax into the containers or silicon molds. Make sure to pour slowly and steadily to avoid spills. Tilt and swirl the containers gently as you pour to coat the sides and corners evenly.
After pouring, lightly tap the containers on the countertop to dislodge any air bubbles that may have formed during pouring. This helps ensure your finished wax melts will have a smooth, bubble-free surface.
Allow the wax to cool and begin hardening in the containers or molds before moving them. The wax needs to set up enough that it won’t spill out of the containers if they are moved or jostled. But it doesn’t need to harden fully yet.
Cool Completely
Allowing the wax melts to fully harden in the molds is an essential step for easy removal and maximum scent throw. The cooling process enables the melted wax to solidify back into a solid state.
After pouring the melted wax into molds, place them in a cool, dry area and let sit undisturbed as they harden. This may take 1-2 hours depending on volume and ambient temperature.
To speed up the cooling process, you can transfer the filled molds to the refrigerator or freezer. Just be careful not to jostle or tip them as the wax will still be liquid. Chilling for 30-60 minutes should be sufficient for the wax to fully set.
Test the sides and bottom of the molds with your fingertips before attempting to remove the finished wax melts. If any areas still feel pliable or sticky, let them continue cooling until the wax has firmed up completely.
Allowing adequate cooling time ensures clean removal from the molds and optimal fragrance retention in your homemade wax melts.
Remove from Molds
Once the wax melts have cooled completely, they are ready to be removed from the molds. This step requires care, as the wax cubes may still be fragile.
Start by gently twisting or pushing on the edges of the mold cavity to pop the hardened wax melt out. If the wax feels solid and does not release, placing the mold in the refrigerator for 10-15 minutes can help further harden the wax and make removal easier.
If the wax melt does not release from the mold cleanly, use a small spatula or knife to gently scrape the edges and assist with removal. Take care not to gouge or scratch the molds during this process, as any imperfections will transfer to the next batch of wax melts.
Work slowly and patiently. With a little practice, you will get the hang of cleanly removing perfect wax melts from the molds every time. Just remember to be gentle yet firm when popping the wax cubes out.
Usage & Storage
Wax melts release their fragrance as the wax slowly melts and liquefies in your warmer. Simply place a cube in your warmer and enjoy the aroma as the wax melts. Wax melts are meant for use in electric, candle, or scented oil warmers only. Do not light or burn a wax melt directly.
For best results, store your homemade wax melts in a cool, dry area away from direct sunlight and heat. Properly stored, they can last 6-12 months. Extreme temperature fluctuations can impact scent throw over time. Monitor for any frosting, sweating, or oil separation, as this can indicate the wax is no longer performing optimally.