How Do You Melt Paraffin At Home?
Paraffin wax is a white or colorless soft solid commonly derived from petroleum and coal. It is made of saturated hydrocarbons, has a low melting point, and is widely used in applications like candles, cosmetics, art supplies, lubrication, and food preparation.
Melting and molding paraffin wax at home has many uses. It allows you to make candles, wax melts, embeds for DIY projects, or even sensory play items. With some simple equipment and safety precautions, paraffin can be melted on the stovetop or in the oven for versatile crafting and creative projects.
This guide will walk through the entire process of safely melting paraffin wax at home and discuss key steps like preparing your workspace, monitoring temperature, adding scents or dyes, pouring into molds, and storage.
Safety Precautions
When melting paraffin at home, it’s important to take proper safety precautions. Paraffin wax can be flammable at high temperatures, so make sure you follow these guidelines:
- Ensure proper ventilation. Melting wax produces fumes, so work in a well-ventilated area.
- Wear protective gear like gloves and goggles. The wax can splash when melting and gloves and eye protection will prevent burns.
- Keep away from open flames. Don’t use any ignition sources like candles or lighters near the melting wax, as the hot wax vapors are flammable.
Taking basic safety measures will help prevent accidents when melting paraffin at home.
Equipment Needed
Melting paraffin wax requires minimal equipment that you may already have at home. The essentials are:
- Stove and cooking pot, or a dedicated double boiler pot
- Makeshift double boiler: Fill a large saucepan with two to three inches of water. Then place a heat-proof bowl or small saucepan on top. The bowl or pan should have a large enough opening for pouring.
- Metal or heat-resistant spoon for stirring
- Instant read thermometer or candy thermometer
- Silicone molds, tins, jars, or containers for pouring and shaping the melted wax
- Oven mitts or potholders
Avoid using valuable cookware since melted wax can be difficult to fully remove. Thrift store finds or dollar store pots work well for DIY projects.
A thermometer is a must for monitoring the wax temperature. Trying to judge by sight makes it too easy to overheat the wax. An instant read thermometer quickly provides accurate readings.
Preparing Workspace
Before melting any paraffin, it’s crucial to prepare your workspace properly for safety. Here are some tips:
- Cover surfaces like countertops, floors, and tables with newspaper, plastic sheeting, or aluminum foil to protect from spills.
- Have a fire extinguisher on hand in case the wax ignites unexpectedly.
- Clear clutter and move flammable items like dish towels or paper towels away from the melting area.
- Tie back any loose hair or clothing that could catch fire.
- Open windows and turn on fans to allow for good ventilation.
- Keep children and pets safely away from the melting setup.
Taking the time to prepare your workspace thoroughly will help prevent accidents when melting paraffin at home.
Melting Paraffin
The key to safely melting paraffin at home is using a double boiler to gently heat the wax at the proper temperature. Here are the steps:
Fill the bottom pot of your double boiler about half full with water and place it over medium heat on the stove. Bring the water to a gentle simmer.
Place the upper pot or bowl part of the double boiler over the simmering water. Make sure the bottom of the top pot doesn’t touch the water.
Add wax chunks or wax melts to the top pot gradually. Add just enough to cover the bottom at first. Stir frequently with a long handled spoon.
Keep an eye on the temperature with a candy/deep fry thermometer. Maintain the wax’s temperature between 130 to 180°F. Don’t let it get above 185°F, which is the flash point.
As the wax melts, continue adding more gradually while stirring. The wax will completely liquefy between 130 to 145°F.
Once fully melted, keep the wax over low heat to maintain its liquid state while you prepare to pour or add color.
Testing Temperature
Once the paraffin starts to melt, it’s important to monitor the temperature carefully. Using a thermometer, maintain a temperature between 130-150°F. This is the ideal temperature range for melting paraffin wax.
If the temperature rises above 185°F, the wax will start to smoke and burn, which needs to be avoided. On the other hand, if the temperature drops below 130°F, the wax may start to solidify again before fully melting.
Test the temperature periodically by inserting a thermometer into the melted wax. Make adjustments to the heat source as needed to keep the wax within the proper temperature range. The wax should appear completely liquid with no residual solid chunks.
Maintaining the right temperature is crucial for allowing the wax to melt fully while avoiding any burning or smoking. Watch the thermometer closely and adjust the stovetop dial or crockpot settings gradually to fine tune the temperature as needed.
Adding Color and Scent
Once the paraffin wax is fully melted, you can add oil-based dyes and essential oils to color and scent the wax. When adding dyes and scents, it’s important to do so slowly and carefully to achieve your desired effect. Only add small amounts at a time, mixing thoroughly before adding more.
Oil-based liquid dyes or wax color blocks are good options for coloring melted paraffin. Add just a few drops of liquid dye at a time, mixing well before adding more. For wax color blocks, shave off a small amount and mix it into the wax. Essential oils can also be added for fragrance, using no more than 1 teaspoon of oil per pound of wax. Stir the wax continuously as you add the oil to incorporate it evenly.
Make sure to add any scents or dyes once the wax is fully melted and at the proper pouring temperature. Adding them too soon can cause the additives to burn or evaporate before the wax is ready to be used. Take care not to over-dye or over-scent the wax, as less is often more when it comes to achieving an appealing color and fragrance.
Removing and Pouring
Once the paraffin wax is fully melted and has reached the proper temperature, it’s time to carefully remove it from the heat source. Make sure to turn off the stove or unplug the wax melter. Wearing heat-resistant gloves, slowly and gently pick up the pouring container. Caution should be taken as melted wax can still cause burns if spilled.
Before pouring, make sure your molds or containers are ready and placed on a heat-safe surface. Position them how you want the wax to be poured. Carefully tip the pouring container and let the wax slowly fill each mold, avoiding any splashing or spills. Go slowly to prevent air bubbles. Leave a little extra room at the top of each mold, allowing for shrinkage as the wax cools and hardens.
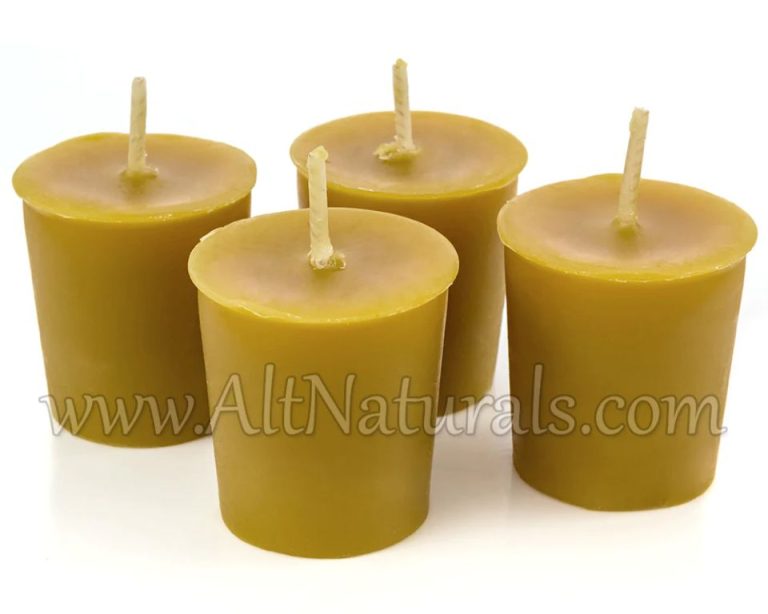
Once poured, gently tap the molds on the counter to release any trapped air bubbles. If needed, top off with a little extra wax. The wax will be slightly cloudy until fully cooled and set up. Allow the wax to fully harden before attempting to remove from the molds.
Cooling and Curing
Once you have poured the melted paraffin into molds, it’s important to allow it to fully cool and cure before attempting to remove the finished candles or wax melts. Here are some tips for proper cooling and curing:
Place the filled molds in a cool, dry, dust-free area where they won’t be disturbed. Do not attempt to cool the wax faster by placing in the refrigerator or freezer, as this can cause cracking or shrinkage.
Allow the wax to fully cool and harden at room temperature. This will likely take 6-12 hours depending on the size and shape of your molds. Do not remove lids or attempt to unmold too soon.
Allow to fully cool and cure for 24-48 hours before gently removing finished candles or wax melts from the molds. The full curing time allows the wax to completely shrink and stabilize, helping prevent defects.
Candles and wax melts are now ready to use! Store finished products in a cool, dry area out of direct sunlight to help preserve scent and color.
Storing Leftover Wax
Once your homemade candles have cured and hardened, you may have leftover melted wax. It’s important to properly store any remaining wax so you can reuse it for future projects.
First, allow all leftover wax to fully cool and harden. Pour the cooled wax into a sealable container, like a glass jar or plastic tub with a lid. Make sure the container is clean and completely dry before adding the wax.
Seal the container tightly to prevent the wax from absorbing any outside odors or moisture. Store the leftover wax in a cool, dry place away from direct sunlight and heat sources. A closet, basement, or garage all make good storage spots.
When you’re ready to reuse the wax, you can simply melt it again using a double boiler or makeshift double boiler. This involves placing the wax container into a pot of simmering water to gently melt the wax. Take care not to overheat the wax, which can scorch it.
With proper storage, most leftover wax can be reused multiple times. Just be sure to strain out any debris before melting and pouring into candle molds or containers. This allows you to reduce waste and get the most out of your homemade candle-making supplies.