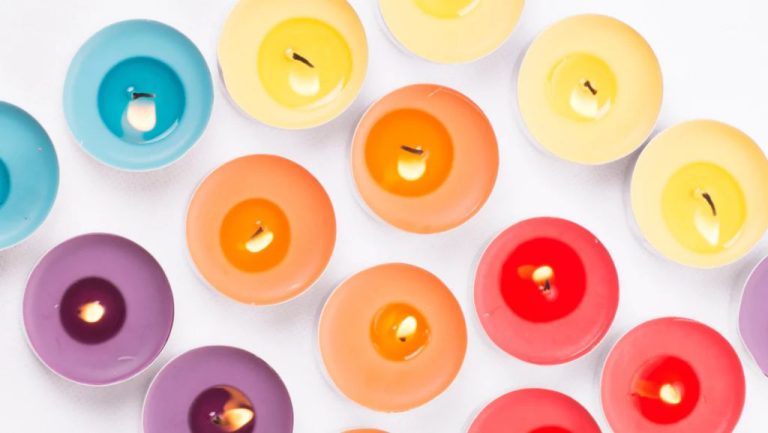
Is Liquid Dye Better For Candles?
Candle dyes come in two main forms – liquid and solid/chip. Both liquid and solid dyes have their own pros and cons when used for candle making. Liquid dyes are oil-based and provide vibrant, intense colors, though some find they don’t blend as evenly. Chip or solid dyes melt directly into wax for uniform color distribution, but may not create as bold of hues. When choosing between liquid or solid dyes, crafters should consider the candle design, wax type, coloring technique, and desired intensity. Properly using either format leads to beautifully colored candles. This guide examines the key differences, with tips for maximizing the potential of both liquid and solid dyes.
Pros of Liquid Dye
One of the biggest advantages of using liquid dye for candles is that it’s easier to mix into the wax to achieve a uniform color. With solid dyes or color blocks, it can be challenging to evenly distribute the dye throughout the wax. But liquids blend in seamlessly when properly mixed.
Liquid dyes like the ones offered by The Flaming Candle (https://www.theflamingcandle.com/candle-dye/liquid-candle-dye/black-liquid-candle-dye/) are highly concentrated, so only a small amount is needed to reach the desired shade. Just an ounce of dye can color up to 125 pounds of wax. This makes liquid dyes extremely cost effective.
The liquid form also makes it easy to achieve lighter or darker shades by adjusting the amount of dye. It’s difficult to control the intensity of color when relying on solid dye chips.
Overall, candle makers who use liquid dyes enjoy easier mixing, better color uniformity, cost savings, and more control over the final color.
Cons of Liquid Dye
While liquid dyes offer simplicity and ease of use, they do have some downsides to consider. One of the biggest cons of liquid dyes is that they can bleed or pool in the wax, making it difficult to achieve precise colors (https://suppliesforcandles.co.uk/candle-college/liquid-vs-chip-dye-which-is-best-for-me/). The liquid form means the dye is more fluid and can spread unevenly through the wax. This can lead to mottled or inconsistent color results.
Additionally, some types of liquid dye have poor affinity for certain waxes like soy or beeswax. The dye may not bind as well and can leach out of the wax after cooling. This can diminish the vibrancy of the color over time (https://www.reddit.com/r/candlemaking/comments/tcev14/which_is_better_dye_chips_or_liquid_dye/). Proper mixing and combining the dye with wax additives can help, but liquid dyes carry more risk of bleeding and fading compared to dye blocks.
Pros of Solid Dye
Solid dyes, also known as granular, powder, or chip dyes, offer some advantages over liquid dyes for candle making:
Easier to Achieve Precise Color: With solid dyes, it’s easier to achieve an exact shade by measuring out the precise amount of dye needed. A little goes a long way, so you can incrementally add more dye until you reach the perfect hue.
Less Messy: Solid dyes are easier to work with and make less of a mess than liquids that can spill or stain. Just sprinkle the granules into the wax and stir to incorporate the color.[1]
Cons of Solid Dye
One disadvantage of using solid dye blocks or chips to color candles is that they can be harder to mix evenly compared to liquid dyes. The solid dye chips need to be melted into the wax before pouring the candles. If not mixed thoroughly, the color may end up uneven with streaks or swirls of darker and lighter shades [1]. With liquid dyes, it is generally easier to achieve a uniform color by mixing it into the wax prior to pouring.
Another downside of solid dyes is the more limited color selection compared to liquid dyes. Liquid candle dyes are available in a huge array of vibrant colors and shades. With solid dyes, the options tend to be more restricted to basic hues like red, blue, green, etc. It can be challenging to find specific shades only available with solid dye chips [2]. So for candle makers interested in creating more unique, custom colors, liquid dyes offer greater flexibility.
Best Uses for Liquid Dye
Liquid dyes work especially well for large batches of candles. Since liquid dyes are highly concentrated, just a small amount of dye is needed to achieve vibrant colors even when working with pounds of wax at a time. This makes liquid dyes the ideal choice for candle makers producing candles in bulk or making particularly large candles.

Liquid dyes also lend themselves well to ombre designs where the color gradients subtly from darker to lighter. The intense concentration of liquid dyes allows for rich, saturated hues on the darker end of the ombre. As less dye is added, the color effortlessly fades into pastel tones at the other end. This effect is harder to achieve with solid dyes.
Candle makers who enjoy swirling and other techniques that require mixing colors together will also find liquid dyes to be a better option than solids. Liquid dyes blend and swirl smoothly in wax without clumping or pooling. The liquid format makes it easy to combine multiple shades for more complex marbled effects.
Best Uses for Solid Dye
Solid dyes, also known as dye blocks or chips, are best for candle makers working in small batches or creating single color designs. Here are some of the top uses for solid candle dyes:
– Tinting smaller amounts of wax. Solid dyes are concentrated, so you only need to use a tiny bit to achieve the desired color. This makes them ideal when working with 1-2 pounds of wax at a time.
– Testing new color combinations. The compact size of dye chips allows you to experiment with different dye colors without committing to bulk amounts of each shade.
– Adding a single color pop. Solid dyes can easily produce a bold, vivid hue. If you want to make an all-white candle with just one color stripe, dye chips give precise color control.
– Creating simple designs. Dye chips are great for candle makers who want to hand-dip or layer solid colors into their wax. Complex marbling is difficult, but solid dyes excel at basic swirling or glitter-dipped effects.
– Making scented candles. Fragrances can interact with liquid dyes, resulting in fading or morphing of the color. Solid dyes are more stable, producing truer colors in scented wax.
– Avoiding messy cleanup. With no liquid to spill or measuring involved, solid dyes minimize the mess from dyeing wax. The compact size makes storage easier as well.
Tips for Using Liquid Dye
When using liquid dye for candle making, following some key tips will help ensure proper color dispersion and intensity:
Add the dye when the wax is at the proper temperature. For soy wax, add liquid dye when the temperature is between 185-135°F. The wax should be fully melted and liquid. If added when the wax is too hot, the dye may burn off. If added when too cool, the dye may not properly incorporate. Refer to the manufacturer’s guidelines for ideal temperatures. https://www.cierracandles.com/how-to-use-liquid-candle-dye.html
Stir thoroughly after adding the dye. Using a utensil, mix the wax and dye together completely so the color disperses evenly. Stir for 1-2 minutes. Insufficient stirring can lead to an uneven color finish.
Tips for Using Solid Dye
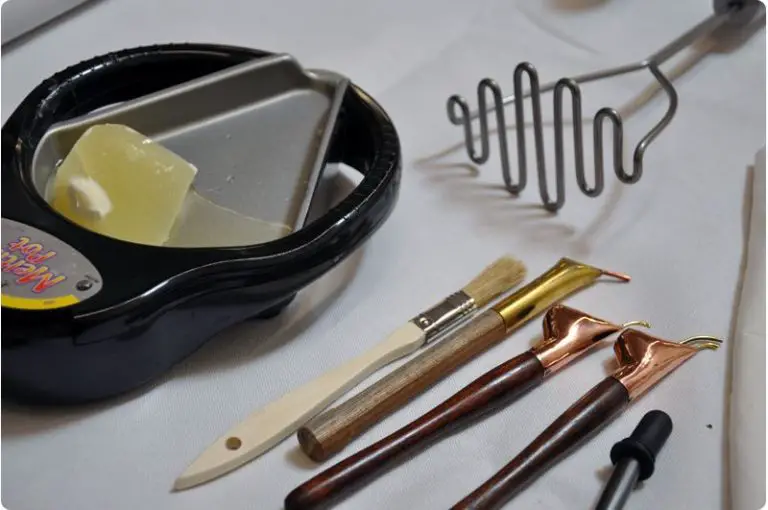
When using solid candle dye, it’s important to focus on proper shredding, melting, and mixing technique for the best results. Here are some tips:
Shredding the solid dye blocks into smaller pieces before adding to wax helps the dye incorporate more evenly. Use a knife or grater to break up dye chips into fine shavings. The smaller the pieces, the easier it will be to fully dissolve in the melted wax.
Always melt the wax first before adding solid dye. Heating the wax to between 180-200°F ensures the solid dye will completely liquefy when added. If dye is added to solid wax, it may not dissolve fully which can lead to uneven coloring.
Stir vigorously after adding solid dye to fully incorporate the color throughout the wax. Continue mixing for 2-3 minutes to make sure no dye particles remain. Never pour colored wax into containers before the dye has fully melted and blended in.
Adding too much solid dye can make the color too intense. Start with a small amount, mixing in more as needed. It’s easier to deepen color than to try reducing an overly vivid hue. Test colors on a paper towel before pouring finished candles.
Cleaning equipment immediately after using solid dyes prevents staining. Any leftover colored wax adhering to utensils or pots will leave traces of dye behind. Wash all tools in hot soapy water after each use.
Allowing the wax to cool slightly before pouring can help achieve a smoother finish. Temperatures between 135-165°F often yield the best looking solid color results.
Conclusion
Both liquid and solid dyes have their pros and cons for candle making. Liquid dyes provide vibrant colors and are easy to mix into wax, but can bleed and fade over time. Solid dyes offer stable, lightfast colors but can be messier to work with and more difficult to blend evenly.
For large production runs where color consistency is critical, solid dyes are the better choice. The pre-measured blocks provide reliable results batch after batch. Liquid dyes are ideal for small batches, testing new colors, or when you want to achieve a seamless ombré effect.
Consider your project and priorities when choosing between liquid and solid dyes. Liquid dyes excel when flexibility and intensity are desired; solid dyes shine when stability and uniformity are paramount. With the right technique, both dye types can produce beautiful, vivid candles. Test samples to determine which option best suits your candle making needs.