How Do You Add Liquid Dye To Candle Wax?
Adding dye to candle wax is done to create colored candles for decorative purposes or to signify a specific scent or occasion. Candle dyes come in either liquid or powder form and allow candle makers to create candles in any color imaginable.
There are two main types of candle dyes – liquid dyes which are oil-soluble, and powdered dyes which are water-soluble. Liquid dyes are the most commonly used for candle making because they blend easily into melted wax. Powdered dyes require an additional mixing step but allow for very vibrant colors.
When adding dye to candles, it’s important to calculate the proper amount of dye to achieve the desired color saturation. Too much dye can negatively impact burn performance. This guide covers techniques for safely dyeing various candle waxes, troubleshooting tips, and creative ideas for designing colorful, eye-catching candles.
Safety Precautions
When working with candle dyes, it’s important to take proper safety precautions. This includes wearing proper attire, ensuring adequate ventilation, and setting up a safe workspace.
Wear an apron or old clothes when dyeing wax to avoid staining your clothes. You’ll also want to wear gloves to protect your hands and avoid skin irritation or staining. Safety goggles are recommended to protect your eyes from splashes or spills of hot wax or dye (CandleScience).
Work in a well-ventilated area when melting wax and adding dyes. Opening windows or working near an exhaust fan can help clear any vapors. Avoid breathing in wax vapors for extended periods.
Your workspace should be clear of clutter and set up on a protected surface. Lay down wax paper, newspaper, or a silicone mat to avoid stains. Have paper towels on hand to quickly wipe up any spills. Keep dye bottles closed when not in use and work carefully when measuring and pouring to prevent messes.
Types of Candle Waxes
There are several common types of wax used in candle making, each with their own properties and characteristics:
Paraffin Wax
Paraffin wax is a petroleum-based wax made from refining crude oil. It is the most widely used candle wax due to its affordable price and excellent burn properties. Paraffin wax is hard, brittle and opaque. It has a high melting point which makes it ideal for molded candles. However, paraffin wax produces more soot than other waxes when burned (Source 1).
Soy Wax
Soy wax is made from hydrogenated soybean oil. It is a renewable and environmentally-friendly wax. Soy wax has a lower melting point than paraffin, so it works better for container candles. It produces less soot and burns longer than paraffin. However, soy wax is prone to frosting and oil migration (Source 2).
Beeswax
Beeswax is a natural wax produced by honey bees. It has a pleasant honey aroma when burned. Beeswax is firmer than other waxes so it can be difficult to work with. It does not adhere well to wicks or glass containers. However, beeswax produces minimal soot and burns brightly.
Gel Wax
Gel wax is a blend of paraffin and mineral oil. It has a thick, jelly-like texture that produces translucent, crystal clear candles. Gel wax allows more fragrance to be added without seeping. It burns slowly and cleanly without excess dripping or smoking.
Types of Candle Dyes
There are several types of dyes used for candle making:
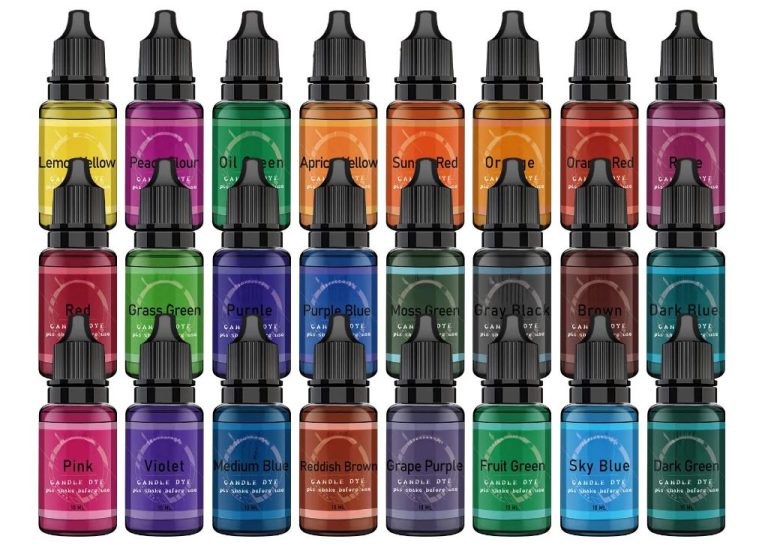
Liquid Dye
Liquid dyes are the most commonly used candle dye. They come in small bottles and can be easily mixed into melted wax. Liquid dyes disperse evenly throughout the wax to create a deep, vibrant color (according to https://www.terre-de-bougies.com/en/content/97-dyes-guide-candle)
Block Dye
Block dyes come in solid blocks that you can shave off amounts as needed. They are good for dyeing small batches of wax. Block dyes may not blend as evenly as liquids, but produce rich colors (from https://craftgossip.com/different-types-of-candle-dyes/).
Powder Dye
Powder dyes are measured by weight rather than volume. They dissolve completely into wax. Powders can create intense colors but need to be mixed thoroughly (according to https://www.cierracandles.com/how-to-choose-candle-dye.html).
Dye Chips
Dye chips are small chips of color that melt into the wax. They allow you to create layers of color. However, they may not blend as evenly compared to liquids or powders (per https://www.terre-de-bougies.com/en/content/97-dyes-guide-candle).
Calculating Dye Amount
When adding liquid dye to candle wax, it’s important to properly calculate the dye load percentage and weight ratios. The dye load refers to the percentage of dye used compared to the total weight of the wax. Most recommendations state using a 0.5-1% dye load for standard opaque candle waxes like soy, paraffin, or palm wax. For transparent waxes like crystal gel, a lower 0.1-0.5% dye load is recommended.
To calculate the dye load percentage, first determine the weight of the wax you’ll be coloring. For example, if you have 4 lbs of wax, multiply by 0.005 (for 0.5% dye load) to determine you need 0.02 lbs of dye (see this guide). Use a sensitive scale to weigh out the calculated amount of liquid dye. When using very small amounts, it can help to first measure a larger volume like 1 oz dye, then calculate what percentage or portion of that volume you need.
The weight ratio of wax to dye is also important. Experts recommend a 20:1 to 30:1 ratio for standard waxes. Going beyond 30:1 risks the dye not dispersing properly. For clear waxes, a ratio of 100:1 is common. Calculating the ratios in advance helps ensure you add the right dye amount.
Adding Dye to Melted Wax
Adding liquid dye to melted candle wax is a simple process but does require some care. Here are the key steps:
First, melt the wax. Use a double boiler or makeshift set up with a pot of water and a container suspended above it. Heat the water to simmering, then add wax chips or blocks to the container. Stir periodically and heat until the wax is fully melted and liquid.
Next, prepare the dye. Shake the dye bottle well before each use. Measure out the desired amount of dye using a plastic pipette or dropper. Good starting points are 1-2 drops per pound of wax or .5-1 teaspoon per pound. Always start with less dye since you can add more later if needed.
Then, add the dye and stir to mix thoroughly. Add drops around the perimeter of the melted wax pool. Stir slowly and scrape the bottom to ensure even coloring throughout. Be very careful, as wax can burn if overheated.
Finally, allow the wax to cool slightly before pouring into containers or over embeds. Cooling too quickly can cause unsightly frosting. Let it sit for 5-10 minutes, test the temperature with a utensil, then pour between 135°F and 145°F. The slower cooling will allow the dye to fully incorporate.
Following these tips will help you achieve beautifully colored and vibrant candles. Always use pure candle dye for best results. Food coloring tends to fade or bleed.
Dyeing Wax Chips
Dyeing wax chips is a simple and effective method for staining wax different colors before pouring candles. Wax chips come in small flakes or chips that you can easily dye in bulk. Here is an overview of how to dye wax chips:
First, you’ll need wax chips, either paraffin, soy, or beeswax chips. Make sure you have enough wax chips for the number of candles you plan to make. Then choose either liquid candle dye or powdered candle dye. Liquid dyes typically come in small bottles that you can add drop-wise into the melted wax. Powdered dyes come in packs of measuring spoons that allow you to easily measure out the powder.
To dye the chips, first melt the wax in a melting pot or double boiler until completely liquid. Then add your desired amount of dye, either drops of liquid or spoons of powder. Generally, you’ll only need a small amount of dye to reach a medium shade. Stir thoroughly to distribute the dye evenly.
Let the dyed wax cool slightly so it starts to thicken but is still pourable. Then slowly pour the liquid wax over wax paper or onto a sheet pan in a thin layer. Allow it to cool completely and harden. Break the cooled wax into smaller chips and flakes that you can then use to pour candles. The color will carry through the entire candle.
Dyeing wax chips allows you to easily produce batches of colored wax for layering or swirling into creative candle designs. It also helps ensure even color distribution compared to adding dye straight to candle jars. Refer to dye instructions for exact recommended amounts.
Layering Colored Waxes
One fun technique for coloring candles is to layer multiple colors of wax. This creates a striped effect or columns of alternating colors. According to Bramble Berry, when layering colors, it’s important to allow each layer to fully cool and harden before adding the next. Once a layer is opaque and no longer warm to the touch, you can pour the next color.
To create stripes, pour a thin layer of one color, let it cool completely, then repeat with the next color. Keep alternating colors to build up stripes. As noted by Candlewic, take 1/3 of melted wax and mix in 1/8 of a dye square for deep, vibrant colors. Make sure the wax is hot enough to fully dissolve the dye. Continue layering stripes until your candle is the desired height.
Troubleshooting
Sometimes dye can cause issues when added to candle wax. Here are some common dye problems and how to fix them:
Insufficient Dye
If the candle color is too light or pale, you likely did not add enough dye to the wax. To fix this, melt down the wax again and add more dye, a little at a time, until you achieve the desired color intensity. Be careful not to add too much dye as this can also cause issues (see dye clumps below). Refer to dye package instructions for recommended amounts.
Dye Clumps
Small clumps or specks of unmelted dye can happen if the dye is not fully incorporated. To prevent clumps, first make sure to use a dye type meant for the wax you are using. Then, melt the wax fully and stir vigorously for 2-3 minutes before pouring candles. If clumps still occur, remelt the wax, strain through a filter to remove clumps, and stir well before repouring (source).
Color Streaks
Streaks of color in the candle wax can occur when dye is not fully mixed. Always stir dyes for several minutes once added to melted wax to fully blend. For streaked candles, remelt, stir vigorously for 5 minutes, and repour (source). Consider using a drill mixer if stirring by hand leaves streaks.
Creative Design Ideas
You can get really creative with adding dye to candles to make beautiful and unique designs. Here are some ideas to try:
Ombre
Ombre designs involve gradually blending from one color to another. To achieve this, add more dye to the wax as you are pouring layers to create a smooth fade between colors. Refer to this Pinterest board for dip dye ombre inspiration.
Embeddings
Add interest by embedding pieces of colored wax or objects into a contrasting colored candle. Some ideas are dried flowers, seashells, beads, glitter, or pieces of crayon. Make sure objects are heat resistant before embedding.
Contrasting Colors
Layering contrasting colors can create cool designs like stripes, swirls, or flakes. Try pairing complementary colors like red and green or opposite shades like dark blue and light yellow. Pour alternating colors in thin layers to get defined color boundaries.

