Can I Make My Own Floating Candles?
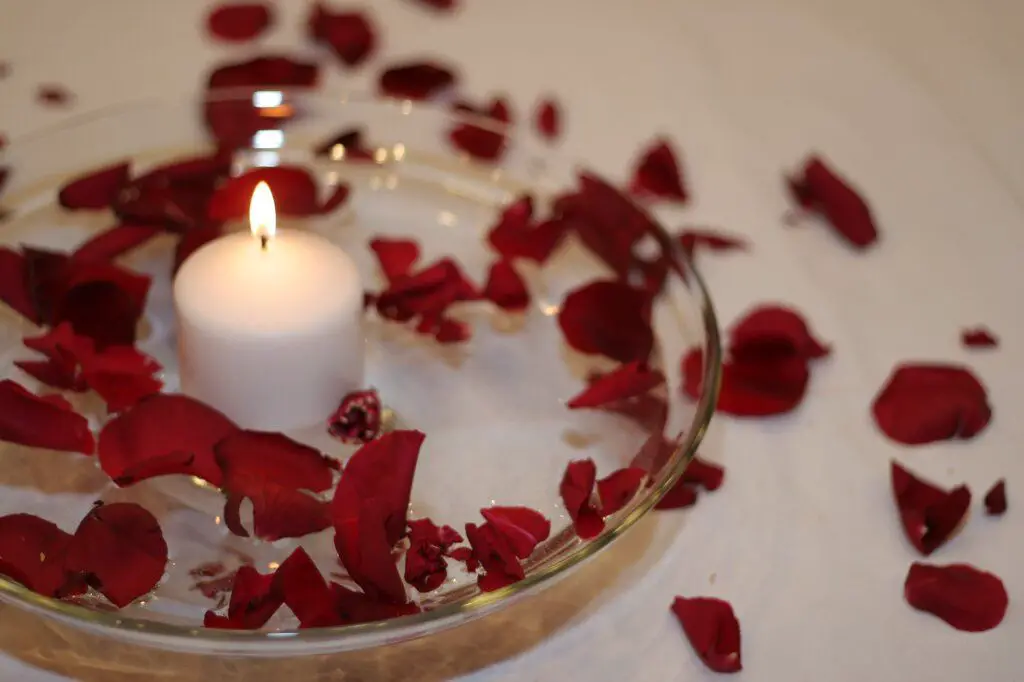
Floating candles are a type of candle that appears to “float” on water or oil inside a glass container or bowl. The candle wax is specially formulated to be lighter than water, allowing it to float freely when the candle is lit. Floating candles create a magical ambiance as the flickering flame seems to hover ethereally over the surface of the water. Their unique floating effect makes them visually interesting and different from regular candles.
Floating candles are popular for their meditative quality and modern aesthetic. The softly flickering flame atop what looks like a pool of liquid light provides a soothing focal point for relaxation or reflection. Floating candles make eye-catching centerpieces and decorative accents for the home. Their versatile design allows them to be used in tablescapes, bathroom decor, outdoor patios, and more. People love the serene ambiance floating candles bring to any space.
Supplies Needed
To make floating candles you will need the following basic supplies:
- Wax – Use a high quality wax like paraffin, soy, or beeswax. Paraffin wax is commonly used for floating candles because it has a high melting point which makes a nice stiff candle. Make sure to use wicks made for the type of wax you choose. Source
- Wicks – Use wicks designed for the type of wax you are using, as different waxes require different wick sizes. Most floating candles use a single 6″ wick in each candle.
- Fragrance – Essential oils or candle fragrances can be added if desired. Use .5-1 ounce of fragrance oil per pound of wax.
- Molds/Containers – You’ll need a container to hold the wax as it hardens into a candle. Glass containers, molds, or jars work well.
- Dye – Liquid candle dye or color blocks can be used to color the wax if desired. Use dye sparingly.
Gather these supplies before starting so you have everything you need ready to go.
Choosing Wax
The main types of wax used for making floating candles are paraffin, soy, and beeswax. Each has its pros and cons.
Paraffin wax is derived from petroleum. It’s relatively inexpensive and makes durable candles that burn cleanly. However, paraffin releases more soot than natural waxes when burned. Some find the sooty residue unappealing.
Soy wax is made from soybeans. It’s a renewable and environmentally-friendly choice. Soy candles burn slower and cooler than paraffin, without releasing soot. However, soy wax is softer and can lose its shape in warm environments. Special additives are needed to help soy wax hold its form.
Beeswax is all-natural wax made by honeybees. It has a lovely honey aroma when burning. Beeswax candles burn slowly and evenly. But beeswax is expensive and can be tricky to work with, as it needs to be blended with other waxes. It may not be ideal for beginners.[1]
For floating candles, soy wax or a soy-paraffin blend is recommended. The soy gives the flexibility needed for the candle to float, while paraffin helps the candle retain its shape. Straight paraffin wax is too rigid for floating candles and may sink.
Adding Fragrance
One of the most important parts of making floating candles is adding fragrance, as this is what will provide the pleasant scents. There are two main options for scenting floating candles – fragrance oils or essential oils.
Fragrance oils are synthetic scents created in a lab to mimic natural aromas like fruits, flowers, and spices. The advantage of fragrance oils is that they are stronger than essential oils and can hold their scent longer in candles. According to The Wax Chandler, candles can typically hold 1-15% fragrance oil by weight depending on the wax type before becoming too strongly scented. The disadvantage is fragrance oils are not natural.
Essential oils are extracted directly from plants and have a more authentic, subtle aroma. However, essential oils can fade faster from candles and may only allow 1-3% by weight. If you want a pure, natural scent, go with essential oils. But for bolder, longer-lasting fragrance, use a quality fragrance oil.
When adding your fragrance, carefully measure the amount according to your wax weight and type. Too much fragrance can cause issues like seepage or burning. But when used properly, fragrance oils or essential oils will provide heavenly scented floating candles.
Coloring the Wax
When coloring floating candles, you have two main options for adding color – liquid dyes or block dyes. Liquid dyes are concentrated colorants that you add directly to melted wax. They come in many vivid colors and allow you to achieve translucent or opaque shades. Start with small amounts, like 1⁄8 teaspoon per pound of wax, and add more if needed. Stir thoroughly to fully incorporate the dye. Popular brands of liquid candle dye include CandleScience, Lonestar, and Mad Micas.
Block dyes, also called color blocks or dye chips, are concentrated color cubes or bars that you add to melted wax as well. Place a small piece of the block into the wax as it melts to achieve the desired hue. Block dyes produce rich, opaque colors. Some drawbacks are that colors can be more limited and blocks may not fully melt. But blocks are convenient since you don’t have to measure out liquid. Look for brands like Candlewic and Peak when buying dye blocks.
For bright colors with no streaks, liquid dyes tend to work a bit better for floating candles. But either type of dye can produce vibrant results. Just make sure to test out coloring on a small batch first before pouring your finished candles.
For recommendations on top liquid wax dyes, see this Reddit thread: https://www.reddit.com/r/candlemaking/comments/15st7x9/wax_painting_on_candles_looking_for_tips_and/
Preparing the Wick
The wick is a crucial component of floating candles, as it is responsible for absorbing and burning the wax while also keeping the flame lit. When preparing your wick, the most important factors to consider are the wick size and material.
For floating candles, you’ll want to use a sustainer wick that is long enough to protrude out of the wax while floating on water. The wick should be roughly 1.5 to 2 times the diameter of your container to ensure it burns properly through all the wax. Typically a #1 or #2 wick works best for most standard floating candle containers.
The wick material is also key. Cotton core wicks work great as they naturally curl over as they burn, retaining the melted wax that keeps the flame going. Other popular options include paper-core wicks or wood/wooden-core wicks designed not to bend. Avoid zinc or metal-core wicks as these can get too hot.
Test different wick materials and sizes beforehand to find the best sustained burn for your wax type and candle dimensions. This will prevent issues like tunneling or poor wax pooling when the floating candle is lit. With the right wick prepared, your floating candle will burn bright!
Choosing Containers
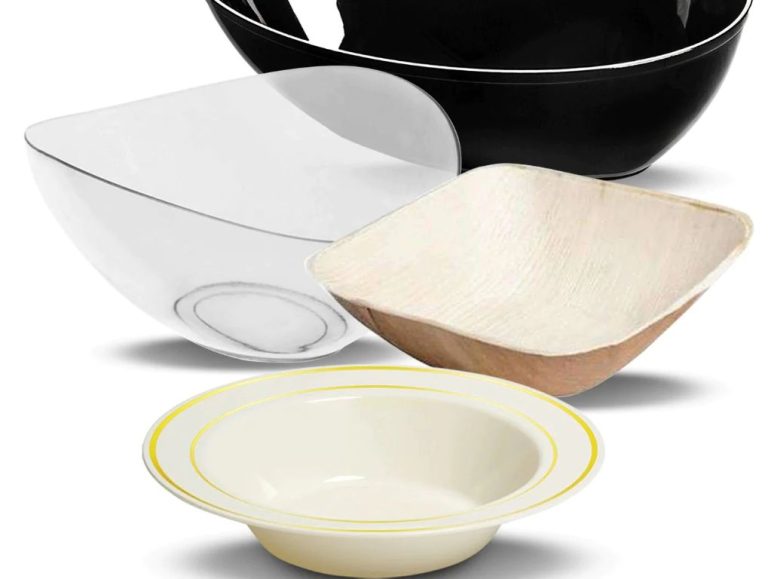
When making floating candles, you have a few options for the containers. Glass and plastic are the most common materials. Glass containers can provide a more elegant, high-end look. Plastic containers are more affordable and come in a wider variety of shapes, sizes, and colors. Here are some key points on glass vs. plastic floating candle containers:
- Glass containers are available in classic shapes like cylinders, hurricanes, and vases. Glass comes across as more sophisticated. However, it is heavier, can break, and costs more than plastic.
- Plastic floating candle containers offer endless options at lower price points. From geometric shapes to novelty designs, plastic provides flexibility. However, some may see plastic as less refined than glass.
- Both glass and plastic come in a range of sizes, from small votives to large containers. Consider the proportions – a large candle in a small container may look overwhelmed or be a fire hazard.
- Make sure to select heat-resistant containers rated for a candle’s melting point. Look for glass or plastic designed specifically for floating candles.
When choosing floating candle containers, weigh factors like appearance, safety, cost, and personal style. With the range available, you can find the perfect vessels to complement your candles.
Melting and Pouring
When making floating candles, properly melting the wax and pouring at the right temperature are crucial steps. According to CandleScience, you’ll want to melt the wax to temperatures between 180-200°F to avoid overheating. Use a double boiler or makeshift double boiler with a saucepan and pitcher to gently heat up the wax. Avoid using direct stovetop heat which can scorch the wax. For soy wax, a lower temperature around 150°F is recommended by Life N’ Reflection.
Before pouring, let the wax cool slightly to 175-185°F. Hotter wax above 200°F can melt styrofoam containers. Take caution, as wax this hot can also burn skin. Use mitts or potholders when handling. Pour carefully and slowly into the container with wick to prevent spills and allow time for the wax to pool properly around the wick. Allow the candle to fully harden and cool before attempting to float or move it.
Creating the Float
One of the most important steps in making floating candles is choosing objects that will float rather than sink in the wax. There are a variety of items you can use to create a visually appealing float, but you need to test them first. According to CandleScience, some objects that typically float well in wax are:
- Seashells
- Fake flowers
- Plastic fish
- Glass gems
- Citrus slices
On the other hand, objects made from heavy materials like rocks, metals, and some woods will likely sink. When in doubt, place the item in a small amount of melted wax to see if it floats before adding it to your candle. The float effect only works if the objects remain suspended in the wax rather than resting on the bottom.
According to Simply Earth, you can also use clear water beads to create an especially cool floating effect. Just make sure you give them enough time to fully hydrate before adding to the candle wax.
Troubleshooting
Floating candles can sometimes experience issues like tunneling, soot buildup, or weak scents. Tunneling is when a hole forms in the center of the candle as it burns. This happens if the wax around the wick melts faster than the outer wax. To prevent tunneling, make sure to use wax with a low melting point like paraffin or soy wax. Trim the wick to 1⁄4 inch before lighting to keep the flame size in check. Soot buildup on the side of the glass happens when the flame is too large. Trim the wick regularly to 1⁄4 inch to prevent excess soot [1].
Weak scents can occur if not enough fragrance oil is added – use 1 ounce of fragrance per 1 pound of wax. Make sure to stir thoroughly when adding the fragrance so it fully incorporates. Letting the candle cure for 1-2 weeks allows the scent to fully develop before burning. Avoid adding too much dye, as it can mute the scent. With proper wick trimming, wax selection, fragrance measurements, and curing time, you can troubleshoot many common issues with floating candles [2].