How Do You Style Candles For Pictures?
Candle photoshoots have become increasingly popular on social media for showcasing products, moods, and aesthetics. Styling candles properly for photographs can elevate the overall look, convey a desired atmosphere, and help capture appealing marketing images. Thoughtful styling considers the candle selection, arrangement, lighting, backdrops, props, smoke effects, photo editing, and optimization for social media.
This guide will provide tips and techniques for styling candle photos from start to finish. We’ll explore how elements like color, texture, and styling work together to create an eye-catching candle photoshoot. With planning and attention to detail, anyone can learn to artfully photograph candles for social media and online shops.
Pick the Right Candles
When styling candles for pictures, it’s important to pick the right candles to create an appealing look. Consider the following aspects when selecting candles:
Size
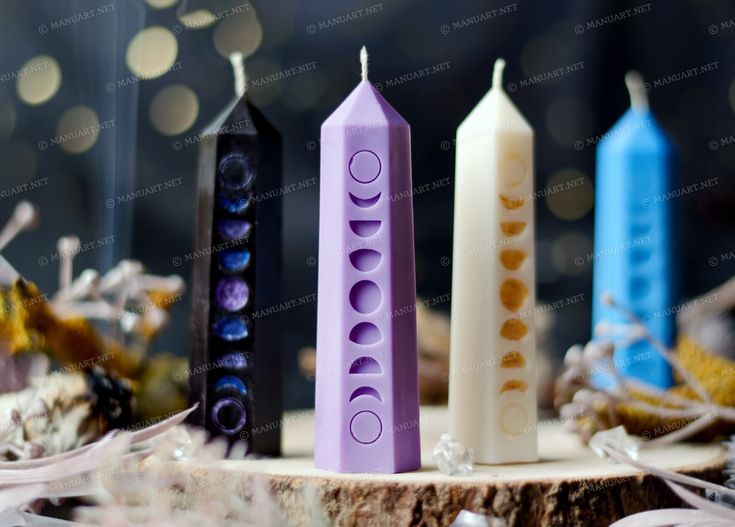
Choose a variety of candle sizes for visual interest. Large pillar candles make dramatic focal points, while small votives and tea lights can add subtle accents. Medium-sized taper and column candles create flexible options for clustered arrangements.
Shape
The shape of the candle impacts the overall look. Tall tapers create height while pillars and votive cups have bold, stocky shapes. Opt for a mixture of taper, column, and votive candle styles to create striking compositions.
Color Variety
Candles in an array of colors make photos pop. Select candles in coordinating as well as contrasting hues to highlight different color palettes. Neutrals like cream, white, and grey provide clean backdrops for bolder colors.
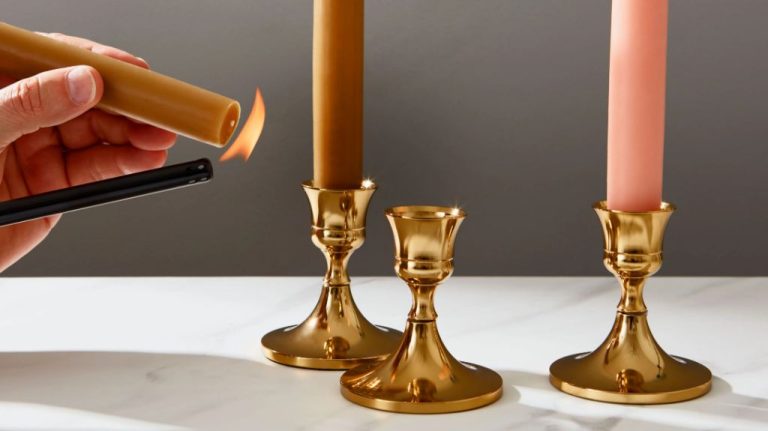
Experts recommend choosing high-quality candles with attributes like minimal dripping for the best photographic styling. Well-made tapered candles provide pleasing proportions and clean lines.
Thinking carefully about size, shape, and color variety when picking candles helps create stunning arrangements perfect for pictures.
Arrangement and Composition
When photographing candles, consider photographic composition techniques like the rule of thirds and leading lines to create a visually pleasing arrangement. The rule of thirds is a technique where you imagine the image divided into thirds both horizontally and vertically, then place important elements like candles at the intersection points. This creates a natural balance and dynamism according to this source. Leading lines use diagonal lines, curves, or repetitive shapes to direct the viewer’s eye through the image.
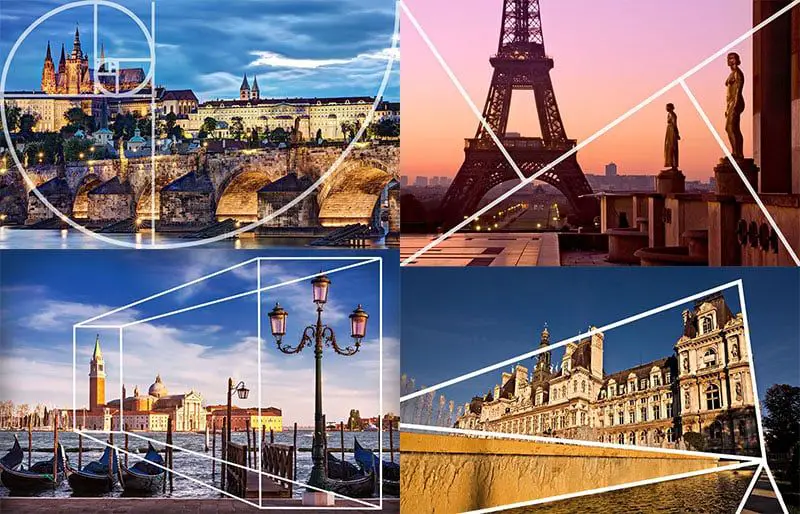
You can also experiment with balancing colors and symmetry in the candle arrangement. Try grouping candles of similar colors and sizes together in triangular or diagonal formations for symmetry. Or create contrast by pairing candles with opposite colors. Keep in mind the visual weight of each element and aim for overall balance across the composition. Leave some negative space around the candles to avoid a cluttered look. Following basic photography composition techniques will elevate your candle pictures from snapshots to artful images.
Backdrops and Surfaces
The backdrop and surface you choose for photographing candles can make a dramatic difference in the overall look and feel of the image. Consider using backdrops and surfaces with different textures, colors, and aesthetic styles to complement your candles.
Wood surfaces like wood tables, cutting boards, and wooden crates provide a natural, earthy backdrop that pairs nicely with simple white or cream-colored candles. The wood grain adds visual interest and texture. Darker wood tones can create bold contrast against white candles while lighter wood provides a more subtle effect.
Marble or stone surfaces lend an elegant, upscale look to candle photos and videos. Pair white candles with gray, black, or white marble for a clean and sophisticated aesthetic. Use a marble surface with veins of color for visual interest. The cool tones of marble nicely complement the warm glow of candles.
Clear glass surfaces like vases, candle holders, and glass table tops allow the candle to be the main focus while adding reflective qualities to the image. A colored glass surface like blue or green provides a vivid pop of color contrast against neutral candles.
In addition to texture and color contrasts, consider complementary or matching color palettes for backdrops and candles. Deep blue or purple backdrops intensify the glow of white candles. Black backgrounds make colors pop. Group candles and surfaces in coordinating tones for a cohesive color story.
Props
Props can add visual interest and create an appealing scene around the candles. Some props worth considering include:
Flowers like roses, daisies, and baby’s breath make beautiful additions around candles with their bright colors and delicate petals. Place a small floral arrangement beside the candles or scatter rose petals around them for a romantic effect. Just make sure to avoid placing fresh flowers too close to the flames.
Books stacked neatly next to candles make for a cozy reading nook vignette. Vintage books with leather bindings suit the warm glow of candles. You can also stack cookbooks in the kitchen or place candles on stacks of large books for height.
Cutlery can add a touch of elegance, like placing ornate silverware alongside candles on a dining table setting. Use cutlery in metallic finishes like bronze, pewter, or gold for a glistening effect in the candlelight.
During festive seasons like Christmas, fall leaves, pine cones, ornaments, and other decorations can complement candle displays. For example, pine sprigs circled around red candles evoke a cozy winter feel. Mini pumpkins and glittery leavessuit autumn candle themes.
Lighting
Proper lighting is crucial for photographing candles to add dimension and capture the glow and flames. Both natural light from windows or outdoors and artificial light like strobes, speedlights, LEDs, etc. can be used effectively. According to Expert Photography, side lighting from a window or artificial source works well to bring out the texture and shapes of candles (https://expertphotography.com/candlelight-photography/). This type of directional lighting will cast interesting shadows to add depth. CandleScience recommends avoiding direct, overhead lighting as it can create harsh shadows. Diffused lighting, like placing candles in the shade, creates softer shadows for a more appealing look (https://www.candlescience.com/product-photography-natural-light/). When using artificial lighting like strobes or flashes, reflectors can improve the lighting quality and soften shadows.
Smoke and Flames
Capturing the motion and drama of candle smoke and flames can create striking photos. Use a fast shutter speed, around 1/200th of a second, to freeze the action of rising smoke and flickering flames (AdaptALux). You may need to increase your camera’s ISO to allow more light if using a fast shutter. For blurry, dreamy effects, use a slower shutter speed like 1/30th and keep the camera still while shooting.
Try photographing flames sideways and from creative angles to capture interesting shapes. Zooming in close can reveal colors and details. For extra impact, look for backlighting opportunities where light shines through smoke.
When editing candle photos, adjust contrast, clarity, and vibrance to make flames stand out. Careful burning and dodging can highlight flames against a dark background. Add a Warm Photo filter for cozy lighting effects. Try cross-processing for an ethereal look. Overlay blending modes like Soft Light and Hard Light intensify flames. For finishing touches, add lens flare and light bokeh textures.
Editing and Filters
Post-processing candle photos is key to achieving a professional, polished look. Using photo editing software like Photoshop or Lightroom, you can enhance the colors, lighting, and overall aesthetic of your images.
Start by doing some basic color correction. Adjust the brightness and contrast so the flames and candles pop against the background. You want vibrant, saturated colors without blowing out the highlights. According to the Reddit user in this post, blending multiple exposures is an effective technique for candle light painting.
Next, tweak the tone curve to add contrast and make the candles stand out. You can also play with split toning to enhance the warmth of the candlelight. Finally, use masking and selection tools to selectively sharpen, brighten or saturate certain parts of the image.
Subtle use of Photoshop filters like Gaussian Blur can creatively soften background elements and draw more focus onto the candles themselves. With the right editing adjustments, you can take your candle photos from flat to eye-catching.
Social Media Optimization
Properly optimizing your candle photos for Instagram and other social media can help attract more engagement and reach new audiences. When styling candle shots for social media, keep these tips in mind:
Carefully crop each photo to highlight your product and compose balanced, interesting shots. Avoid large areas of empty space and ensure your candles are the star. Use the cropping tool to fine-tune the framing.
Overlays like quotes, captions, or hashtags can personalize the image. Place text in clean, readable fonts in areas that don’t overwhelm the photo. Make sure the text complements your brand style.
Maintain a cohesive visual brand for your candle business across social media channels. Use the same logo, color scheme, fonts, etc. to reinforce brand recognition. Edit photos to fit your style guide.
Test different angles, arrangements, backgrounds, and edits to discover which images resonate most with your target audience. Analyze social media metrics to see which photos attract engagement. Use these insights to refine your candle styling strategy.
Final Thoughts
Styling candles for pictures takes some planning and effort, but the results can be incredibly eye-catching and dramatic. The most important things to remember are choosing the right candles, arranging them intentionally, using props and backdrops to enhance the composition, lighting everything effectively, and editing your photos afterwards. The candle styling process allows you to get creative and make something beautiful to share. With the tips provided throughout this guide, you should now feel equipped to style candles like a pro for your own brand or personal use.
The next time you need product photos or lifestyle images featuring candles, keep this advice in mind. Take your time setting up the shot, use high quality candles, pay attention to visual details, and edit the photos afterwards to really make them pop. Sharing your perfectly styled candle pictures on social media or your website will wow your audience. So grab some candles and your camera to experiment with new arrangements and start snapping your own gorgeous, artistic candle shots today!