Why Do All My Candles Tunnel?
What is Candle Tunneling?
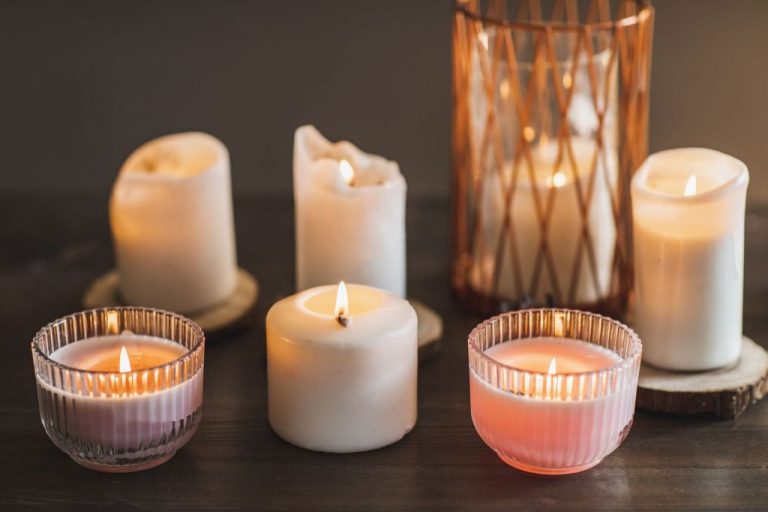
Candle tunneling refers to when a candle burns unevenly, creating a hole or tunnel in the middle of the wax while the outer edges remain unmelted (https://tlccandleco.com/blogs/tlc-talks/what-is-candle-tunneling-and-how-do-you-prevent-it). This results in the flame burning down into the candle, leaving the sides untouched. Visually, a tunneled candle will have a deep crater in the center with hardened wax around the edges.
Tunneling is problematic for consumers because it leads to poor fragrance throw, produces a lot of wasted wax, and causes candles to extinguish themselves before fully burning. Essentially, instead of getting a nice even burn throughout the whole candle, tunneling results in an uneven melt pool that prevents the candle from burning properly. This diminishes the candle’s scent saturation in a room and shortens its usable lifespan.
Common Causes of Tunneling
There are a few common causes behind candle tunneling:
Wick Issues
One of the most common reasons candles tunnel is an improperly sized wick. Specifically, using a wick that is too large for the candle can cause tunneling. As the All Seasons Wax Company explains, “A very common cause of tunnelling is the usage of a wick too small for the volume of wax or the width of your vessel. A wick that is too large will burn hotter and faster than the wax can properly melt.” This results in the wax around the wick melting faster than the rest of the candle, creating a tunnel effect.
Wax Issues
The wax used in the candle can also influence tunneling. As Harlem Candle Company notes, “If wax is too hard or too soft it can cause issues with proper melt pool creation.” Using wax with too high of a melting point or the wrong wax blend for the candle’s size and shape makes it difficult for an even melt pool to form, increasing tunneling.
Vessel Size and Shape
If the candle’s container is too large relative to the wax volume, the melt pool may not reach the edges, creating a tunnel down the center. The shape of the vessel also matters – more circular/rounded containers allow an even melt across the top, while candles in narrower containers are prone to tunneling.
Wick Issues
One common cause of candle tunneling is having the wrong wick size for the candle. As explained on Harlem Candle Company’s blog, thick wicks tend to tunnel while thin wicks can cause tunneling in large candles where the flame isn’t hot enough to melt the outer wax. Properly trimming the wick to 1⁄4 inch before each burn can help prevent tunneling issues. Wick placement is also key – having the wick centered in the candle will promote an even burn.
Wax Issues
The type of wax used in candle making can impact tunneling. Paraffin wax, which is a byproduct of petroleum refining, is prone to tunneling because it contracts a lot as it cools. In contrast, soy wax and beeswax blends contract less as they cool, making them less likely to tunnel (Source).
Pour temperature also matters. Pouring wax that is too hot can cause the outer edges to cool and contract quickly while the interior remains molten. This differential cooling rate leads to tunneling. Ideal pour temperatures vary by wax type but are generally between 120-160°F (Source).
Finally, cooling candles slowly and evenly after pouring is important to prevent tunneling. Allowing candles to cool at room temperature away from drafts gives the wax time to contract uniformly (Source). Rapid cooling can create temperature gradients that lead to tunneling.
Vessel Size and Shape
The size and shape of the candle vessel play an important role in burn rate. Tall, narrow vessels like pillar candles will have a faster burn rate than short, wide vessels. This is because the wax pool has more surface area exposed to air in a narrow vessel, increasing melt rate and burn time. Wide vessels with a larger diameter create a smaller melt pool and slower burn time.
Smaller vessels also tend to burn faster and are more prone to tunneling. Large vessels or wide pillar candles burn slower, allowing the wax to melt evenly across the top as it burns down. Very large jars or pillars that are over 3 inches in diameter will need multiple wicks to prevent tunneling.
For votive and container candles, a vessel with a diameter of 2-3 inches is ideal for most wax types like soy, paraffin, or beeswax. Pillar candles work best at 1.5-2 inches wide to allow even burning. Vessels larger than 3-4 inches for jars, and pillars wider than 2-3 inches, are prone to issues with tunneling. Adjust your wick size appropriately for the vessel shape and volume.
Improper Curing
One of the key reasons candles tunnel, especially on the first burn, is improper curing. Curing candles is the process of slowly heating the candle to allow the melted wax to fully adhere to the wick and vessel. According to https://homesick.com/blogs/news/how-to-fix-candle-tunneling, inadequate curing can lead to weak spots in the wax near the wick as it first heats up. If the wax isn’t thoroughly attached to the wick while warm, it can pull away and create a tunnel as the wick continues burning through the top layers of wax.
Proper curing requires gradually warming up the entire candle to a temperature of around 130 degrees Fahrenheit for 4-8 hours to allow the wax molecules to fully settle and adhere. Letting candles cure in a low oven or temperature-regulated space ensures even, slow heating so wax adheres smoothly around wicks before the first full burn. Skipping this curing step often leads to quick tunneling in the first hour as the candle burns. Taking time to properly cure candles allows for strong, even adherence of wax and avoids tunneling issues down the road.
Burn Location
One common cause of candle tunneling is where the candle is burned. Drafty locations or air currents around the candle can cause uneven melting and tunneling. According to Harlem Candle Company, “Moving air from a fan, air vent, or even people walking past the candle can accelerate melting on one side.”
Additionally, if the candle is burning too close to the edges or sides of the container, it can increase tunneling. As Prosperity Candle explains, “When burning your candle too close to the edges, the melted wax can’t pool properly before reaching the sides. This will limit the melt pool and encourage tunneling.” They recommend keeping the flame at least 1 inch from the edges.
How to Fix a Tunneling Candle
There are several methods you can try to fix a candle that is tunneling:
First, trim the wick to about 1/4 inch before attempting to fix the tunneling. This will help ensure the wick is the proper length when you repair the candle [1].
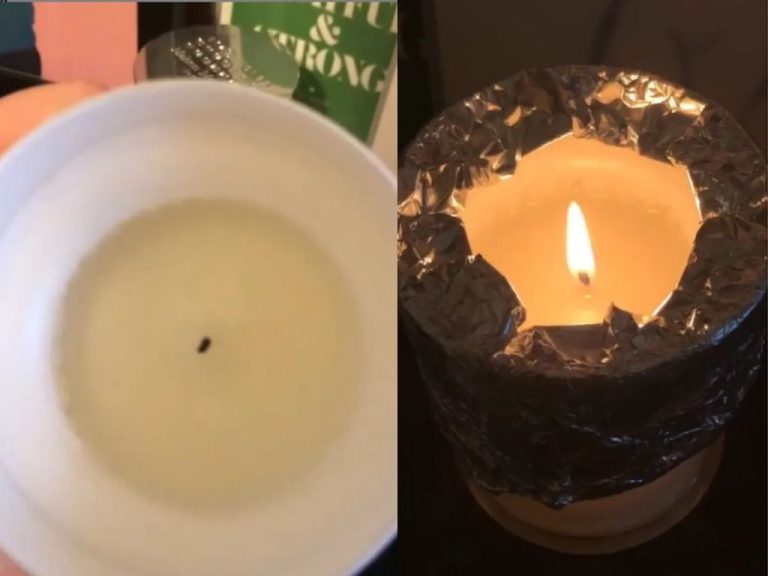
One option is to pour off the melted wax, and then repour it back into the container to level out the surface. Make sure the wax is fully melted and liquid before repouring. Allow the wax to cool and solidify again before relighting [2].
You can also try using a wax melt cup or votive candle to melt wax and fill in the hole. Carefully pour the melted wax into the tunneled area to fill it in. Wait for the wax to fully harden before relighting the candle [3].
Preventing Tunneling
Tunneling can often be prevented by following proper candle making techniques and using optimal materials.
Make sure your candle has the proper wick size for the wax type and vessel diameter. The wick should be wide enough to maintain a full melt pool but not so wide that it creates excessive sooting (ref1). Using a wick that’s too small is a common cause of tunneling.
The wax formulation also impacts tunneling. Opt for wax blends with a mix of wax types, as single waxes like paraffin or soy are more prone to issues. Well-blended waxes melt more evenly (ref2).
Select a vessel size suited to the wax volume to allow proper heat distribution. Too small of a container can lead to poor melt pool circulation. Follow recommended fill ratios based on the candle diameter (ref3).
Allowing adequate cure time for the finished candle is also key. Curing 24-48 hours helps realign wax crystals and prevents issues like tunneling on first burn (ref2). Rushing this step often backfires.
Following these best practices when making candles will help minimize frustrating tunneling issues.
When to Accept Some Tunneling
In very large candles, such as pillars, some tunneling towards the end of the candle’s life may be inevitable. As the candle burns down, the wax pool becomes larger and the heat more intense in the center. This makes it increasingly difficult to maintain an even melt across a large diameter. With pillars in particular, the tendency to tunnel grows as the candle nears the end of its burn time.
Additionally, minor tunneling in the final hours of any candle’s burn is often unavoidable. As the candle wick nears the bottom of the vessel, it becomes more exposed to air currents that can disrupt melt pool equilibrium. The wax pool also shrinks, concentrating heat in a smaller area around the wick. This makes it progressively harder to achieve complete top-to-bottom melting without a tunnel forming.
In these circumstances, moderate tunneling does not necessarily indicate a problem. It is often a normal part of a candle’s final burn. However, deep, early tunneling can still be prevented through proper wick size, wax formulation, and burn conditions.