What Not To Do When Making Candles?
Using Unsafe Materials
Three main types of unsafe materials to avoid when making candles are flammable wax, lead wicks, and undiluted essential oils, as these can create fire hazards.
Some candle waxes like paraffin are very flammable and have a low flash point. This makes them likely to ignite unexpectedly when the candle burns, which increases fire risk. Using wax with a higher flash point above 150°F is safer (https://northwoodcandlesupply.com/blogs/news/5-candle-making-safety-tips-everyone-should-follow).
Lead core wicks release toxic lead vapors when burned, so only use candle wicks made from safer materials like cotton, wood, or paper. Lead exposure can cause health problems, especially for children (https://lonestarcandlesupply.com/candle-making-safety-tips/).
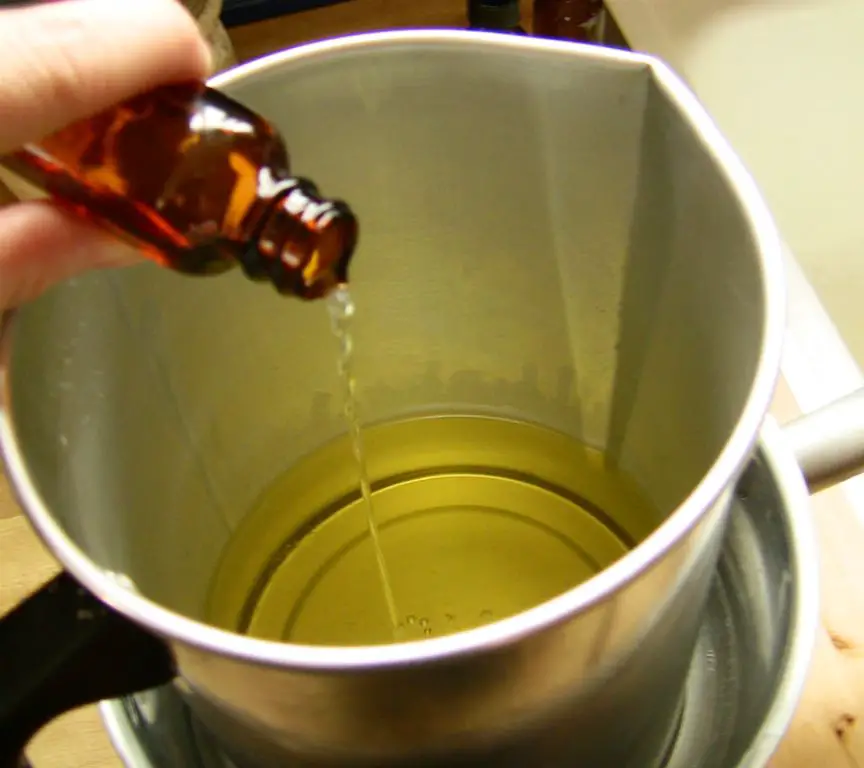
Pure essential oils are highly concentrated and can ignite easily. Only use essential oils diluted in carrier oils to no more than 1-3% concentration in candles. Undiluted oils make candles much more prone to catching fire.
Improper Wick Size
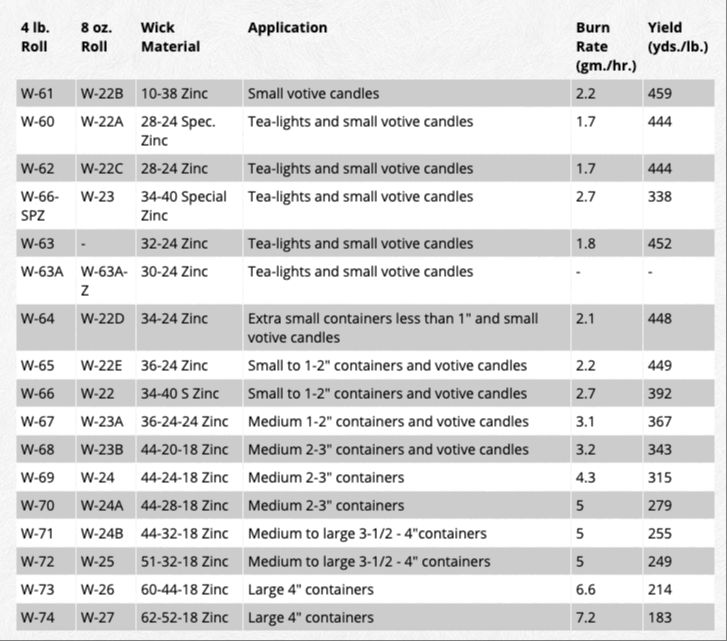
Choosing the improper wick size is one of the most common mistakes when making candles. The wick size must be matched to the diameter of the candle vessel to allow for proper melting, wax pool size, and an even burn. According to CandleScience, the wick should leave a wax pool with a diameter around 1 inch wide for every inch of candle diameter.
If the wick is too small for the candle diameter, it can cause tunneling where a hole forms in the center as the edges remain unmelted. Tunneling results in an uneven melt pool and the candle extinguishing itself before all the wax is used. A wick that is too large will create excess soot and smoking. The flame will be too big and hot, burning the wax quicker than intended and releasing more soot into the air. Properly testing wick sizes during the design process is crucial to finding the optimal wick for even burning.
Insufficient Wax Curing
Allowing candle wax to properly cure is a crucial step in candle making that should never be rushed. When poured candles cool too quickly, moisture bubbles can form, leading to an uneven surface and poor burn performance. As the Armatage Candle Company explains, curing gives wax time to fully harden and stabilize, preventing issues like frosty appearance, wet spots, and sink holes.

The curing process allows microscopic wax crystals to form properly as the candle cools and hardens. Rushing this process traps moisture bubbles within the wax, creating an imperfect surface and bumpy texture when the candle is lit. Candles also need time for any fragrance oil to fully bind with the wax. Insufficient curing can lead to diminished scent throw or “fall out” later on.
For soy wax candles, a minimum curing time of 1-2 weeks is recommended, according to eHow. Beeswax and other wax blends may require longer. The key is to cool candles slowly in a warm, dry area without disturbing them. Patience allows moisture to fully evaporate for the highest quality finished candle.
Pouring at Wrong Temperature
One of the most common mistakes when making candles is pouring the wax at the wrong temperature. Heating the wax to the proper temperature before pouring is crucial for creating quality candles without defects. Pouring wax that is too hot or too cold will ruin the look and burn of the candle.
If the wax is poured at too high of a temperature, typically over 180°F, it can cause major cosmetic defects like sinkholes on the top as the wax cools. According to Lone Star Candle Supply, pouring temperatures between 125°F – 145°F are ideal for avoiding sinkholes.
On the flip side, pouring wax that is too cold, usually under 130°F, will lead to frosting or mottling on the top as the wax sets. The experts at Lets Make Candles recommend pillar candles be poured above 180°F to prevent frosting.
Candle makers should invest in a good thermometer and test pour temperatures to determine the ideal range for their wax type and climate. Rushing the pour or letting wax sit too long can also impact the ideal temperature.
Inadequate Room Temperature
Making candles in a room that’s either too cold or too hot can cause issues with the finished candles. The ideal room temperature for pouring candles is around 70-75°F (21-24°C). Pouring wax in a cold room below 65°F (18°C) can result in the wax cooling and setting too quickly, leading to uneven candles with cracks and craters due to shrinkage 1. On the other hand, pouring candles in a hot room above 80°F (27°C) may lead to the candles sweating or developing wet spots on the surface as excess moisture evaporates from the cooling wax 2. Maintaining an ambient room temperature between 70-75°F while pouring candles allows the wax to cool slowly and evenly, resulting in smooth candles with minimal defects.
Rushing Cooling Process
One of the biggest mistakes when making candles is rushing the cooling process.
After pouring hot wax into containers, it’s crucial to let candles cool down slowly and thoroughly before moving them or putting on lids. Cooling too quickly can cause cracking, sinkholes, and other cosmetic issues.
Candles should be left uncovered in a room temperature area for at least 12-24 hours before moving or lididing, according to experts (https://lonestarcandlesupply.com/dos-and-donts-of-candle-making/). This allows wax to cool and harden properly.
Putting candles in the refrigerator or freezer may seem like a good idea, but rapid temperature drops can shock the wax and cause cracks or craters.
Rushing the cooling process ruins all the hard work put into making candles. Have patience and let candles cure completely before handling.
Reusing Old Candle Wax
While it may seem appealing to reuse old candle wax, this can lead to issues with your new candles. As a candle burns, it produces soot that builds up in the wax. This soot will make your new candles appear dirty and can also impact how well your new wicks burn (Martha Stewart, 2023). Additionally, dyes and fragrances in old candle wax can break down and discolor over time. Reused wax may lose its original color and scent strength (The Spruce, 2022).
To avoid issues with soot buildup and discoloration, it’s best to use only new, clean wax when making candles. While reusing old wax may seem thrifty, the results will likely disappoint. Stick to high quality, fresh waxes in the proper hues and scents for beautifully burning candles.
Improper Wick Centering
Properly centering the wick is crucial for even candle burning. When the wick is off-center, it creates an uneven flame and causes the candle to form tunnels or burn unevenly down the side. This wastes wax and shortens the life of the candle.
To center a wick properly, the tab at the bottom must be centered in the candle container. At the top of the candle, the wick should also be centered and straight. Special wick centering tools like the CandleScience Wick Placing Tool can help position wicks perfectly every time.
Wicks that are off-center or crooked will curl and bend as they burn, creating uneven melt pools. The wick will also tunnel down one side of the candle faster than the other. For safe, long-lasting candles, taking the time to properly center wicks is a must.
Insufficient Curing Time
Allowing candles to properly cure is one of the most important steps in candlemaking. According to Armatage Candle Company, candle curing typically takes 1-2 weeks for soy wax candles to fully cure before burning, with closer to 2 weeks being ideal.
When candles are not allowed to cure for an adequate amount of time, several issues can occur. The most common problem is sweating, which happens when oils melt out of the wax and leak onto the sides and bottom of the container. According to discussions on Reddit’s r/candlemaking community, insufficient curing is the number one cause of sweating in candles [1].
Additionally, not allowing candles to cure can lead to poor wax adhesion, sinkholes, air bubbles, and uneven burn. Fully cured candles have a more cohesive wax structure that provides an even melt pool and burn down. Taking the time to properly cure candles results in a higher quality, better burning product.
Using Low Quality Fragrances
One mistake candle makers often make is using low quality fragrances in their candles. Low quality fragrances typically contain synthetic chemicals and fillers that can irritate the skin and fail to provide sufficient scent throw when the candle is burned.
Many low quality candle fragrances are diluted with chemicals like phthalates and parabens, which can cause skin irritation, headaches, and breathing issues when inhaled (see source). Quality fragrances made with essential oils and high concentrations of fragrance oils will burn cleaner and be gentler on the skin.
Additionally, low quality fragrances often lack scent throw, meaning the fragrance does not effectively fill the room when the candle is lit. This is because cheaper fragrances contain smaller amounts of actual fragrance oils, and fillers that do not aid with scent dispersal. High quality fragrances with at least 5-8% fragrance load will fill a room with lovely aroma (see source).
When making candles, invest in quality, concentrated fragrances to create an enjoyable experience for the candle burner. Synthetic, diluted fragrances can diminish the candle burning experience.