How To Do Wax At Home?
Waxing is a popular hair removal method that involves applying wax to the skin and then removing it, taking the hair with it. At-home waxing has become increasingly popular in recent years as an alternative to going to professional waxing salons.
Waxing at home offers several advantages over going to a salon:
- It’s more affordable – waxing kits and supplies for home use are cheaper than paying salon prices for each waxing session.
- It’s convenient – you can wax whenever you want, without having to book appointments or travel to the salon.
- You’re in control – you can take as much time as you need and wax at your own pace in the comfort of your home.
However, there are some potential downsides to at-home waxing to keep in mind:
- There’s a learning curve – it takes practice to wax properly, especially in hard to reach areas.
- Risk of skin irritation or ingrown hairs if not done correctly.
- Messy – wax can be messy if you don’t take precautions.
Overall, waxing at home can be an affordable and convenient option if you take the time to learn proper technique. This guide will walk through the entire process step-by-step to help achieve salon-quality results at home.
What You’ll Need
To wax at home, you’ll need the following supplies:
- Wax – Choose a hard or soft wax formulated for the area you plan to wax. Hard waxes are good for coarse hair on areas like the legs and arms. Soft waxes work better on sensitive areas like the face and bikini area. Some recommended products are the Happy Waxing Kit which contains both hard and soft wax.
- Wax warmer – This gently heats the wax to the ideal temperature for application. Look for a model with temperature controls and automatic shut off. The Bliss Poetic Waxing Kit includes a wax warmer.
- Applicator sticks – These wooden or plastic sticks apply wax to the skin. You’ll need multiple sticks during the process.
- Muslin strips – After applying the wax, these fabric strips are pressed onto the skin and then quickly ripped off to remove hair. The strips can be reused.
- Pre-wax oil – Rubbing this lightly scented oil onto skin before waxing will allow the wax to adhere properly. It also makes removal easier.
- Aftercare lotion or gel – Soothe skin and prevent ingrown hairs after waxing.
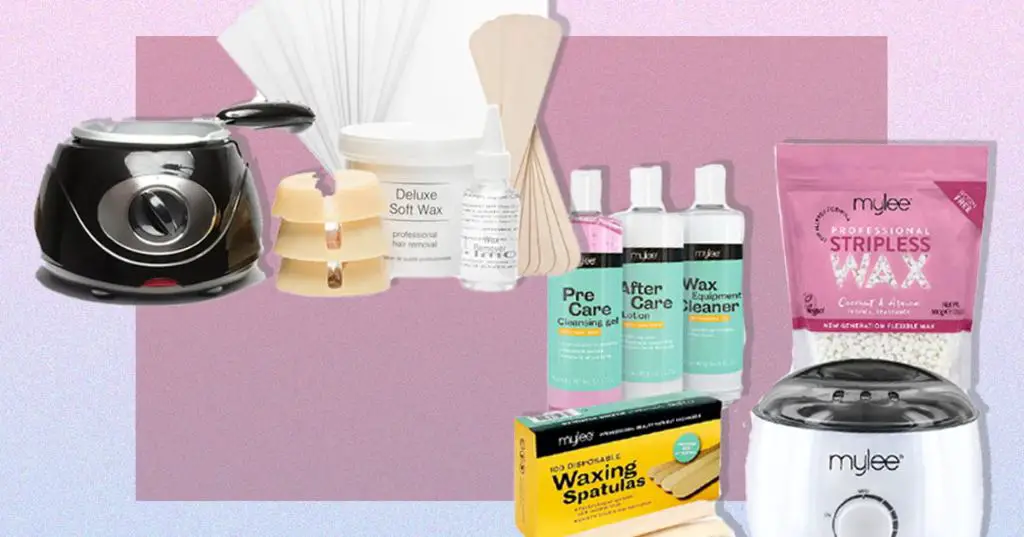
It’s helpful to purchase an all-in-one waxing kit with these components included, like the Nad’s Sugar Wax Kit. Make sure to get the right kit for the area you’ll be waxing.
Preparing Your Skin
Properly preparing your skin before waxing at home is crucial for getting the best results. You’ll want to exfoliate and avoid putting lotion on the areas you plan to wax.
Exfoliating helps remove dead skin cells and allows the wax to adhere directly to the hair follicles. Gently scrub the areas you plan to wax using an exfoliating mitt or body scrub one to two days before you wax. This will prevent ingrown hairs and allow the wax to grip the hairs better for a smoother waxing experience. See more tips for exfoliating before waxing.
You’ll also want to avoid using moisturizer or body lotion on the areas you plan to wax for 24-48 hours beforehand. Lotions and moisturizers create a barrier on the skin that can prevent the wax from adhering properly. Going lotion-free allows the wax to grip the hair for easier removal.
Heating the Wax
To heat your wax properly, you’ll first need to melt the solid wax. The quickest and easiest way to do this is in the microwave, but make sure you use a microwave-safe container. Heat the wax in 30 second intervals, stirring in between, until it’s fully melted. The ideal temperature for wax is 130-140°F (54-60°C). Any hotter, and you risk burning. Any cooler, and the wax won’t spread properly or adhere well. You can use a thermometer to check the temperature.
If you don’t want to use the microwave, you can purchase an electric wax warmer instead. These are great for maintaining your wax at a consistent temperature during the process. Slowly heat the wax in your warmer until fully melted. Keep the wax around 130°F (54°C) for optimal performance.
Some people melt their wax in a makeshift double boiler on the stove instead. Add water to a pot, then place your wax container inside, being careful not to let any water get into the wax. Heat the water slowly until the wax melts completely. Remove the wax container once melted.
No matter how you choose to melt it initially, try to maintain your wax at 130-140°F (54-60°C) throughout the waxing process for ideal results. This ensures proper application and removal.
Test the Temperature
Before applying wax to any sensitive areas, it’s important to test the temperature first. An easy way to do this is by putting a small drop of wax on the inside of your wrist, and letting it cool for a few seconds. The wax should feel warm but not hot. As a guide, hard wax is typically 130-140°F when ready to use (MissCire 2022).
Let the wax fully harden on your wrist, then pull it off. It should come off relatively easily, without feeling like it burns or pulls your skin. If the wax feels too hot or sticky, let it cool down another 5-10°F before testing again. Getting the right wax temperature is key for a smooth, effective waxing experience.
Keep in mind the temperature you’re comfortable with may vary depending on the area being waxed. For example, you may prefer slightly cooler wax for more sensitive zones like the bikini area. It’s always best to err on the side of cooler rather than hotter when in doubt.
Apply the Wax
When applying the wax, it’s important to spread a thin, even layer in the direction of hair growth. As recommended by the American Academy of Dermatology, “Apply the wax to a small section of your skin with unwanted hair. For the best results, always spread the wax in the direction of hair growth.”
Applying the wax in the direction of hair growth allows for the hairs to be easily encapsulated by the wax so they can be pulled out from the root when removing. As noted on Reddit, “One tip I’d like to add – apply wax in the direction of your hair growth. Hold the skin tight in surrounding areas and pull in the opposite or perpendicular direction of growth.”
Be sure to spread a very thin layer, applying too much wax can make hair removal more painful and messy. Work in small sections and reapply wax frequently as needed.
Removing the Wax
When removing wax strips, it’s important to do it swiftly in the direction of hair growth. Pulling slowly can be more painful. The key is to keep the skin taut with one hand, grip the edge of the strip with the other hand, and pull quickly and firmly in the direction of the hair growth. It helps to pull up and outwards rather than straight up. Breathe out when pulling off the strip. Don’t stop mid-way – one swift motion will minimize discomfort. Cool the skin by applying a soothing lotion or cold compress if needed. According to dermatologists, technique and speed are especially important for sensitive areas like the bikini line.
Professionals recommend holding the skin firmly and pulling the strip off as close to parallel with the skin as possible, in a quick, continuous motion. For hard to reach areas like the back, it may help to have someone assist in removing the strips. The key is keeping the strip close to the skin when pulling, rather than yanking the skin itself. This, along with speed, helps make the process as comfortable as possible. With the right technique, waxing can be relatively quick and minimally painful.
Sources:
https://www.aad.org/public/everyday-care/skin-care-basics/hair/how-to-wax
https://www.webmd.com/beauty/cosmetic-procedures-hair-removal
Aftercare
After waxing, it’s important to take care of your skin to avoid irritation, ingrown hairs, and other issues. Here are some tips for aftercare:
Avoid sun exposure on the waxed area for 24-48 hours. The skin will be sensitive and prone to burning. Wear sunscreen if you must be in the sun. See waxing aftercare.
Exfoliate the area 24 hours before and after waxing to prevent ingrown hairs. Use a gentle scrub or loofah. Be very gentle on freshly waxed skin. See Post-Wax Care: Tips & Best Practices.
Moisturize daily, especially right after cleansing, to keep skin soft and help new hairs grow in properly. Use a gentle, unscented lotion. Avoid scented products that could irritate. See Waxing Aftercare – The Remedy Room.
Avoid shaving between waxes, as it can cause irritation. Let the hair grow out to the ideal length for your next wax.
Wear loose, breathable clothing over newly waxed areas to prevent irritation and ingrown hairs. Avoid tight fabrics that rub against the skin.
Troubleshooting
If you experience any irritation or discomfort after waxing at home, there are some simple things you can do to ease the symptoms. Redness and inflammation are common side effects that tend to resolve on their own within a couple days. To help reduce redness, apply a cool compress or an aloe-based gel to the area (source). You can also take an anti-inflammatory medication like ibuprofen to alleviate swelling. Avoid exposing freshly waxed skin to the sun, as this can worsen irritation.
If you see signs of an infection, such as pus-filled bumps or a fever, contact your doctor right away. Ingrown hairs can often be remedied by exfoliating regularly with a gentle scrub and applying tendskin to prevent additional ingrown hairs (source). For persistent irritation or painful bumps after waxing, your dermatologist may be able to provide prescription treatments to speed healing.
Conclusion
In summary, waxing at home can be an effective and affordable way to remove unwanted hair when done properly. The main benefits of home waxing include convenience, cost savings, and the ability to wax on your own schedule. With some practice and patience, home waxing can yield smooth results comparable to professional waxing services. Just be sure to take the necessary precautions to avoid irritation or injuries. Test small areas first, prep the skin properly, use the right temperature wax, apply thinly and in the direction of hair growth, and remove swiftly in the opposite direction. Moisturize and exfoliate regularly afterwards as well. While professional waxing may be ideal for sensitive areas, DIY waxing kits provide an accessible option for hair removal that, with some trial and error, can become a rewarding beauty ritual.