Is It Safe To Melt Bar Soap?
Bar soap is a solid cleaning product made from fats, oils, and sodium hydroxide. It contains no added water and is often created by hand through a process called saponification. Many people enjoy bar soap for its natural ingredients, longer-lasting format compared to liquid soaps, and lower environmental impact. However, bar soap can become dried out, misshapen, or difficult to use over time. Melting bar soap and remolding it is one way to revive hardened bar soap and give it new life. The process of melting and molding bar soap allows you to customize soap recipes, embed exfoliating ingredients, create fun shapes, and even mix soaps together. With proper precautions, melting bar soap can be a fun DIY project with useful results.
Reasons People Melt Soap
There are several reasons why people choose to melt bar soap:
- To make liquid soap or hand soap – Melting bar soap and diluting it with water makes a easy hand soap or foaming liquid soap. Many homemade soap makers will grate and melt leftover slivers of soap to make liquid hand soap.
- To soften old bar soap – Bar soap can get very hard and develop an unpleasant texture over time. Gently melting an old bar will soften it back up and make it usable again.
- To create soap mixtures – Melting different bar soaps together allows you to custom blend scents and properties. Adding ingredients like oils, extracts, or exfoliants when the soap is melted makes it easy to evenly distribute throughout.
- To make decorative soaps – Melting soap allows you to pour it into creative molds to make shaped or embossed soaps. Melting also makes it easy to create layered or swirled soap designs.
According to www.wikihow.com/Melt-a-Soap-Bar, reasons for melting soap include making liquid soap, softening old bars, and creating custom soap mixtures (source).
Is Melted Soap Safe to Use?
Generally, melted soap is safe to use if it is properly melted and handled. The main risk when melting soap comes from the caustic chemical lye, which is used in making bar soap from scratch. Improperly handling lye can cause severe burns (Source: https://www.poison.org/articles/is-it-safe-to-make-soap). However, once saponified into finished bar soap, the lye is no longer caustic. Simply melting finished, cured bar soap does not re-activate any residual lye.
Melting processed bar soap from the store poses minimal risks. However, inhaling vapors from melted soap can potentially irritate lungs and nasal passages for some people (Source: https://www.quora.com/Is-it-bad-to-inhale-melted-bar-soap). Proper precautions like working in a well-ventilated area can mitigate this. Allowing melted soap to cool fully before use is also recommended, as soap that is too hot can cause skin burns. With responsible handling, melted bar soap presents no significant safety hazards.
How to Properly Melt Soap
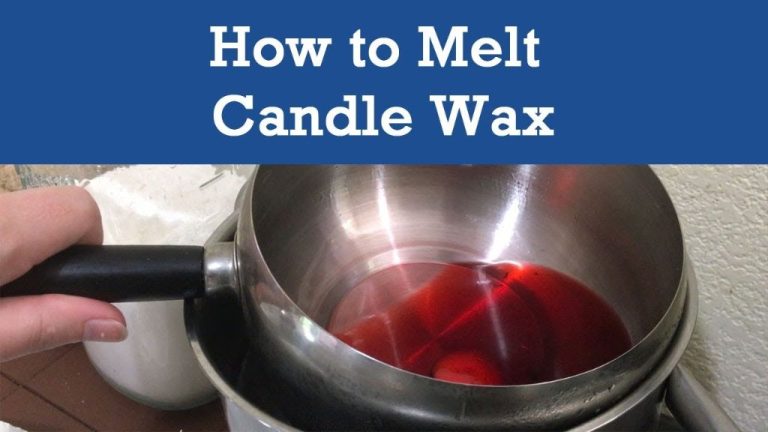
The safest way to melt soap is using the double boiler method. This involves placing the soap pieces in a heat-safe container or bowl, then putting that container into a pot with a couple inches of simmering water. The steam from the simmering water gently heats and melts the soap.
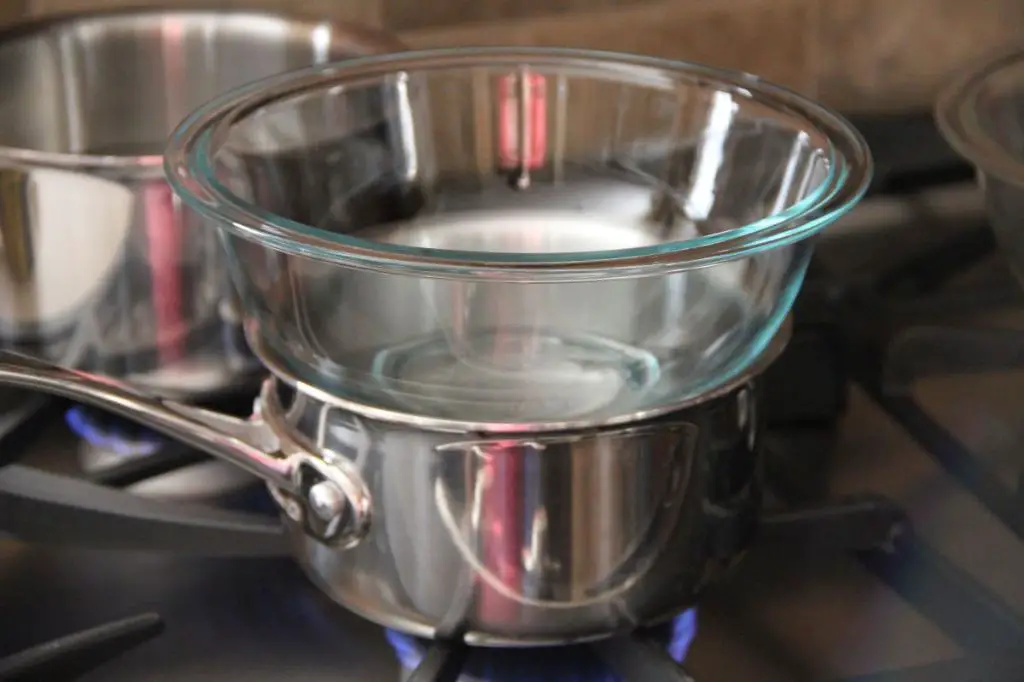
It’s important to use low, steady heat when melting soap. High heat can scorch and burn the soap, resulting in discoloration and a change in scent. According to WikiHow, the ideal melting temperature for soap is between 120-150°F. Excessive heat above 170°F can damage the soap [1].
Stir the melting soap frequently, being careful not to create bubbles or froth. Melting may take 15-30 minutes depending on the amount of soap and whether it’s been shredded or chopped into smaller pieces first. The soap is fully melted when there are no more solid pieces remaining.
Take care not to overheat the soap, as this can break down the chemical bonds in the ingredients. Signs of overheating include a burnt smell, darkening color, increased viscosity, and separation of ingredients. For best results, use the lowest temperature possible to fully melt the soap.
Adding Ingredients to Melted Soap
One of the great things about melted soap is how easy it is to customize by adding extra ingredients. There are many additives you can stir into melted soap to change its properties and create your own signature soap recipes.
Some of the most common ingredients added to melted soap include:
- Essential oils – For fragrance and aromatherapy benefits
- Colors – To create fun, vibrant soaps
- Exfoliants – Such as oats, seeds, or coffee grounds to make a scrubby soap
- Superfatting oils – Like olive, coconut or avocado oil to make a more moisturizing bar
When adding extracts like essential oils, a good rule of thumb is to add about 1 teaspoon per pound of melted soap base. Always add the oils after the base has fully melted and stir thoroughly to incorporate.
Colored pigments, clays or oxides can be added starting with 1/4 teaspoon per pound of soap. Mix well and add more if a darker shade is desired. Liquid dyes typically only require a few drops per pound.
Exfoliating ingredients like oats or pumice should be added slowly, starting with 1 tablespoon per pound of soap base. Check the texture and mix in additional scrubby ingredients if needed. Let harden slightly before shaping so the exfoliants don’t sink.
Superfatting with extra oils is a great way to create a more moisturizing bar from plain melt and pour soap. Simply melt the base then stir in 1-2 tablespoons of oil per pound before pouring into molds. The extra oils remain unsaponified to condition skin.
Get creative with mixing and matching additives like essential oils, clays, herbs or flower petals to make custom soaps. Just be sure to fully incorporate any ingredients into the melted soap before pouring into molds.
Storing Melted Soap
Once you have melted your soap, it’s important to let it cool completely before attempting to store it. Melted soap should be cooled to room temperature to ensure it has re-hardened and solidified properly. Removing melted soap from heat sources like the microwave or double boiler too soon can cause uneven cooling and textural issues.
For storage, place cooled melted soap in an airtight container like a plastic container or glass jar with a tight-fitting lid. This prevents the soap from absorbing excess moisture from the air. As an optional extra step, you can refrigerate melted soap to extend its shelf life. The cold environment of the refrigerator will further inhibit bacteria growth. However, this is not strictly necessary if the soap will be used up quickly.
When stored properly in an airtight container, melted soap can last up to a year in the pantry. With refrigeration, melted soap may last even longer before it starts to degrade in quality and develop odor issues. Be sure to label your melted soap with the date for future reference.
Remelting Leftover Soap
Generally, it is safe to remelt leftover soap pieces. This allows you to combine soap slivers into a new usable bar. However, you’ll want to watch for any signs of spoilage in the leftover soap before melting it again.
According to the Instructables article “Reforming Soap Scraps,” https://www.instructables.com/Reforming-Soap-Scraps/ you can remelt soap scraps by putting them in a pot with a small amount of water, melting them down, and pouring into a mold. This lets you give new life to old soap pieces.
Before remelting, inspect the leftover soap. Discard any pieces that are very wet, look moldy, or have an unpleasant odor. Only remelt healthy-looking soap scraps to avoid problems. As long as the soap appears normal, remelting should be safe.
Remelting can breathe new life into old soap. But keep an eye out for issues like spoilage that would make the melted soap unsafe to use. With some basic precautions, remelting leftover soap is a great way to reduce waste.
Troubleshooting Melted Soap
Even when carefully following recipes and instructions, problems can arise when melting soap. Here are some common issues and how to resolve them:
Fixing Seized or Solid Soap
If your melted soap base suddenly thickens and solidifies, this is referred to as “seizing up”. It usually happens if the soap gets overheated, cools down too quickly, or too much liquid is added.1 To fix seized soap:
- Gently reheat the soap in short bursts of 10 seconds, stirring continuously. Don’t overheat.
- If too dry, mix in a small amount of vegetable oil, taking care not to thin it too much.
- Work quickly to pour the melted soap into molds before it seizes up again.
Preventing Soda Ash
A white powdery deposit called “soda ash” can form on top of melted and hardened soaps. This happens when lye reacts with air.2 To prevent soda ash:
- Spritz the top of poured soap with rubbing alcohol to seal it.
- Cool soap quickly by placing molds in the refrigerator.
- Wrap cured soap to protect from air exposure.
Melted Soap Recipes
Melted soap is very versatile and can be used to create a variety of specialized soaps, including liquid hand soap, shaving soap, and soap for eczema. Here are some recipe ideas:
Liquid Hand Soap
To make liquid hand soap with melted soap, combine 1 cup melted glycerin soap, 1/2 cup liquid castile soap, 1 teaspoon vegetable glycerin, 10-15 drops essential oil, and 4 cups water in a mixing bowl (source). Whisk thoroughly until well combined. Pour the mixture into foaming hand soap dispensers and let sit 1-2 days until thickened.
Shaving Soap
For a rich, moisturizing shaving soap, mix 1 cup melted shea butter soap base with 1 tablespoon carrier oil like olive or jojoba oil and 2 teaspoons bentonite clay (source). Pour into shaving soap molds and let fully harden before using. The carrier oil will provide lubrication for a smooth shave.
Soap for Eczema
To make soothing soap for eczema-prone skin, melt 1 cup goats milk soap base and combine with 1 tablespoon colloidal oatmeal and 5 drops lavender essential oil (source). Pour into molds and let harden completely before use. The colloidal oatmeal helps relieve itchiness.
Conclusion
Melting soap is generally safe if done properly. The key points are:
- Use gentle heat like a double boiler or microwave at 50% power to melt soap slowly.
- Avoid inhaling any fumes by melting soap in a well-ventilated area.
- Add ingredients like essential oils, colors, or exfoliants after soap has fully melted and cooled slightly.
- Store melted soap in an airtight container and use within a few weeks.
- Remelt hardened soap one time only to avoid changing the soap properties.
- Fix common issues like accelerated trace or separation by remixing, adding water, or reheating briefly.
When safety precautions are followed, melting soap allows for easy customization and creative use in DIY projects. The ability to melt and remold soap makes it a very versatile product for home use.

