How To Make Homemade Candles For Sale?
Candle making is a fun and creative hobby that many people enjoy. It’s also a great way to start a home-based business and make extra income. The candle industry has been growing steadily over the past several years. According to My Candle Making, the global candle market is predicted to reach $11.8 billion by 2027. With some basic supplies and equipment, you can start making beautiful, high-quality candles right from your own home.
This guide will take you through everything you need to know to make homemade candles and sell them for profit. We’ll cover choosing wax, adding scents and colors, preparing wicks, pouring, cooling, labeling, packaging, and tips for selling your finished candles. With the right techniques, you can make candles that look and smell as good as any store-bought candle. The satisfaction of creating handmade candles and sharing your unique scented creations with others makes candle making a worthwhile and engaging pursuit.
Supplies Needed
When getting started with making candles, there are some essential supplies you’ll need to purchase. The main components include:
- Wax – The most common types used are paraffin, soy, or beeswax. Paraffin wax is affordable and easily accessible. Soy wax is made from soybeans and is a cleaner burning option. Beeswax is natural but more expensive. (Source)
- Wicks – You’ll need wicks designed specifically for the type of wax you choose. Popular options include cotton, paper, zinc core, and wood wicks.
- Fragrance oils – These oils provide the scents and aromas. You can find many fragrances like fruits, flowers, baked goods, etc.
- Dyes – If you want colored candles instead of plain white, liquid or block candle dyes can safely color the wax.
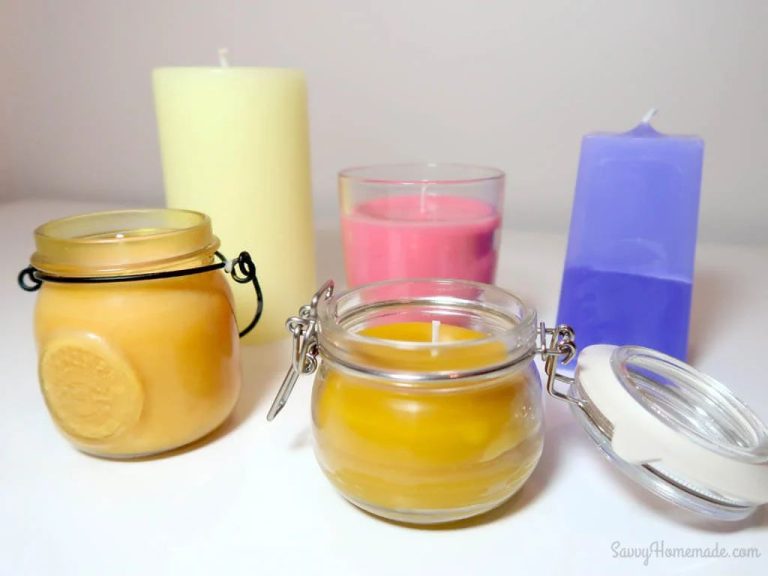
- Containers/Molds – You can pour candles into containers like glass jars or metal tins. Silicone molds allow shaping candles into shapes and figures.
Other handy supplies include thermometers, pour pots, and labeling materials. Quality ingredients and the right tools will set you up for candle making success.
Choosing Your Wax
One of the most important decisions when making homemade candles is choosing the right wax. The three main types of wax for candle making are paraffin, soy, and beeswax. Each has its own benefits and drawbacks.
Paraffin wax is a petroleum byproduct made from crude oil. It is inexpensive, readily available, and easy to use. Paraffin has a high melting point which allows it to hold fragrance oils well. However, paraffin produces more soot than other waxes when burned. Some people prefer to avoid paraffin for environmental and health reasons (Source).
Soy wax is made from hydrogenated soybean oil. It is renewable and biodegradable. Soy wax burns cleaner than paraffin with less soot. It also holds fragrances well. The drawbacks are that soy wax is softer than paraffin and can lose its scent when burned too long. Soy wax also tends to frost and sweat more than other waxes (Source).
Beeswax is all-natural, made by honey bees. It has a lovely honey aroma when burned. Beeswax is compatible with essential oils and burns cleanly. However, beeswax is expensive and challenging to work with. It has a low melting point which makes candles prone to melting in warm environments (Source).
Many candle makers use a blend of waxes to get the best properties of each. Testing different wax combinations will help determine the right balance for your candles.
Adding Fragrances and Colors
Coloring and scenting your candles will allow you to customize them and make them unique. There are several options for adding fragrance and color to homemade candles:
For fragrance, you can use either fragrance oils or essential oils. Fragrance oils are specially formulated for candles and provide a strong, consistent scent. Essential oils are from natural ingredients but may fade faster or morph when burned. Use 0.5-1 oz of fragrance oil per pound of wax.
For coloring, you have two main options – liquid dyes or powder dyes. Liquid dyes are easiest to incorporate by adding drops into melted wax before pouring. Powder dyes require pre-mixing with wax to dissolve before adding. Use just a small amount of dye to achieve bold colors. Too much can negatively impact scent throw or burn quality.
Aim for 1-5% fragrance and less than 1% dye by weight. Test different scent and color combinations to create custom candle designs.
Sources: https://candleprojects.com/, https://www.mycandlemaking.com/candle-making-farm-cheshire/
Preparing the Wick
The wick is a crucial component of candle making. Properly preparing the wick will ensure your homemade candles burn cleanly and evenly. There are several steps involved in readying the wick:
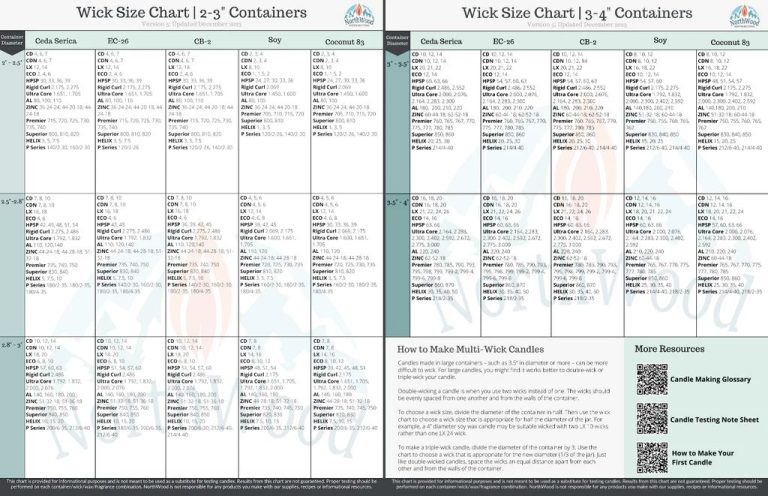
Choose an appropriate wick type and thickness for the wax and vessel you are using. Common options include cotton, paper, zinc core, and wood wicks. Consider braided vs single ply wicks as well. Refer to a candle making guide to select the right wick diameter and type.
Prime the wick before use. This “sets” the fibers and prevents clogging from the melted wax. Dip the wick in a priming solution, let dry completely, then dip again. Allow to fully dry again. Commercial wick primers are available, or you can make your own by dissolving salt or borax in water.
Prepare wick tabs by cutting a small piece of wick and adhering it to the bottom of the wick using glue. The tab will anchor the wick to the bottom of the vessel. Alternatively, some vessels have built-in wick holders.
Now the wick is ready for candle making! Proper wick preparation helps candles burn longer and more evenly.
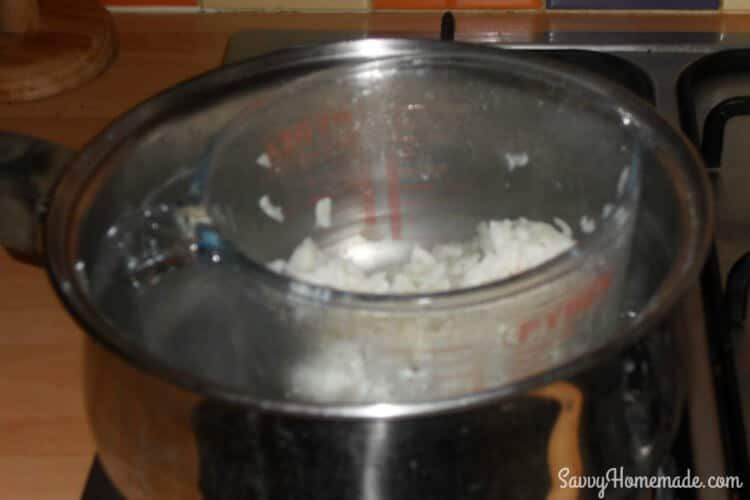
Melting and Pouring
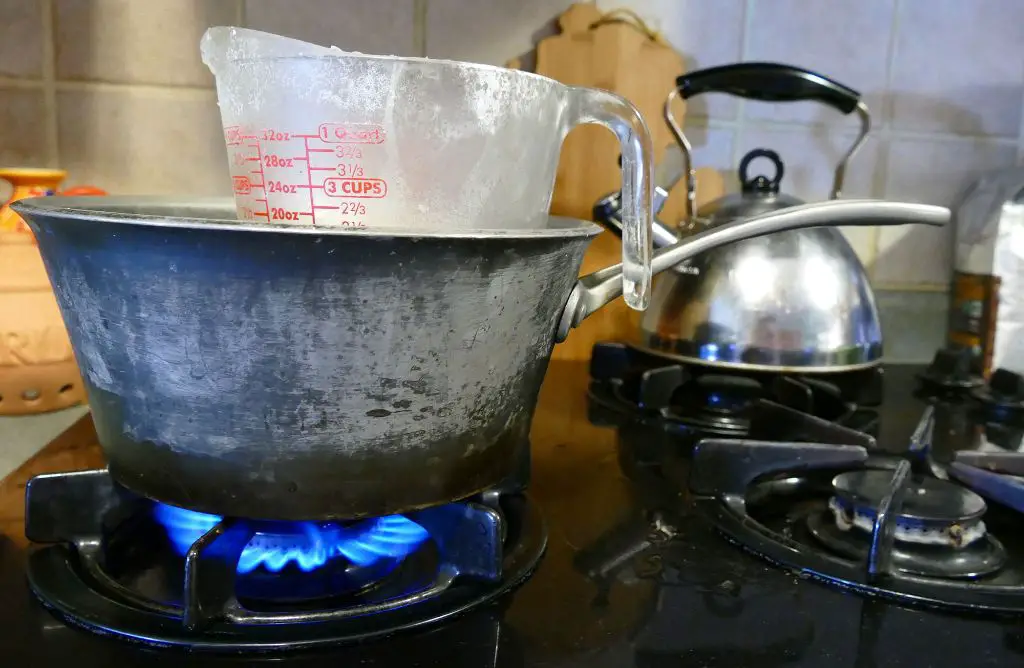
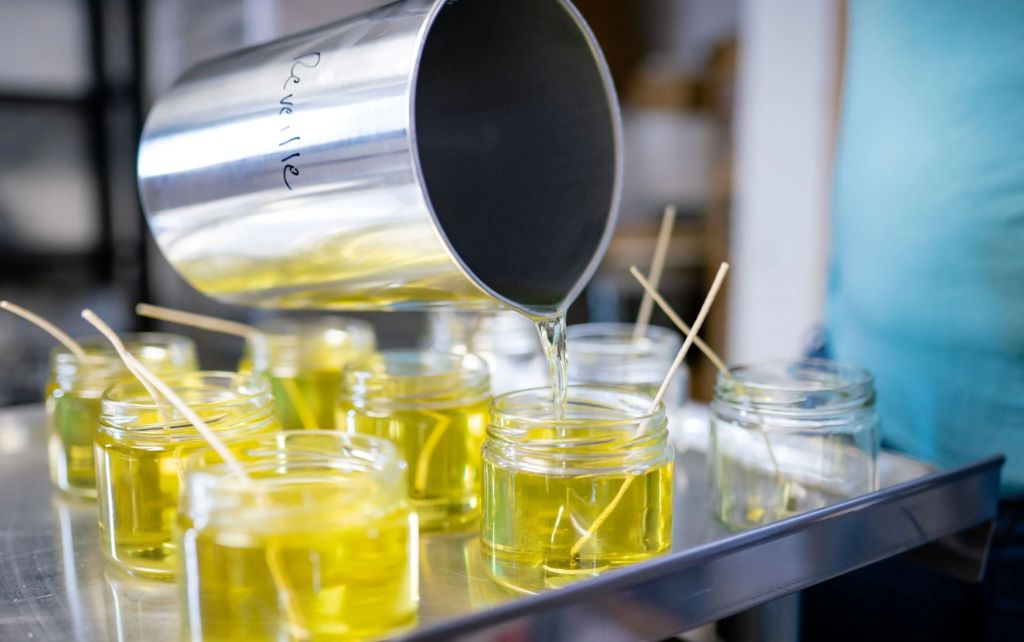
The next step is to melt the wax and carefully pour it into the containers. First, place the wax into a heat safe pouring pot or pitcher. Using a double boiler method is recommended to gently melt the wax. Make sure the water in the double boiler does not touch the bottom of the pouring pot, as this can cause the wax to overheat. Heat the wax to between 150-165°F to reach the ideal pouring temperature (source). Use a thermometer to monitor the temperature.
Once the wax is fully melted, remove it from the heat. Carefully pour the wax into each container, leaving about 1/4 inch of headspace. Pour slowly and steadily in one spot to prevent air bubbles. Allow the candles to fully cool and set up before moving them. The wax will need to cure for 24-48 hours before the candles are ready to use.
Cooling and Curing
After pouring your candles, it’s important to let them cool and cure properly for the best results. Here are some tips on the cooling and curing process:
Once you’ve finished pouring your candles, let them cool undisturbed at room temperature. Don’t move or handle the candles until they have fully set up and hardened. This may take 6-12 hours depending on your wax and vessel type. Soy candles specifically need time to cool and harden before moving to prevent cracks or divots.1
Once cooled and hardened, you’ll need to let your candles cure for 1-2 weeks before burning. Curing allows the wax to fully integrate with the fragrance oil and strengthens the scent throw. The curing process enables chemical reactions that bind the wax and fragrance together.2 Do not burn your candles until they have cured.
During the curing period, store candles with lids off in a dry, room temperature area out of direct sunlight. This allows any residual wet spots or moisture to evaporate. Lids can go on after 1-2 weeks once cured.
Test burning a sample candle after 2 weeks to check that the cure is complete before selling your candles. Fully cured candles will have an even burn and strong scent.
Testing and Quality Control
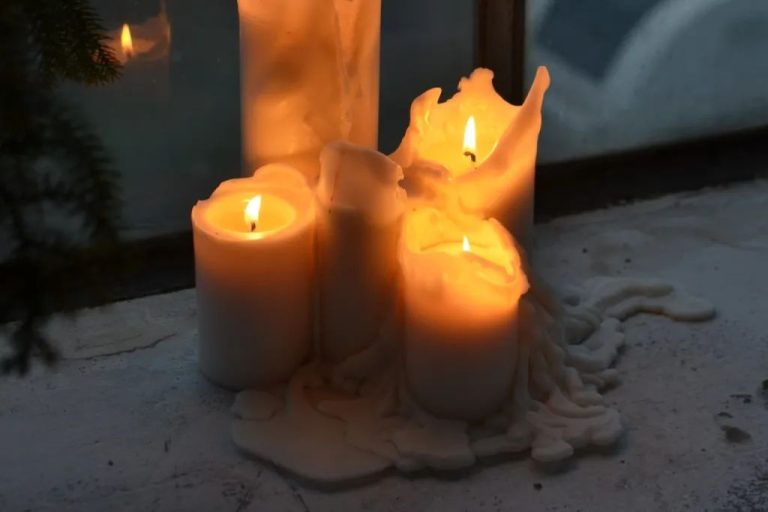
Once your candles have cooled and cured, it’s important to test them for quality control. You’ll want to do a burn test on each new candle fragrance and shape to check for issues like tunneling or frosting.
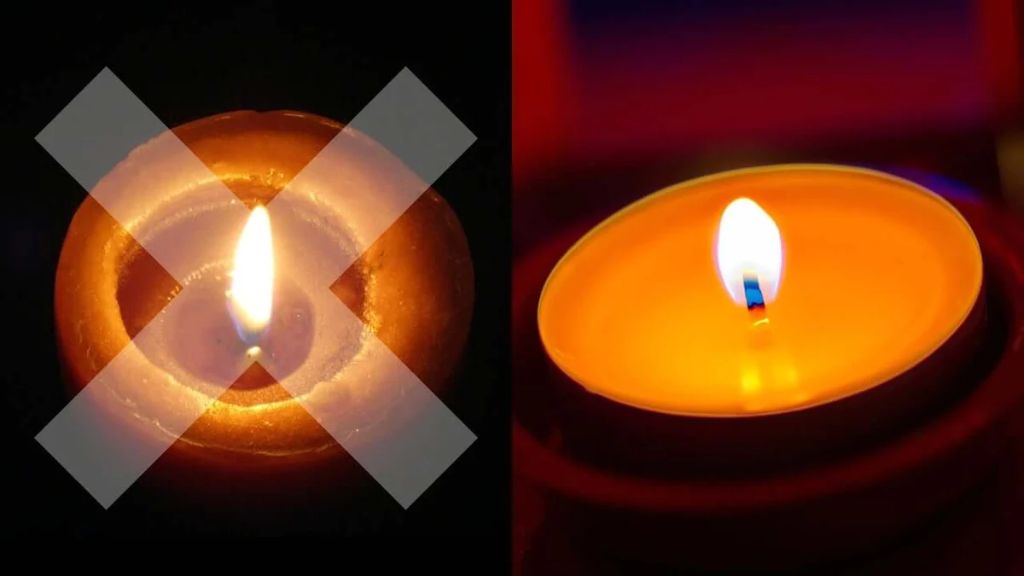
To do a burn test, light the candle and allow it to burn for at least 2 hours. Observe the melt pool and make sure the entire top layer of wax melts evenly without creating a hollow tunnel through the center. If tunneling occurs, it’s often due to the wax cooling too quickly or the wick being too small. Try using a larger diameter wick or cooling the candle more slowly next time.
Also check for frosting, which is when white crystals form on the surface as the wax cools. Frosting usually happens when you use too much fragrance oil. Try reducing the amount of fragrance slightly to prevent frosting.
If the candle passes the burn test with no tunneling or frosting, you can be confident in the quality. Repeat testing with each new candle scent or shape you create. This testing process will help perfect your candle recipes over time.1
Labeling and Packaging
Once your candles are cured and ready for sale, you’ll need to properly label and package them. Candle labeling laws in the United States make offering certain information about your product mandatory. Your label should include:
- Your business name and address
- Net weight of the candle
- Ingredients list
- Any relevant cautionary information
You may also want to include usage instructions, fragrance name, and burn time. Be sure to adhere to FDA regulations and make truthful claims about your candles. For packaging, you have lots of options like boxes, tins, jars, tubes, and bags. Choose a type that fits your brand image and allows customers to easily view the candle. Refer to this article for creative packaging ideas to make your candles stand out.
Selling Your Candles
Once you have perfected your candle making process and created high quality products, it’s time to start selling them! Here are some tips for marketing and selling your homemade candles successfully:

Come up with a pricing strategy. Consider your costs for supplies and labor, and add on a reasonable profit margin. A common formula is to multiply your costs by 2-3x. Compare your pricing to other handmade and boutique candles. Price competitively for your market. Offer discounts on bulk orders or first purchases to attract customers.
Create branding and professional labeling. This gives your candles a polished, legitimate look. Include your logo, scent name, weight, burn time, ingredients, care instructions, and any legally required information. Purchase sticker labels or make your own.
Set up an online shop on Etsy, Shopify, or your own website. Photograph products attractively. Write descriptions highlighting unique scents and branding. Promote your shop on social media and run targeted ads.
Sell at local craft fairs, flea markets, boutiques, and holiday markets. Rent table space and interact personally with customers. Bring business cards, brochures, or other promotional materials.
Offer wholesale pricing to local gift shops, boutiques, and other retailers to get products on their shelves. Provide wholesale order forms and branding merchandise like displays and samples.
Leverage local opportunities like craft shows, fairs, and holiday markets. These allow you to interact directly with customers. Have business cards, brochures, or other promotional items on hand.
Consider pop-up shops or seasonal kiosks to create a temporary physical location. Decorate to accentuate branding and products. Hand out coupons and samples to hook new customers.