How Do You Swirl Dye In A Candle?
Swirling candles are candles that have two or more colors of wax artfully swirled together to create beautiful and visually interesting effects. The swirling effect is achieved by carefully pouring and layering melted wax of different colors into the candle mold. As the wax cools, the colors remain distinct and separated, but also blended into organic, captivating patterns.
Swirl candles have become popular for their handmade, artisanal aesthetic. The swirling makes each candle unique. Many people enjoy making swirl candles as a creative hobby or to make homemade gifts for loved ones. The swirling process allows makers to express their creativity and produce stunning one-of-a-kind candles. Swirl candles also appeal to customers looking for decorative candles that stand out from mass-produced varieties.
Choosing Dyes
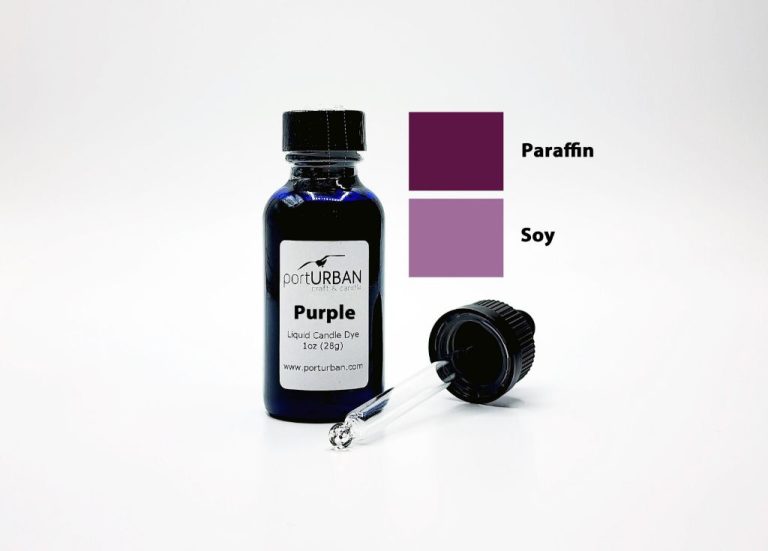
When it comes to choosing dyes for candle making, you have two main options – oil-based dyes or water-based dyes. Oil-based dyes are designed to blend with wax and create a seamless look when melted into candles. They produce vibrant, translucent colors. Water-based dyes sit on top of wax and create dotted or streaky effects when swirled. They can give a “tie-dye” look.
For color combinations, complementary or analogous schemes create attractive swirled patterns. Try using 2-3 colors for best results. Start with one primary color and add accent colors in smaller amounts. Using too many colors can make swirls muddy and unclear. Aim for colors that have enough contrast to show up distinctly when swirled together.
In terms of dye amounts, a good guideline is to use 0.5-1 oz of oil-based dye per 1 lb of wax. For water-based dyes, use 3-5 drops per 1 lb of wax. The exact amount can vary based on the desired intensity and number of colors used. Do tests with small amounts of wax to achieve the look you want before adding dyes to a full batch.
Preparing the Candle
It’s important to start with a candle container or vessel with smooth, even sides. The smoother the sides, the more defined the swirling design will be. Make sure the candle container has a flat, level bottom as well. An uneven surface can cause issues when pouring the wax and lead to an uneven design.
Proper wick placement is also key when preparing the candle container. Center the wick so it’s straight and positioned in the middle. Use a wick sticker or glue dot to adhere the wick to the bottom of the container. You want the wick to be tight and aligned to get a good burn. Wicks that are off center or loose can cause problems like tunneling when the candle is lit.
Take the time to carefully prepare the candle vessel so your swirl design comes out clean and defined. Smooth, even sides and proper wick placement will set you up for success.
Melting the Candle
One of the most important steps in swirling a candle is properly melting the wax. Different types of wax have different melting points, but most candle waxes melt between 120-170°F. It’s crucial to melt the wax slowly and evenly to the proper temperature to avoid burning the wax or creating air bubbles.
The best way to melt wax for swirling is to use a double boiler. This allows you to gently heat the wax to the ideal temperature. Fill the bottom pot with a couple inches of water and place your wax in the top pot. Heat the water slowly until the wax becomes fully melted. Use a thermometer to monitor the temperature and keep it in the ideal range for your wax type. Constantly stir the wax as it melts to prevent hot spots.
Melting too quickly or unevenly can cause the wax to discolor or lose its fragrance. Keep the heat low and stir often for an even, thorough melt with no burned or unmelted bits of wax remaining.
Once your wax is completely liquid with no lumps remaining, it’s ready for adding dyes and creating swirls.
Adding Dyes
Adding dyes is a key step in creating a swirled candle. Here are some tips for adding dyes effectively:
First, drop a few drops of dye into the melted wax. It’s best to start with just a small amount of dye so you don’t oversaturate the color. Refer to the dye manufacturer’s recommendations for exact amounts. Popular dyes used in candle making include liquid candle dye, gel candle dye, dye blocks, and dye chips.
After adding the dye, gently stir the wax to incorporate the color. Avoid vigorous stirring, as you want the dye to remain somewhat concentrated. The colors will naturally spread when you pour the wax.
Let the dyed wax rest for a minute or two before pouring. This brief pause allows the dye to set so it won’t bleed too quickly when poured.
Repeat adding small amounts of different colored dyes to build up the swirled effect. For more defined swirls, use fewer colors and greater contrast between shades. Pastel or similar shades tend to bleed together more.
Swirl Techniques
There are a few main techniques for creating swirls and marble effects in candles:
Spoon Swirling
Spoon swirling involves using a spoon to create swirls by dragging through the wax and dye mixture in the container. Here are the steps for spoon swirling:[https://www.candlescience.com/learning/how-to-make-marble-candles/]
- Add a small amount of wax to the bottom of the container and heat until melted.
- Add drops of dye to the melted wax.
- Use a spoon to drag through the wax and dye, creating swirls.
- Let the swirled wax harden before pouring the rest of the plain wax.
Spoon swirling allows you to have lots of control creating detailed swirl patterns.
Pour Swirling
Pour swirling involves layering colored wax poured into the container. Here are the steps:[https://www.thesprucecrafts.com/marbled-container-candles-517265]
- Melt wax and divide into separate pouring pots for each color.
- Tilt the candle container and pour a thin layer of one color along the side.
- Tilt the opposite direction and pour the next color to layer the wax.
- Continue alternating pouring colored wax to fill the container.
The pouring technique creates large swooping marble patterns.
Wood Skewer Swirling
This swirling method involves using a wood skewer to drag through poured wax to create swirls. Here is the process:
- Pour a thin layer of colored wax into the bottom of the container.
- Use a wood skewer to drag through the layer of wax in curves.
- Let the swirled design harden before pouring plain wax to fill.
Wood skewers create bold swirling streaks and veins.
Experiment with different techniques to achieve unique marble candle designs.
Troubleshooting
Swirling dyes in candles can sometimes be tricky. Here are some common troubleshooting tips for getting those perfect swirls:
Causes of Uneven Swirls
Uneven swirling patterns are often caused by the wax setting too quickly before you have a chance to complete the design. This can happen if the wax is too cold. Try reheating the candle to 185-200°F before swirling to give the wax more fluidity (Candlescience).
Another cause of uneven swirls is not stirring the dye fully into the wax before pouring. Make sure to completely incorporate the dye so it has evenly distributed through the wax.
Fixing Wax that Sets Too Quickly
If your swirls start setting before you have time to complete them, you can remedy this by gently warming the surface of the candle with a heat gun. Turn the heat gun on low and wave it back and forth over the candle to gently remelt the top layer so you can continue swirling (Life N Reflection).
Ideal Wax Consistency
The wax should be around 185-200°F when swirling for best results. This keeps the wax fluid enough to create intricate designs but viscous enough not to blend all the colors together. Test the wax temperature periodically as you work.
Second Pour
One of the benefits of a second pour is that you can achieve a more intricate swirl design. With a second pour, you pour your initial layer of wax and let it partially set up. Then you add your second layer of wax in a contrasting color and achieve swirls as you pour. The partially set first layer helps keep the colors separate. A second pour also allows you to add more fragrance. Fragrances can burn off when candles are heated for too long, so adding fragrance in a second pour helps maintain a stronger scent. According to the Craft Server forum, a second pour is useful for filling in relief holes around the wick to help achieve a smoother finish.
As recommended on the Soap Making Forum, you can create a two tone look by adding chunks or slivers of a second color wax before pouring your base wax. When doing a second pour, it’s important to pour before the first layer sets up completely so the wax layers adhere properly.
Cooling and Curing
After pouring the candle, allow the wax to fully set and harden. This may take 6-12 hours or more depending on the size of the candle. Do not move or disturb the candle during this initial cooling phase to prevent the beautiful swirl pattern from shifting or distorting. Once the candle has completely solidified, the curing process begins.
Curing refers to allowing the candle to rest undisturbed for 1-2 weeks after it has cooled and hardened. This gives the wax time to shrink and stabilize, preventing issues like sinkholes, cracks, and seepage when the candle is burned. During the curing period, do not trim the wick or test burn the candle.
After full curing, use wick trimmers to carefully trim the wick to 1⁄4 inch length. This prepares the candle for a clean, even burn when lighting. Now the swirl candle is ready to be enjoyed! Follow standard candle safety precautions and trim the wick as needed with each burn.
Inspiration and Ideas
Candle swirling opens up endless possibilities for creative expression. Here are some inspiration sources to spark your imagination:
Swirling Styles
There are many different swirling techniques to create stunning designs. Some popular styles include:
– Spiral swirls with a stirred or dragged look.
– Folded and rolled designs that resemble agate stones.
– Feathering and fanning for painterly watercolor effects.
– Stripes and zig-zags using straight pour lines.
– Marbling with swirling and layering to blend colors.
– Geometric patterns like circles, squares, and waves.
Color Palettes
Choosing the right color combinations can make your swirled candle really stand out. Some ideas include:
– Complementary colors like orange and blue.
– Bright rainbow palettes.
– Earthy naturals like greens and browns.
– Monochromatic shades of a single hue.
– High contrast black and white.
– Pastels for a peaceful ambiance.
Designs
Incorporate seasonality, occasions, themes or meanings into your candle designs. Some inspiration:
– Holiday motifs like Christmas trees or hearts for Valentine’s Day.
– Florals and nature motifs like leaves, branches or sea shells.
– Celestial designs with moons, stars and galaxies.
– Spiritual symbols like mandalas, runes or yin-yang.
– Abstract modern art looks.
Let your creativity shine through in your hand-swirled candle designs!