How Do You Swirl Colors In Melt And Pour Soap?
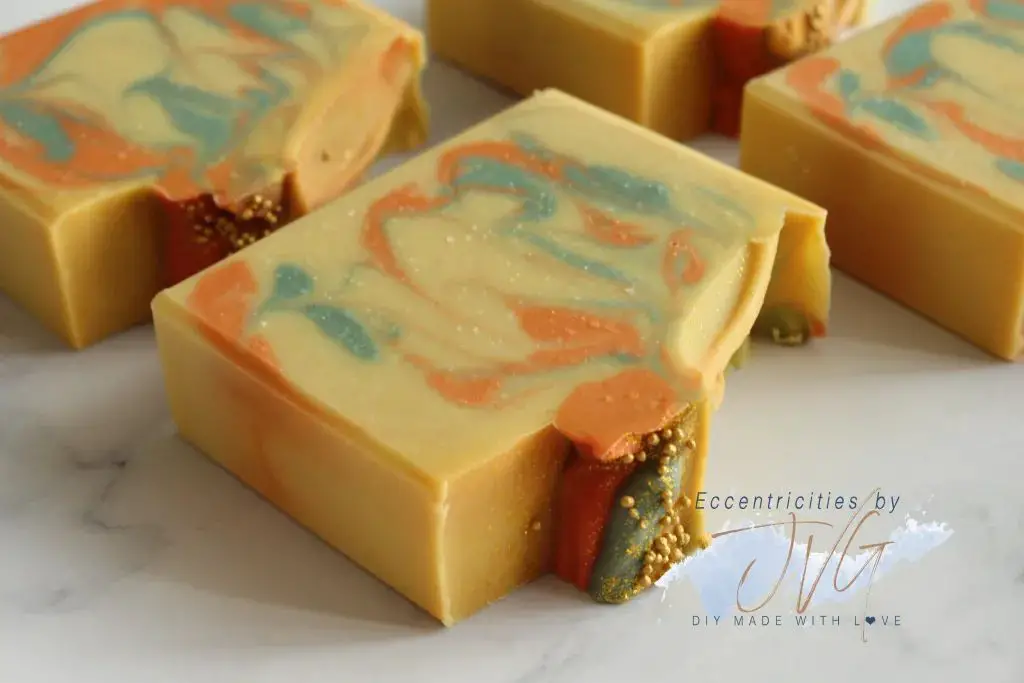
Soap swirling is the process of mixing two or more colored soap batches together to create visually appealing designs and color patterns in the final bars of soap. According to https://www.mariegale.com/colored-and-swirled-soap/, soap swirling is “particularly tricky” but can result in beautiful soap bars when done right.
The main reasons soap makers choose to swirl their soap are for the visual appeal and to make each bar unique. Swirling soap requires some specialty tools and a bit of practice, but allows endless possibilities for creativity. The two main techniques for swirling are in the pot swirls, where colors are mixed directly in the soap pot before pouring, and pour swirls, where colored batches are poured into the mold one after another. Proper swirling requires paying close attention to the viscosity of the soap and having precise pouring skills.
This article will cover all the key techniques and design methods, from basic two color swirls to advanced multi-color swirls and patterns. With the right information and some experimentation, swirling melt and pour soap can produce stunning works of art for the bath and shower.
Selecting Melt and Pour Soap Base
When selecting a melt and pour soap base for swirling, you’ll want to consider the type of base, clarity, and how well it swirls. The main types of melt and pour bases are glycerin and surfactant based. Glycerin bases tend to be thicker and easier to swirl, while surfactant bases are thinner. Look for a base marketed for swirling that has a creamy viscosity. Opt for a base with high clarity so the swirls will show through brightly. According to Bramble Berry, a base with “no sodium lauryl sulfate” works well for swirling. Test out a few bases to see which you prefer for swirl patterns.
Choosing Colorants
When making swirled melt and pour soap, you can choose between liquid and powder colorants. Both can produce beautiful swirls, but have some differences.
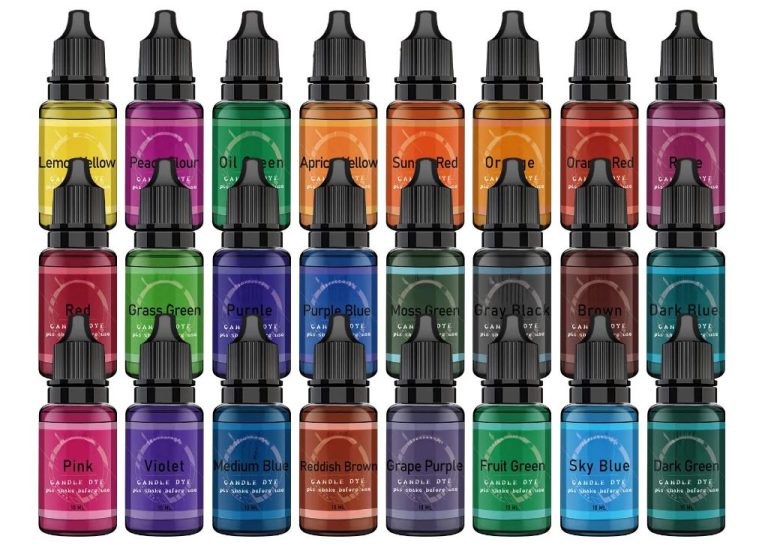
Liquid colorants are convenient to use directly from the bottle and generally easier for beginners. They blend and disperse smoothly into melted soap for vivid even color. However, they can bleed or morph during swirling. Liquid colorants also contain glycerin which reduces lather. Popular options are micas and oxides suspended in glycerin or lightweight soap bases.
Powder colorants require a bit more work to dissolve into melted soap before swirling. But they allow more control over color vibrancy. And they hold their shape better for more defined swirls. Common powder options are micas, clay, charcoal, turmeric, and other natural mineral pigments. Always fully dissolve powders so specks don’t end up in the final bars.
You can mix custom colors by blending two or more colorants together. Adjust ratios to achieve your desired shades. Layering multiple colors in the same bar creates even more swirl variety. Just avoid combining colorants that may morph or bleed together undesirably like some liquid options. Test combinations on a soap sample before using in finished bars.
No matter which type of colorants you choose, use soap stable options formulated for melt and pour. Follow usage rates as too much pigment can overwhelm the soap base. And stick to 1-3 colors maximum for beginner swirling. As you gain experience, you can explore more elaborate color palettes and designs.
Adding Fragrance
Fragrance is an important part of creating beautifully scented swirled soap. There are two main options for scenting melt and pour soap – fragrance oils and essential oils.
Fragrance oils are artificially created scents that come in thousands of options from fresh floral to masculine musky. They tend to be stronger and longer lasting than essential oils. Common fragrance oil options for swirled soap include lavender, lemongrass, rose, jasmine, vanilla, and sandalwood. Fragrance oils should be added at 0.5-1 oz per pound of base.[1]
Essential oils are from natural plant sources and offer therapeutic aromatherapy benefits. However, they fade faster than fragrance oils. When using essential oils, select those safe for skin contact like lavender, orange, peppermint, lemon, and tea tree. Add essential oils at 0.25-0.5 oz per pound of soap base.[2]
No matter which scent option you choose, add the fragrance oil or essential oil to the melted soap base before adding colorants. The chemical components of fragrances can slightly alter soap color over time.
Preparing the Soap Base
Before swirling, it’s important to properly prepare the melt and pour soap base. First, cut the soap base into chunks and place in a microwave-safe container. Melt the soap in 30 second intervals, stirring between each heating. Take care not to overheat the soap or scorch it. Melt until it’s fully liquefied with no lumps. Remove from heat and let cool slightly until it thickens to the consistency of honey or light syrup.
Next, add any colorants a little at a time, stirring to distribute the color evenly. Use caution with adding pigments as a little goes a long way. Avoid adding colorant when the soap base is too hot or it may seize up. Let cool further before adding essential oils or fragrance for swirling. Check manufacturer’s guidelines for how much to use based on the soap base weight. Stir thoroughly to incorporate. Now the soap base is ready for swirling!
For more tips on preparing melt and pour soap bases, check out this beginner’s guide: Free Beginner’s Guide to Soapmaking: Melt and Pour
Swirling Tools and Techniques
There are various tools you can use to create swirls and patterns in melt and pour soap. Some common swirling tools include:
Chopsticks: Regular wooden chopsticks work great for swirling. Their tapered ends allow you to create delicate swirls. Hold the chopsticks together and drag through soap layers to create swooping designs.[1]
Skewers: Bamboo skewers are another easy tool you likely already have for swirling soap. They can create thicker swirls compared to chopsticks. Hold two together and pull through soap to make wide sweeping swirls.[2]
The swirling motion is also key for creating patterns. Drag tools through soap with gentle, consistent motions. Quick or jerky movements may cut through the design rather than swirling. Pull tools at angles to create loops and curves for visual interest.
Pouring molten soap itself in motions can also swirl colors. Pour over spoon backs, spatulas or whisks to guide soap into swirling as it lands in layers. The impact of the pour creates the swirls.
Advanced Swirling Designs
Once you’ve mastered the basics of swirling, you can move on to more advanced techniques to create intricate designs and patterns in your soaps. Here are three popular advanced swirling methods:
In-the-Pot (ITP) Swirl
The ITP swirl involves swirling colors directly in the soap pot before pouring the batter into the mold. This requires working quickly to swirl the colors before the soap starts to set up. According to School of Natural Skincare, the ITP swirl allows you to create bold, dramatic designs.
Feather Swirl
Also known as a “pull through” swirl, the feather swirl involves using a skewer or swirling tool to pull thin strands of color through white or uncolored soap. This creates delicate, feather-like patterns. Work slowly and gently to avoid mixing the colors too much.
Funnel Pour
Funnel pouring involves slowly pouring contrasting colors of soap batter through a funnel or directly into the mold to create layers and stripes. Adjust the flow rate to control the stripe thickness. According to Modern Soapmaking, this requires a thick trace for best results.
Troubleshooting Swirls
Sometimes swirls don’t turn out perfectly on the first try. Here are some common issues and how to fix them:
Uneven Colors
If some colors are more dominant than others, try adding more of the color that is getting lost. For example, add more white if the white is disappearing into the other colors. You can also try pouring the dominant color last when layering (The Nerdy Farmwife).
Blobs and Gaps
If you end up with large globs of a single color or big gaps of unswirled soap, your batter likely thickened up too fast. Try moving quicker next time when pouring layers or making swirls. Adding more liquid oil to the recipe can also help slow trace (Modern Soapmaking).
Unmolding and Cutting
After letting your swirled soap creations sit and fully harden in the mold, it’s time to unmold and cut them into bars. Here are some tips for this important final step:
When to Unmold:
Wait at least 24 hours before unmolding melt and pour soaps. This allows them to fully set up and harden. Attempting to unmold too soon may damage the swirls and structure.
Cutting Bars:
Use a non-serrated knife to cleanly cut through swirled bars. Cut in a swift, decisive motion without dragging or sawing which can distort the pattern. Wipe any soap residue off the knife between cuts.
Cut bars to your desired thickness and shape. Many aim for bars around 1 inch thick. Cut down any rough or uneven edges for a neater finish.
Cleaning Up Edges:
Once cut, wipe excess soap residue off the sides and bottom of bars with a damp cloth. Use a vegetable peeler on the very outside edges to gently peel off dried drips and create smooth, even sides.
Curing and Using Swirled Soaps
After swirled soap is unmolded, it needs 4-6 weeks of curing time for the lye to fully react before using (Source: https://creamyvibrance.com/blogs/blog/why-and-how-of-curing-soap-1). Proper curing is important for preserving the visual swirls and creating a gentle, moisturizing bar of soap. During curing, the soap bars should be placed on a wire rack in a dry, well-ventilated area out of direct sunlight. Turning the bars over every few days allows even curing.
Once cured, swirled melt and pour soaps create a beautiful visual effect when lathering. The swirls remain visible and do not bleed together. When washing with swirled soap, gently massage the bar to build up a rich lather. Rinse thoroughly after use. With proper curing, swirled soaps will last 3-6 weeks under regular use.

