How Do You Make Wicks Lay Down?
Candle wicks are typically made from braided cotton and serve an important purpose in candle making. As defined by Wikipedia, “A candle wick works by capillary action, conveying (“wicking”) the fuel to the flame. When the liquid fuel, typically melted candle wax, reaches the flame it vaporizes and combusts” (Candle wick – Wikipedia). In other words, the wick acts as a delivery system that brings wax to the flame in order to keep the candle burning.
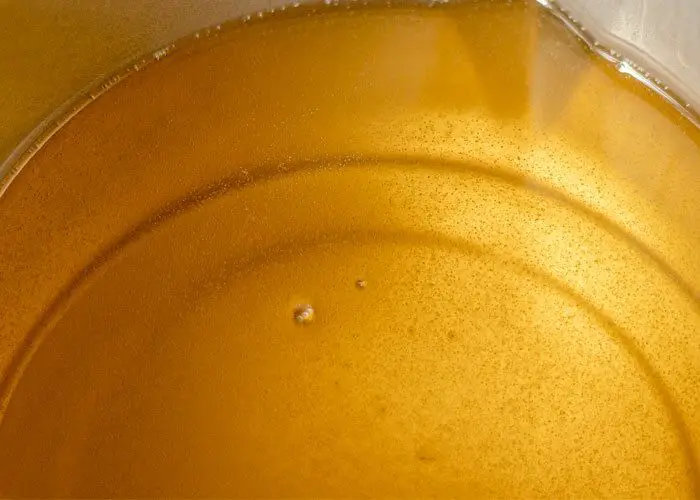
The wick is essential for drawing liquid wax via capillary action. As the wax pool melts, the wick soaks up the liquid wax and brings it to the flame. This feeds the flame to keep it lit and allows for continuous burning. Without a proper wicking system, the candle would not burn properly.
Trim the Wick
Properly trimming candle wicks before lighting is essential for safety and optimal performance. Experts recommend trimming wicks to 1⁄4 inch before first use (6). This helps candles burn evenly and prevents excess smoking or sooting. Long wicks tend to bend, tunnel, and drown in melted wax. A 1⁄4 inch tip will provide a strong flame for the first burn. Afterward, trim to 1⁄8 inch for cleaner burning.
It’s best to trim wicks when wax is cool and solid. Use sharp wick trimmers or nail clippers for a clean, straight cut. Avoid burnt or frayed wick ends which will not sustain a flame. With the right trim length, wicks will curl as they burn, allowing for self-trimming. But check occasionally and trim again if needed. Proper wick maintenance helps candles burn efficiently, safely, and completely.
Use Proper Wick Size
One of the most important factors in getting your candle wicks to lay flat is using the proper wick size for your candle’s diameter. The wick must be wide enough to absorb all the wax that melted while burning, but not so wide that too much unburned wax pools around the wick. Generally, larger candle diameters need larger wick sizes.1
Most wick manufacturers provide charts that recommend the ideal wick size based on your candle diameter. Find the measurement of your candle’s diameter, then choose a wick size from the corresponding row on the chart. For example, a pillar candle with a 2-inch diameter would need a size #1 or #2 cotton wick according to common size charts.2 Testing different wick sizes around the chart’s recommendation will help you determine the optimal lay down for your wax type and fragrance load.
Preheat the Candle
Preheating a candle before lighting the wick for the first time is an important step to help the wick stay upright when burning. The preheating process allows the melted wax to soak into the new wick before exposing it to an open flame. This helps stiffen and set the wick so it stands up straight when lit instead of bending over or falling into the melted wax pool.1
To preheat a candle, place the unlit candle in a warm oven at around 100°F for 5-10 minutes. This low temperature gently warms the wax and container without overheating. The wax will soften just enough for the wick to absorb wax into its fibers and braid. The wax cools and sets around the wick, helping hold it upright when the candle is lit later on. Preheating allows melted wax to penetrate the full length of the wick before reaching the melting point temperature of a flame. This prepares the wick for its first burn.
You can also use a heat gun or lamp to gently warm the candle, concentrating on the top layer of wax near the wick. Avoid excessive heat. The goal is to only warm the wax slightly to prepare the wick. After preheating, allow the candle to cool completely before lighting so the wax fully sets around the wick. Taking the time to preheat a candle ensures the wick has the stiff, upright structure needed for proper burning.
Add Scent Crystals
Adding fragrance crystals or flakes to a candle can enhance the scent, but it’s important to use them sparingly. According to craftserver.com, too many crystals can clog up the wick and cause it to lay flat1. The crystals don’t melt as readily as the wax, so they can build up on the wick and prevent it from standing upright. This results in poor wax pooling and diminished fragrance throw. To avoid this, carefully follow usage instructions, and use no more than 1-2% fragrance crystals by weight. Gently stir them into melted wax so they disperse evenly. Too many crystals clustered in one area can overload the wick at that spot.
It’s also best to add crystals only after the candle has been poured and as the wax starts to harden. Adding at this stage prevents clogs better than mixing into liquid wax. Slowly sprinkle a small amount across the cooling wax and allow to settle before adding more. Overloading the wax surface can cause crystals to sink to the bottom and accumulate on the wick. Proper crystal amounts and gentle stirring creates the best scent experience.
Use Wick Stickum
Wick stickum is an adhesive that is applied along the length of the wick to help it stay straight and adhere to the melted wax pool as the candle burns. As the candle melts, the wick stickum softens and acts as a glue to keep the wick upright and centered in the wax pool.
To use wick stickum, simply apply a thin layer along the lower part of the wick that will sit inside the wax. Let the stickum fully dry before inserting the wick into the candle. The dried adhesive will help anchor the wick in place when the candle is lit. This prevents the wick from tilting or falling over as it burns and melts the wax around it.
Wick stickum is an easy solution for making wicks in pillar candles, containers candles, and votives lay down properly. The adhesive helps stiffen the wick so it stands up straight. Yet the stickum also allows the wick to flex and bend with the melted wax pool as the candle burns. This combination keeps the wick centered to maximize fragrance distribution and prevent tunneling.
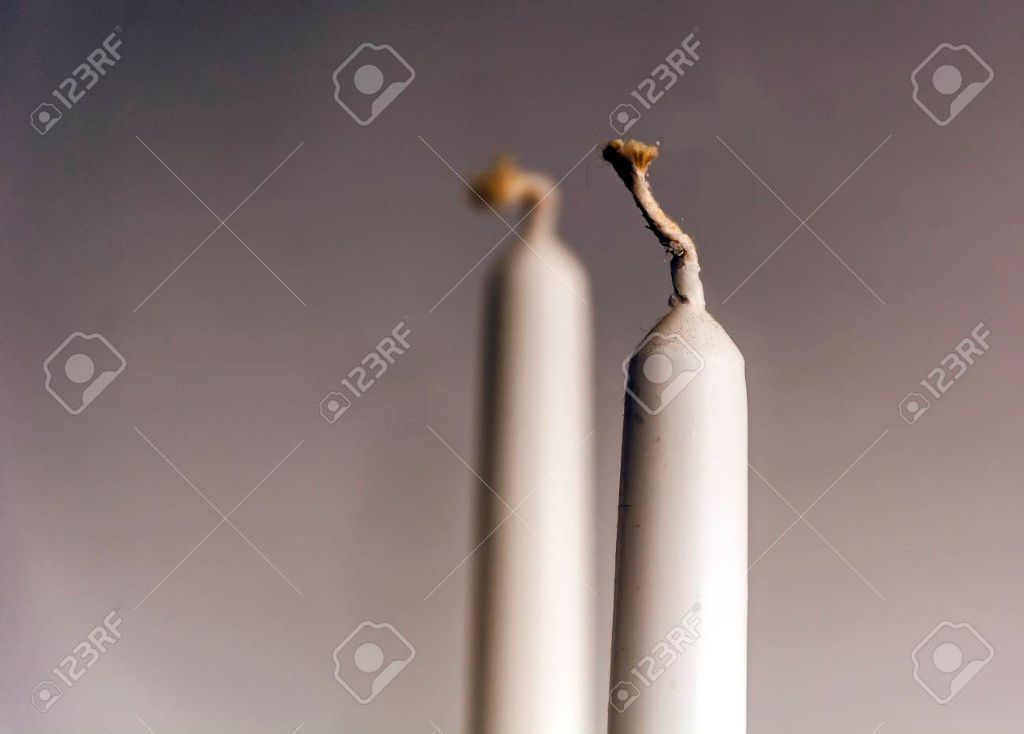
Trim Ash
Ash buildup on the wick as the candle burns is one of the main reasons the wick stands up instead of leaning over. The ash hardens at the tip of the wick, acting as a stiff support that holds the wick upright. As more ash accumulates with additional burning time, the wick gets propped up higher and higher.1
Trimming the ash off the wick before each burn will help the wick lay back down. Use nail clippers, scissors, or a special wick trimmer to snip off the hardened ash from the tip of the wick. Cut just above where the rigid ash ends and the flexible wick begins. This allows the wick to bend over once again as the candle burns. Leaving ash on the wick can also cause the candle to produce more soot.
In addition to trimming before each use, occasionally give your candle a more thorough trim after deeper burns. Cut the wick to about 1/4 inch to remove any substantial ash that may have built up from multiple burns. This helps keep wick lengths in check and allows for a cleaner burn.
Avoid Drafts
Breezes and drafts can cause a candle’s flame to flicker and jump around, making the wick curl over instead of standing upright. This happens because the moving air provides additional oxygen to the flame, making it burn larger and hotter than normal. The increased flame will rapidly melt wax around the wick and can cause the wick to bend over with the weight and heat.
According to communitycandlesupply.com, candle makers should avoid having fans or open windows blowing directly on a burning candle. Air currents should be minimized around the candle as much as possible. It is best to burn candles in an enclosed space without excessive airflow. If burning a candle outdoors, make sure it is protected from wind gusts that could blow out the flame or bend the wick.
Test Wax Composition
The composition of the wax you use can impact wick performance. Natural waxes like soy wax, beeswax, and palm wax burn at lower temperatures than paraffin wax. This means that wicks need to be sized differently for natural vs paraffin waxes.
Paraffin wax melts at temperatures around 130-150°F whereas soy wax melts at temperatures around 115-135°F. The lower melt point of natural waxes like soy means that using too large of a wick can cause issues like tunneling. Always test wicks with the specific wax you are using to find the best performing size.
Additionally, some natural waxes like soy wax tend to be softer and more amorphous than paraffin. This can allow wax to creep up and swallow the wick as it burns. Using proper wick sizing for the wax type can help prevent issues.
When formulating a candle, always test multiple wick sizes to determine optimal performance based on factors like wax type, fragrance load, and more. Wicks specifically designed for the wax type, like CD wicks for soy candles, often perform the best.
Conclusion
In summary, there are several techniques candle makers can use to help wicks lay down rather than mushrooming up:
Using the proper wick size for the wax and diameter of the candle is crucial. A wick that is too small may drown, while one too large can mushroom. Consult wick size charts to select the right width.
Preheating the wax before pouring into the container allows air bubbles to escape, resulting in a smoother burn. Crystals can also be added for more even wax pooling.
Applying wick stickum or glue dots helps anchor wicks in place so they stay upright initially but will bend as the candle burns. Trimming the wick to 1⁄4” before lighting also promotes a flatter flame.
Avoiding drafts around a burning candle prevents air from fueling the flame unevenly. Testing wax composition and adjusting wick materials can fine-tune the burn if needed.
With the proper materials, preparation and testing, candle wicks can lay down rather than mushrooming up, for a cleaner, more effective burn.