How Do You Make Soy Coconut Wax Blend?
Soy wax and coconut wax are two popular types of wax used for candle making. Soy wax is made from soybeans and is known for its clean burn and easy scent throw. Coconut wax comes from coconut oil and provides excellent adhesion and scent retention. While both waxes have their strengths, blending them together leverages the benefits of each.
A soy and coconut wax blend offers the best of both worlds – the soy wax contributes to a smooth appearance and cleaner burn, while the coconut wax boosts scent throw and adhesion to the container wall. The result is a candle with excellent hot and cold scent throw that holds its shape while burning evenly from top to bottom. Blending the waxes also allows for customization of the wax properties like melting point and hardness.
Making a soy coconut wax blend for candles involves melting, mixing and pouring the two waxes in specific ratios. Proper wick selection and adding fragrance at the right temperature are also key steps. The process is straightforward but does require care and precision. This guide covers everything needed to make great quality soy coconut wax candles at home.
Ingredients Needed
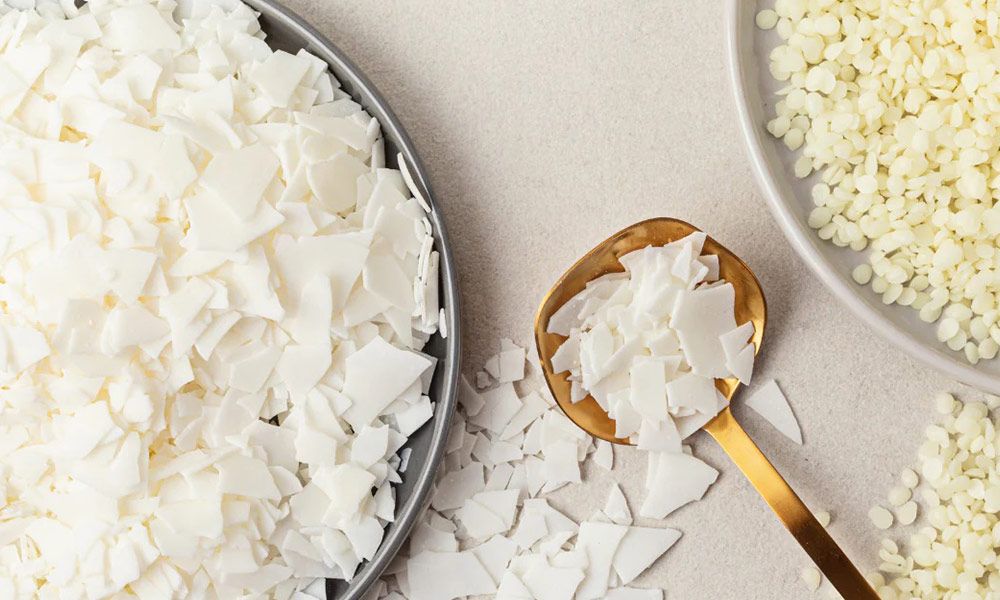
The main ingredients needed to make a soy coconut wax blend are:
– Soy wax – This is the base wax that provides a smooth finish and good scent throw. Popular options are Golden Brands 464 and NatureWax C-3.
– Coconut wax – This wax helps make the blend harder and aids in scent adherence. It is typically used at 5-15% of the total wax weight.
– Fragrance oils (optional) – Fragrance oils can be added for scent. Use 1-10% of the wax weight, depending on personal preference.
– Dye (optional) – Liquid or block candle dyes can be used to color the wax. Use sparingly as a little goes a long way.
The soy and coconut waxes are key. Fragrance and dyes can be added if desired but are optional.
Melting the Wax
When making soy coconut wax candles, it’s important to properly melt the wax. Soy wax has a melting point between 115-125°F, while coconut wax melts between 76-86°F according to Hive and Honey Candle Co [1]. Due to the difference in melting points, it’s best to use a double boiler method to melt the wax.
To use the double boiler method, place water in the bottom pot and heat it to a simmer. Then place your soy and coconut wax mixture in a heat safe container suspended above the simmering water. The steam from the simmering water will slowly melt the wax to the proper temperature. Avoid letting the wax get too hot. Monitor the temperature with a thermometer and remove the wax from heat when it reaches 185-190°F. The residual heat will continue melting the last bits of solid wax while allowing you to avoid overheating. Properly melting the wax is key for proper soy coconut wax blend candles.
Choosing a Ratio
When making a soy and coconut wax blend for candles, the ratio of each wax type is important for the performance and properties of the final candle. There are a few typical ratios used by candle makers:
A common starting point is a 70% soy wax to 30% coconut wax ratio. This blend combines the excellent scent throw and smooth burning qualities of soy with the hardness and opacity added by coconut wax (https://candlemaking.com.au/blogs/videos-fact-sheets/mixing-your-coconut-and-soy-waxes-for-container-candles). The higher percentage of soy allows for good fragrance absorption.
A 60% soy wax to 40% coconut wax ratio is also popular. With a bit more coconut wax, this creates a harder finished candle that is opaque, has a smooth appearance, and stands up to higher fragrance loads (https://www.reddit.com/r/candlemaking/comments/vjm8bm/ratio_for_beeswax_coconut_wax_and_soy_wax_blend/).
Candle makers may adjust the ratio depending on factors like desired opacity, fragrance load, and jar shape. Too much coconut wax can make the wax prone to frosting or sweating. In general, a higher soy content promotes scent throw, while more coconut wax gives a harder, smoother candle.
Adding Fragrance
When making soy coconut wax candles, it’s important to add the right amount of fragrance oil. Most soy coconut wax blends can hold 9-12% fragrance oil before seizing or releasing fragrance when burning (source: https://makesy.com/products/virgin-coconut-soy-1). A good guideline is to start with 1 ounce of fragrance oil per 1 pound of wax and adjust up or down from there.
To add fragrance, first measure out the amount of oil you want to use. Then, once your soy coconut wax is fully melted, remove it from the heat source. Next, carefully stir in the fragrance oil, mixing thoroughly to fully incorporate it. Adding the oil while the wax is still over heat can cause some of the fragrance compounds to burn off. After mixing in the fragrance, you can pour your soy coconut wax into containers and allow it to cure.
Coloring the Wax
There are two main types of dye used to color soy coconut wax – dye blocks and liquid dye. Dye blocks are blocks of concentrated dye that you can grate or shred into your wax as it melts. Liquid dyes are concentrated dyes dissolved into a liquid carrier that you can measure out and add directly to your melted wax.
When adding dye, it’s important to add it slowly and test the color as you go. Only a small amount is needed to get vibrant colors. As a general guideline, use 1⁄8 to 1⁄4 teaspoon of liquid dye per pound of wax. For dye blocks, start with grating in a pea-sized amount.
Stir the dye thoroughly to fully incorporate it. Let the wax fully cool and harden before judging the final color. Colors will look darker in the liquid wax compared to the final hardened candle. If desired, you can add more dye in additional amounts until reaching the perfect shade.
For best results, use a dedicated dye meant for candle making. Liquid dyes formulated for soy wax will blend and disperse the best. Other options like food coloring, crayons, or cosmetic dyes may bleed or fade when burned.
Preparing the Containers
Properly preparing the containers is an important step before pouring your soy coconut wax blend. Here are some key steps:
Cleaning
Make sure all containers are thoroughly cleaned and free of residue. Wash with hot soapy water, rinse well, and allow to fully dry. You want the containers to be pristine so the wax adheres properly.
Wicking
Wicks help control the burn rate and melt pool of the candle. Prepare wicks in advance by using glue dots or affixing wick stickers to the bottom of the containers before pouring the wax according to the manufacturer’s guidelines. Choose an appropriate wick size and type for the diameter of the container. Common options include CD, ECO, LX, and HTP (Source).
Prepping Jars and Tins
For glass jars, make sure the rim is clean so the wax can adhere. Tins should be wiped clean before pouring as well. Some candle makers recommend spraying the containers lightly with rubbing alcohol to help the wax stick and remove any imperceptible residue. Allow containers to fully dry before adding wax.
Pouring the Wax
When pouring a soy coconut wax blend, it’s important to pay attention to the pouring temperature. According to Golden Brands, their 454 Coconut Soy Wax should be poured at around 170°F. Meanwhile, NatureWax recommends pouring their C-6 blend between 120°F to 165°F.
In general, soy coconut wax blends should be poured between 120°F and 175°F. Allow the wax to cool slightly between pours to prevent sink holes. Pour the wax slowly and evenly into each container. Allow the candles to cure for 1-2 weeks before burning to ensure optimal performance.
Best practices for pouring soy coconut wax blends include:
– Carefully monitoring wax temperature with a thermometer
– Allowing wax to cool between pours
– Pouring slowly and evenly into containers
– Allowing candles to cure before use
– Testing different pour temps to find the optimal range
Cooling and Curing
After pouring the wax into containers, it’s important to let the candles properly cool and cure before use. Proper curing allows the wax to reach its maximum hardness and makes the candle burn more slowly and evenly.
For soy-coconut wax blends, a cure time of 1-2 weeks is recommended. According to candle making supplier CandleScience, “Allow candles to cure for two weeks for optimal fragrance throw.” [1]
During the curing process, candles should be stored in a dry, room temperature area away from drafts and direct sunlight. Consistent, moderate conditions allow the wax to set up properly. Temperatures between 60-75°F are ideal during curing. After 1-2 weeks, the candles will be fully cured and ready to burn.
Troubleshooting
Soy-coconut wax blends can run into some common issues. Here are some of the most frequent problems and how to fix or prevent them:
Frosting
Frosting is when white crystals form on the surface of the candle after it’s been poured and cooled. This happens when the wax cools too quickly. To fix it, apply gentle heat evenly over the surface until the crystals melt away. To prevent frosting, avoid pouring soy wax below 135°F (Source: https://www.candlescience.com/wax/soy-wax-trouble-shooting-guide/).
Sinking
If the wax sinks down in the middle of the candle, this is caused by pouring the wax too hot, above 145°F. To prevent sinking, pour between 135-145°F. If sinking happens, let the candle cure for at least 48 hours and see if it corrects itself as it cools fully (Source: https://www.candlecreations.co.nz/knowledge/candle-making-tutorials/four-common-soy-candle-problems/).
Wet Spots
Wet spots make the surface of the wax appear oily or spotted. This is caused by pouring the wax too cool, below 130°F. To prevent wet spots, pour between 135-145°F. If wet spots occur, try gently warming the surface with a heat gun to blend them in (Source: https://www.candlescience.com/wax/soy-wax-trouble-shooting-guide/).