How Do You Make Homemade Candles?
Candle making is an ancient craft that was developed independently across many civilizations as a source of light before electric lighting. The basic process involves melting wax, adding a fragrance or scent if desired, placing a wick into a mold or container, pouring the melted wax around the wick, allowing the candle to cool and solidify, and then removing the finished candle from the mold. Candle waxes come in different forms including paraffin, soy, beeswax, and gel. Wicks are typically made from braided cotton or paper fibers. The wax can be scented with essential oils, fragrance oils, or left unscented. Candles are poured into molds, jars, tins or other containers. After pouring, the candles cure for 24-48 hours before being used. The finished candles can have creative shapes, colors and scents. With some basic materials and safety precautions, candle making can be a fun craft and hobby that also results in lovely handmade candles to give as gifts or use at home.
Choosing Candle Waxes
There are a few common types of wax used for candle making including paraffin, soy, and beeswax. According to Martha Stewart (https://www.marthastewart.com/8061950/candle-wax-type-guide), paraffin wax is the most widely used candle wax. It is made from petroleum and is highly refined, odorless, and colorless. Paraffin burns cleanly and makes hard candles. Soy wax is made from soybeans and is a natural, renewable resource. It burns slower than paraffin and makes softer candles. Beeswax is made by honey bees and has a natural honey scent. It makes durable candles that burn brighter than other waxes.
When choosing a candle wax, consider factors like scent throw, hardness, burn time, environmental impact, and price. Paraffin is inexpensive but not eco-friendly. Soy is renewable and eco-friendly but more expensive. Beeswax is natural but has the highest price point. Most candle makers recommend using soy or a soy-paraffin blend for beginners according to Archipelago (https://shoparchipelago.com/blogs/blog/types-of-candle-wax).
Candle Wicks
Choosing the right wick is crucial for proper candle burning. The wick acts as the fuel delivery system in a candle, bringing wax to the flame via capillary action. Wicks come in different materials like cotton and paper.
Cotton wicks are the most common choice. They have a braided or knitted construction that provides excellent capillary flow to feed the flame. Cotton wicks burn cleanly and hold their shape well. Popular options include zinc-cored wicks which have a zinc strand inside to help maintain an upright wick as the candle burns. Eco-friendly cotton wicks without zinc are also available.
Paper wicks are another option made from natural materials like wood pulp. They can be more economical than cotton wicks. However, paper wicks don’t tend to burn as cleanly and can leave more soot behind. They also don’t hold their shape as well when the candle pools. Paper wicks work best with soy wax candles. When choosing wicks, consult manufacturer guidelines based on the type of wax and candle being made.
Proper wick sizing is also important. Thicker candles require thicker wicks. Following wick guidelines will help ensure clean burning and prevent issues like tunneling. With the right wick, candles will burn evenly and provide fragrance efficiently.
Candle Scents and Essential Oils
Essential oils are commonly used to add fragrance to homemade candles. Certain essential oils are more popular than others for candle making. According to The New York Times, some of the most popular scents include floral notes like jasmine and rose, woody scents like cedar and sandalwood, and fresh scents like lemon, orange, and eucalyptus. Candle enthusiasts also enjoy warm aromas like vanilla, cinnamon, and clove.
When using essential oils, it’s important to follow usage rates carefully. Most essential oils should be used sparingly at around 1-3% of your candle wax weight. Using too much essential oil can result in issues like soot, tunneling, and scent throw problems. Start with a usage rate on the lower end, around 1%, then adjust up slowly in future batches if desired. Always research usage rates for specific essential oils before adding to your candle wax.
Candle Containers
Choosing the right container is an important decision when making candles. Two of the most popular options are glass and metal.
Glass containers like jars allow you to see the candle wax and any decorative elements inside. Glass also helps the candle burn cleanly as it amplifies heat. Glass jars and containers come in many shapes, sizes, and styles to fit any decorative need. However, glass can break easier than metal.
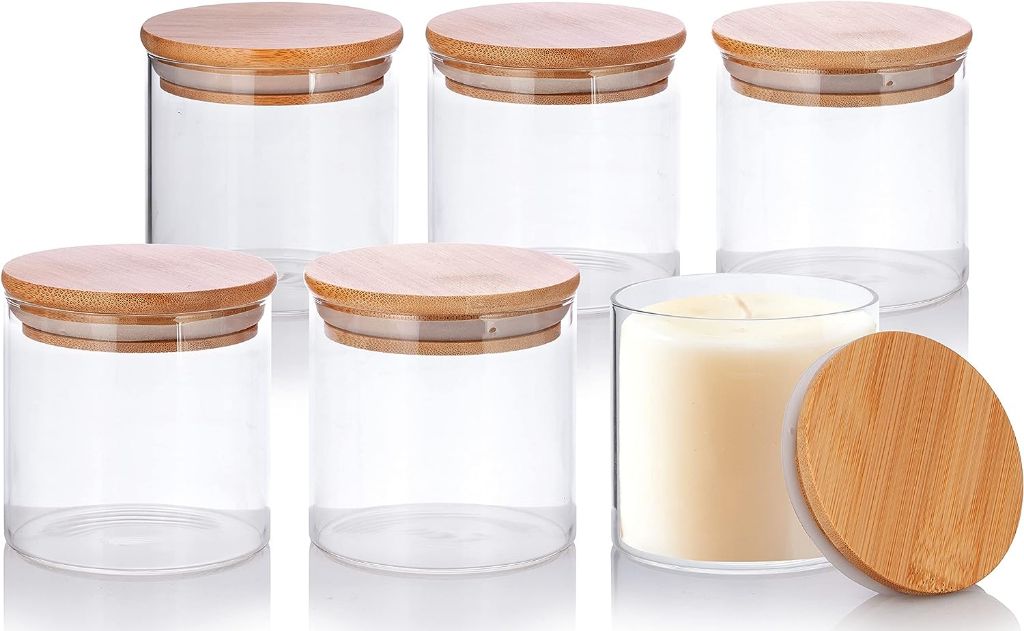
Metal containers like tins provide a more durable and protective housing for candles. Tins often have a vintage look as well. However, the metal can get hot to the touch when the candle burns. Metal also blocks light, so any decorative aspects inside will be harder to see.
Ultimately the choice comes down to personal preference and the look you want for your candles. Both glass jars and metal tins make excellent vessels with their own sets of pros and cons to weigh.
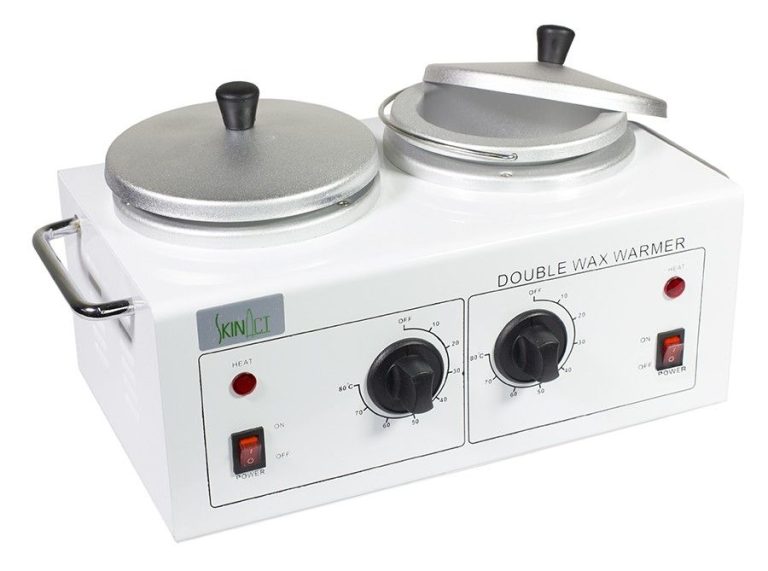
Melting the Wax
One of the most common methods for melting wax for candle making is using a double boiler. This involves placing the wax in a heat-safe container or pouring pot and setting that inside a pot with simmering water.
To do this:
- Fill the bottom pot about halfway with water and place it on the stove over medium heat. Bring the water to a simmer.
- Place the pouring pot or container with wax inside the simmering water. The bottom of the pouring pot should not be touching the bottom of the pot.
- Stir the wax occasionally as it melts completely. This prevents the wax from overheating.
- Once fully melted, you can remove the pouring pot and turn off the heat. The wax is now ready to add fragrance and color.
The double boiler method evenly heats the wax at a lower temperature to help preserve the quality of the wax. This prevents scorching or burning the wax which can happen if heated directly on a stovetop. It’s a simple, safe way to melt wax for candle making.
For more on melting wax, see this guide: https://www.harlemcandlecompany.com/blogs/journal/all-the-ways-to-melt-candle-wax
Adding Fragrance
One of the most important steps in candle making is determining how much fragrance oil to add. The general recommendation for soy wax candles is to use 5-10% fragrance oil by weight (Source1). This means if you have 1000g of soy wax, you would add 50-100g of fragrance oil.
Going above 10-12% fragrance can start to compromise the stability and performance of the candle, so it’s best to stay in the 5-10% range (Source2). The lower end around 5% will provide lighter fragrance, while the upper end around 10% will provide a stronger scent. It depends on the fragrance oil strength and your personal preference.
A good rule of thumb is to stay under 10% fragrance oil in your soy wax candle (Source3). So for an 8 oz candle made with soy wax, use no more than 0.8 oz or 22 grams of fragrance oil.
Preparing the Wick
Properly preparing the wick is an important step when making candles at home. The wick length and centering directly impact how well your candle will burn. According to Suffolk Candles, “Now the best method for securing your wick in a candle jar is to use high heat silicone gasket repair sealant…” (source).
For wick length, a good rule of thumb is to cut the wick about 1/4 inch taller than the height of the container or candle mold. This extra length will help ensure the wick stays centered as the wax cools and shrinks. The wick needs room to move, so don’t cut it flush with the top of the container.
Proper wick centering prevents tunneling and helps the candle burn evenly. Wick stickers, adhesive dots, or metal wick sustainer tabs can be used to hold the wick in place while pouring wax. Wooden centering devices are also very effective at keeping wicks centered in jars and other containers.
Take the time to carefully position and adhere the wick before pouring wax into your candle vessel. Straight and centered wicks lead to successful homemade candles that provide an even and complete burn.
Pouring the Candles
One of the most important factors when pouring candles is the temperature. Each type of candle wax has an optimal pouring temperature. For example, soy wax is typically poured between 135-160°F (Brambleberry). Paraffin wax can be poured at temperatures ranging from 150-170°F (Lonestar Candle Supply). The pouring temperature will affect how well the wax adheres to the candle container and the finished look of the candle. Too high of a temperature may cause bubbles or an uneven surface on the finished candle. Too low of a temperature may lead to frosting or cracking of the wax as it cools.
The best way to determine the optimal pouring temperature for your specific wax is to follow the manufacturer’s recommendations and experiment. Heat the wax slightly above the recommended temperature, then allow it to cool to the low end of the range. Carefully pour a test candle and inspect the results. Adjust the temperature up or down in increments of 5-10 degrees to achieve the best finish. The optimal pouring temperature can vary based on environmental factors like room temperature and humidity as well.
Curing the Candles
After pouring the candles into the containers and allowing them to cool, the final step is to cure them before use. Proper curing is important to allow the candles to reach their maximum scent throw and burn consistency. Curing allows the wax to crystallize and solidify fully.
Curing times can vary depending on the type of wax used:
- Soy wax candles should cure for 10-14 days according to Armatage Candle Company.
- Paraffin wax candles only need 3-5 days to cure according to The Spruce Crafts.
- Beeswax candles need 7-10 days to cure properly.
During the curing process, it’s recommended to leave the candle lids off in a room temperature area. Once curing is complete, the candles are ready to be lit and enjoyed!