How Do You Make Dark Green With Dye?
Introduce Topic
Dark green is a deep, rich shade of green that has been popular for dyeing fabric and yarn for centuries. The dyeing process for achieving a dark green color typically involves using a mixture of blue and yellow dyes. People want to dye materials dark green for several reasons:
Dark green is associated with nature, growth, renewal, and harmony. It’s considered a restful and stable color. Dark greens are widely used in interior design and fashion. Historically, dark forest greens were popular among the nobility and upper classes. Today, dark green remains a versatile color used in home furnishings like rugs, curtains, and upholstery as well as clothing.
Dark green wool was commonly used for uniforms starting in the 19th century. Military regiments, police units, fire brigades, railways, and other organizations used the color for its authority and tradition.
In crafts like knitting and crochet, dyers seek rich, complex dark greens to make garments, blankets, and other projects. The color flatters many complexions.
Overall, dark green is a timeless, sophisticated shade that adds depth and visual interest to textiles. The dyeing process allows crafters and designers to infuse their creations with this versatile hue.
Gather Materials
To make dark green fabric dye, you will need to gather the following materials:
- Fiber reactive dyes in green and blue
- Soda ash dye fixative
- Synthrapol dye dispersant
- Gloves to protect your hands
- Apron to protect your clothing
Fiber reactive dyes are ideal for dyeing cellulose fibers like cotton, linen, rayon, hemp, and bamboo. The blue dye mixes with the yellow dye to create the dark green color. Soda ash helps the dyes bond permanently to the fabric. Synthrapol helps disperse the dye evenly. Gloves and an apron keep your skin and clothing safe from stains.
Prepare Dye Bath
To prepare the dye bath for dyeing fabric dark green, first mix the dye powders with warm water according to the package directions. Use a dedicated plastic or enamel container for mixing dyes. As a general rule, mix 1/2 teaspoon of dye powder per 1 cup of warm water for pale colors, and up to 2 teaspoons of dye powder per 1 cup of water for darker colors. Use more dye powder for darker shades like dark green. Mix powdered dyes thoroughly into the warm water until fully dissolved.
Once the dyes are dissolved, add the soda ash fixative according to the package instructions, usually around 1/2 cup per 1 gallon of prepared dye. The soda ash helps the dye bond permanently with the fabric. Mix thoroughly again until incorporated. The prepared dye bath is now ready for adding the dampened fabric. Refer to Dharma Trading and Blick Art Materials for additional details on mixing and preparing fiber reactive dyes.
Prepare Fabric
The first step in preparing fabric for dyeing is properly washing it. This removes any dirt, oils, starch sizing, or other residues that may prevent dye from absorbing evenly into the fibers. According to the article How to Dye Fabric, you’ll want to wash the fabric in hot water using a dye-friendly detergent like Synthrapol or Procion. The hot water helps remove any sizing, while Synthrapol removes oils and waxes without leaving residue. Soak the fabric in a bath of hot water and Synthrapol for at least 15 minutes before rinsing thoroughly. It’s important to get the fabric as clean as possible so the dye can bond directly to the fibers.
Once washed, the fabric should be soaked again in a plain water bath with a couple teaspoons of Synthrapol added. This pre-soak prepares the fibers to readily absorb the dye. Make sure the fabric is fully saturated by submerging it in the pre-soak bath for at least 15 minutes up to overnight. Then thoroughly rinse the Synthrapol out with clean water before moving onto the dye bath. Pre-soaking optimizes the dye absorption for more vivid, evenly saturated results.
Add Fabric to Dye Bath
Once the dye bath is prepared and heated to the proper temperature, it’s time to add your damp fabric. Make sure the fabric is thoroughly wetted out before adding it to the dye bath. This helps the dye properly saturate the fibers. According to Ann Johnston’s book “Color by Accident,” the fabric should be dipped in room temperature water before dyeing to ensure even wetting (Color by Accident).
When placing the fabric in the dye bath, avoid dropping it in haphazardly. Gently lower and submerge the entire fabric into the bath. Then, stir continuously for 5-10 minutes to ensure thorough saturation and an even application of dye. As Ann Johnston advises, “Stir constantly after adding your fabric to the dyebath to make sure the dye is evenly dispersed through the fabric” (Color by Accident).
Continuous motion helps prevent blotchiness or uneven dyeing. Make sure to regularly lift, rearrange, and rotate the fabric as you stir to expose all sides to the dye evenly. The constant agitation during dyeing allows the fabric to readily absorb the dye from the water for maximal color saturation.
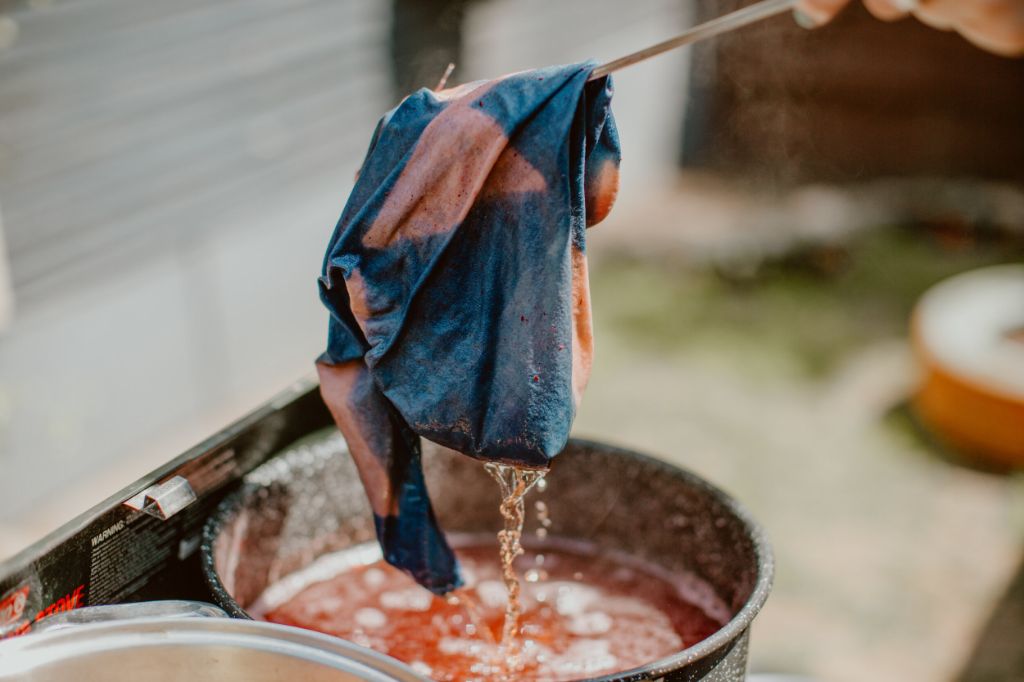
Rinsing
Once the fabric has soaked in the dye bath for the desired amount of time, the next step is to thoroughly rinse out the excess dye. It’s important to rinse with cool water, as hot water could set the dye permanently. Rinse the fabric under a steady stream of cool water, massaging periodically, until the water runs completely clear and you cannot detect any more excess dye rinsing out (1). This may take 10-20 minutes.
As you’re rinsing, you can test for colorfastness by rubbing the dyed fabric against a white cloth or paper towel. If any dye comes off onto the white material, continue rinsing. Once you can vigorously rub the dyed fabric without any more dye coming out, you’ll know the dye is set and it’s ready to be dried (2). Proper rinsing helps ensure color vibrancy and prevent bleeding.
(1) https://www.reddit.com/r/tiedye/comments/gocaar/question_about_rinsing_dyed_fabric/
(2) https://www.lovetoknow.com/home/projects-diy/create-beautiful-shibori-textiles
Drying
Once the fabric has been rinsed thoroughly, it needs to be dried properly to set the dye. There are two main methods for drying dyed fabric:
Hang drying: After rinsing, gently squeeze out excess water from the fabric then hang it on a clothesline or drying rack, using clothespins. Make sure to hang the fabric in a shaded area out of direct sunlight. Allow the fabric to air dry completely. According to Alamy, hanging to dry helps set the dye evenly across the fabric.
Laying flat to dry: You can also lay the dyed fabric flat on top of an absorbent surface like towels or newspaper. Roll the fabric in towels to soak up excess moisture. Then unfold and lay flat until thoroughly dry. Laying flat prevents the fabric from bunching up and keeps the shape intact as it dries. Make sure to dry in a shaded spot.
It’s important not to machine dry or tumble dry dyed fabrics, as the heat can cause dye to bleed or fade. Allow 24-48 hours for the fabric to fully dry before using. Once dry, the color should be set and you can proceed to washing and ironing.
Second Dye Bath
For very dark green shades, repeating the dyeing process with a fresh dye bath is recommended. This second immersion allows the fabric to absorb more dye pigments and results in a darker, richer color.
When creating the second dye bath, increase the amount of dye used by 25-50% compared to the first bath. Using more dye powder or liquid concentrates deepens the fabric’s color saturation. Monitor the dye bath closely and remove the fabric once the ideal dark green tone is achieved.
Before immersing the fabric into the second dye bath, thoroughly rinse it after the first dyeing to remove excess dye. Wring out excess water before submerging the fabric again. Agitate frequently while dyeing to ensure even penetration of color.
Double dyeing with an intensified second bath is an effective technique for dyeing very dark, forest green fabric at home. Close supervision is needed to prevent over-dyeing the fabric to black. Test samples are recommended before dyeing large pieces of fabric.
Washing
Proper washing is important for maintaining the color and quality of dyed fabrics. The first wash after dyeing should always be done with a dye fixative like Synthrapol to set the dyes and prevent bleeding. Synthrapol washes should be done in cool or warm water.
For later washes, use a gentle laundry detergent and wash in cool water. Avoid using chlorine bleach as this can fade or alter dyed colors. It’s best to wash dyed fabrics separately from other garments, especially when washing for the first time after dyeing. Washing separately prevents any excess dye from bleeding onto other clothing.
When machine washing, use the delicate or hand wash cycle. Line dry or dry flat if possible to preserve the vibrancy of the dyes. Following proper washing methods will help keep dyed fabrics looking their best.
Conclusion
In summary, making a rich dark green fabric dye involves preparing a dye bath with the proper ingredients and ratios, pre-treating the fabric, immersing the fabric in the dye bath for an extended period, rinsing thoroughly, and often doing a second dye bath for maximum color saturation. The key to achieving a lush dark green is using a high ratio of dye to fabric weight, using darker dye colors like forest green mixed with some teal or blue, and leaving the fabric in the dye bath for at least an hour. For care, wash the dyed fabric separately in cold water to preserve the color. Storing out of sunlight will also prevent fading over time. With some trial and error, you can create beautiful hand-dyed fabrics in dark jewel tones of green.
To get an optimal deep forest green:
– Use at least 2-3 times more dye powder compared to the weight of dry fabric
– Mix darker green dyes together, adding a touch of teal or blue if desired
– Make sure fabric is wetted out before immersing in the dye bath
– Agitate frequently while soaking for 60-90 minutes
– Consider doing a second dye bath to reinforce the color
Caring for hand-dyed fabric:
– Wash separately in cold water using a dye-fixative or color catcher
– Line dry or tumble dry on low to prevent fading
– Store finished fabrics out of direct sunlight