How Do You Make A Mason Jar Wax Warmer?
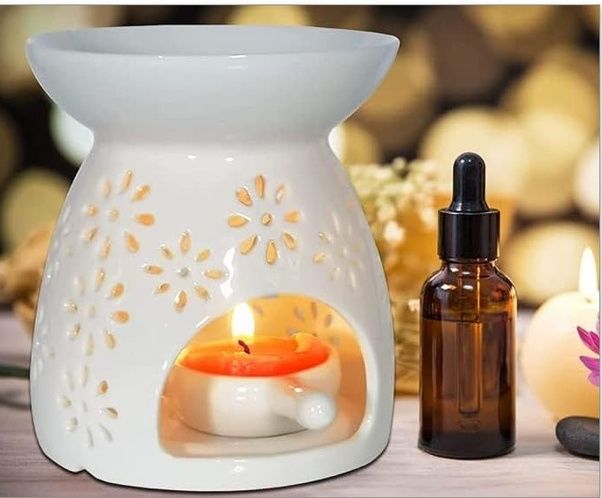
A Mason jar wax warmer is a simple, inexpensive way to create an easy DIY wax warmer for your home using a Mason jar, tea light candle, and soy wax. Wax warmers are a popular alternative to candles since they melt wax to release a lovely fragrance without an open flame. They are a safer option than candles, especially if you have kids or pets. The benefits of a Mason jar wax warmer include:
- They are inexpensive to make with simple household materials.
- Safer than candles since they don’t have an open flame.
- Release lovely scents and fragrances when the wax melts.
- Creates a warm, inviting atmosphere and ambiance.
- Easy to reuse and change fragrances.
- Personalizable by using different jars, wax, and scents.
Overall, Mason jar wax warmers are a fun, simple DIY project to make an elegant wax warmer for your home. The rest of this article will explain step-by-step how to make your own.
Materials Needed
To make a mason jar wax warmer, you will need the following materials:
- Mason jars – Any size mason jar will work, but a wide mouth 16 oz jar is recommended.
- Wax melts or cubes – These provide the fragrance.
- Scissors – Needed to cut the mesh material.
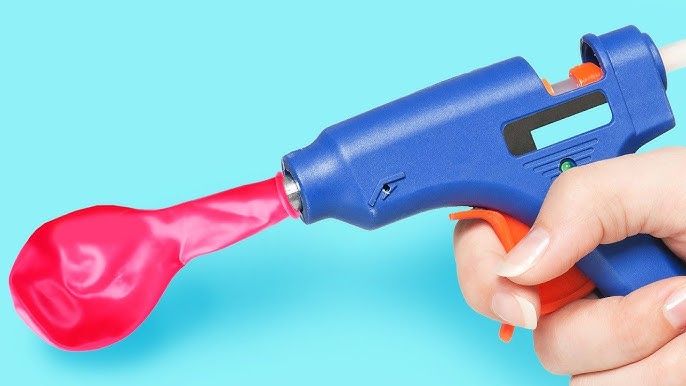
- Glue gun and glue sticks – For assembling the lid.
- Battery-operated tea lights – These provide the heat to melt the wax. Get the flameless LED type for safety.
You may also want to have on hand some craft paint, glitter, beads, lace, or other embellishments to customize your warmer. Most of these materials can be found affordably at dollar stores, craft stores, or big box stores.
For example, this DIY from Pinterest uses basic materials like a mason jar, tea light, and wire.
Preparing the Mason Jar
The first step in making a Mason jar wax warmer is to prepare the jar itself. Start by removing any labels from the outside of the jar. You can soak the jars in warm water to help loosen the labels. Use a scraper to get all residue off.
Once the labels are removed, wash the jars thoroughly with soap and water. Make sure there is no sticky residue left behind. Rinse and dry the jars completely. It’s important that the jars are completely dry before moving to the next step. Any moisture left behind can interfere with the wax heating properly.
For reference on preparing jars for crafts, see: https://diycandy.com/mason-jar-crafts/
Making the Lid
The lid for the wax warmer can be easily made using cardstock and the original mason jar lid. Start by tracing the jar lid onto a piece of cardstock. Use scissors or a craft knife to carefully cut out the circle. The cardstock circle should be just slightly smaller than the lid so it fits inside the metal rim.
Before placing it into the lid, you can decorate the cardstock if desired. Some ideas are painting it, gluing on ribbon or raffia, adding glitter, affixing a decal, or using permanent markers to draw designs. Refer to mason jar lid craft ideas for inspiration such as: https://www.pinterest.com/lddbd5/jar-lid-crafts/. When ready, insert the decorated cardstock circle into the regular mason jar lid.
Now you have a customized lid for your wax warmer that coordinates with your decor. The cardstock allows the scent to diffuse out while preventing the actual candle flame from igniting the wax or overheating the jar.
Adding the Tea Light
An essential component of the mason jar wax warmer is the tea light. Tea lights provide a safe, stable flame to melt the wax. For this DIY project, use a battery-operated tea light rather than a regular candle tea light. This eliminates the need for an open flame and makes the warmer safer and easier to use.
To add the tea light:
- Take the metal lid and turn it over so the smooth inside surface is facing up.
- Place the battery-operated tea light in the center of the lid.
- Apply a generous amount of hot glue on and around the edges of the tea light to adhere it securely to the lid. Make sure no hot glue drips down into the tea light chamber where the battery and switch are located.
- Press the tea light firmly into the hot glue and hold for 30-60 seconds as it sets.
- Once dry, check that the tea light is fixed securely to the lid and won’t fall off when flipped over.
The tea light should now be safely glued into place in the center of the lid, ready to provide warmth for melting wax when the warmer is assembled.
Preparing the Wax
To prepare the wax for your Mason jar wax warmer, start by unwrapping a wax melt cube. You can use a store-bought wax melt cube or make your own by following a DIY wax melt recipe. If desired, cut the wax melt cube into smaller pieces to help it melt faster. This will allow more surface area of the wax to be exposed to the melting heat.
If using a homemade wax melt, be sure to avoid any wax pieces with wicks in them. The wicks can pose a fire hazard when melting the wax. Stick to just the plain wax pieces without wicks.
Have the wax pieces ready in a heat safe container, like a glass measuring cup. This will make it easy to pour the melted wax into the jar once ready.
Assembling the Warmer
To assemble your Mason jar wax warmer, start by placing wax pieces or cubes inside the jar. The wax can be poured or broken up into chunks first. Refer to the wax packaging for guidance on melt times and amounts to use. Generally 1-2 cubes or 1-2 ounces of wax is sufficient for most homemade warmers.
Next, place the perforated tin lid on top of the jar opening. Make sure the tea light can fit through the hole in the center. Then insert a new tea light through the lid so it rests atop the wax pieces inside. Make sure the tea light is positioned securely and centered.
Now the wax warmer is fully assembled and ready for use! Simply light the tea light to melt the wax and release its fragrance. The melted wax will pool in the bottom of the jar as it warms.
Using Your Warmer
Using your DIY Mason jar wax warmer is easy. Once you’ve assembled your wax melt warmer, you’ll want to place it on a level surface. Avoid using your Mason jar wax warmer on surfaces that are vulnerable to heat, like finished tables or marble counter tops. The bottom of the jar will get quite hot.
To use your wax warmer, simply light the tea light candle and place it in the holder under the jar. The tea light will heat up the contents of the jar and melt the wax. As the wax melts, the fragrance will be released into the surrounding area to scent your room. Just be sure not to leave the lit candle unattended.
Once the wax has fully melted, you can extinguish the tea light. The melted wax will continue releasing its fragrance as long as it remains in liquid form. When you are ready for a fragrance change, let the wax fully harden again before dumping it out and adding a new scented wax for your next use.
Enjoy your homemade Mason jar wax warmer to scent and fragrance your home in an easy, inexpensive way!
Cautions when Using a Mason Jar Wax Warmer
When using your homemade Mason jar wax warmer, it’s important to keep some safety precautions in mind. Warmers that use tea lights or candles can pose fire hazards if not used properly. Here are some tips for staying safe:
Don’t leave your wax warmer unattended while it is lit. Always blow out the tea light or candle before leaving the room. These small flames can easily tip over if bumped or knocked off a table. Never leave a burning tea light or candle unsupervised.
Keep your wax warmer away from flammable materials like curtains, rugs, paper, etc. Place it on a heat-safe surface, not directly on wood. The heated wax can drip down the sides of the jar, so have a plate or trivet underneath to catch spills. Don’t put the warmer near anything that could catch fire.
Make sure to extinguish the flame completely before touching or moving your wax warmer. The tea light cup and melted wax will be very hot right after the candle has been blown out. Allow everything to cool fully before handling.
Use caution around children and pets, as the flame and hot wax could burn or scald. Do not allow young kids or animals near the lit warmer unattended.
With these simple precautions, you can safely enjoy your homemade mason jar wax warmer! Just be sure to never leave a burning candle unwatched, and keep the setup away from anything flammable.
Customizing Your Warmer
Once you get the basics down, you can make each Mason jar wax warmer unique by customizing it. Here are some ideas for personalizing your homemade wax warmers:
Painting Jars
You can paint the outside of the Mason jars with acrylic paints or spray paints to match any decor. Try painting patterns like polka dots, swirls, or stripes. For a rustic look, try a crackle paint technique. Metallic spray paints also work nicely to give a shimmering effect.
Embellishing Lids
Glue items like lace, burlap, or ribbon around the jar lids to coordinate with your decor. You can also decoupage the lids with scrapbook paper, photos, or fabric for a one-of-a-kind design.
Seasonal Themes
Make your warmer perfect for the season or holiday by customizing it to match. Try painting winter-themed jars with snowflakes for Christmas, pastels for spring, or red, white and blue for summer. You can also add small thematic embellishments to the lids like mini pumpkins for fall.