How Do You Make A Campfire With A Firestarter?
Gather Materials
The first step in building a campfire is gathering the necessary materials. This includes tinder, kindling, logs, an ignition source like matches or a lighter, and a firestarter. According to The Essentials of a Wood Fire: Tinder, Kindling, Fuel, tinder is used to initially start the fire and ignite easily. Good tinder options include dry grass, leaves, pine needles, cotton balls, and wax-infused fire starters. Kindling are smaller twigs and sticks that will catch the flame from the tinder and allow the fire to grow. Kindling should range in diameter from pencil-sized to 1 inch pieces. Finally, logs around 3-5 inches in diameter will sustain the fire and provide long-burning fuel. It’s important to have logs of varying sizes to maintain proper airflow. Matches and lighters are reliable ignition sources, while commercial firestarters made of wax and sawdust help ignite the tinder quickly.
Choose Site
When choosing a site for your campfire, it’s important to select a clear area away from overhanging branches and other flammable material. Experts recommend situating your campfire at least 15 feet away from tents, shrubs, trees or other objects that could easily catch fire (https://smokeybear.com/en/prevention-how-tos/campfire-safety/how-to-pick-your-campfire-spot). You’ll want an open space with no low-hanging branches above it. Leaves and pine needles can easily ignite, so clear the area of debris down to bare dirt if possible.
Do not place your campfire directly next to your tent. Wind can shift suddenly and blow sparks onto your tent, potentially causing it to catch on fire. Allow ample distance between your tent and the campfire – at least 15-25 feet (https://www.quora.com/How-close-to-the-campfire-can-you-place-your-tent). Choose your campfire site thoughtfully and take into account the direction of prevailing winds. Face the opening of your tent away from the campfire if possible. With some foresight, you can enjoy a safe and cozy campfire experience.
Make Fire Pit
Selecting the right spot and preparing the fire pit area is an important step before starting your campfire. According to FirePitSurplus.com, typical round fire pits range from 36-44 inches in diameter[1]. For a square fire pit, aim for an interior length between 34-42 inches[1]. Consider an area with good drainage and no overhanging branches.
Start by clearing away any dried leaves, sticks, stones and other debris from a circle about 4-5 feet wide. Use a shovel or rake to clear down to bare dirt. For the fire pit itself, dig a shallow pit about 10-12 inches deep and 3-4 feet wide[2]. The shallow pit helps contain the fire and prevent it from spreading.
Line the edge of the pit with rocks to help retain the shape and size. Look for larger stones or bricks to make a tidy border. Space the lining material a few inches apart to allow oxygen flow. Avoid using river rocks which may explode from the heat.
Prepare Tinder
Tinder is the most crucial element for starting a fire. Tinder refers to extremely flammable material that easily ignites with a spark or small ember. Good tinder immediately bursts into flames to create the initial fire that will spread to larger fuel sources.
Look for lightweight, very dry, finely divided materials that catch fire readily. Excellent natural sources of tinder include shredded bark, dry grass, leaves, pine needles, seed fluff, and bird down feathers. The best tinder ignites with only a small ember or spark. Some of the most effective natural tinder comes from resinous sappy woods like pine, fir, and spruce. This very flammable wood is often called fatwood or lighter wood.
To prepare your tinder, shred bark, leaves, grass, and other materials into a loose fist-sized bundle. Break down the materials into tiny threads and fibers, maximizing surface area. Fluff up the tinder bundle so air can easily circulate through it. Keep your tinder absolutely dry by storing it in a waterproof container or plastic bag.
Assemble Kindling
Kindling refers to small twigs, sticks, and woody material that will easily ignite to help start your campfire. According to The Essentials of a Wood Fire: Tinder, Kindling, Fuel[1], kindling serves as the bridge between your initial tinder and the larger fuel logs. When building your campfire, it’s important to arrange the kindling in a teepee shape over the tinder. This teepee structure allows air flow to feed the flames and allows the fire to grow upwards into the kindling before igniting the logs.
You’ll want dry, small twigs and sticks ranging from pencil thickness to thumb thickness for your kindling. Arrange these in a teepee formation with the skinny ends facing upwards and the thicker ends facing down toward the tinder[2]. Leave some space between the sticks to allow oxygen flow. This teepee of kindling will help transfer the fire from your initial tinder to the larger logs by creating a gradual progression of igniting material.
Place Logs
Once you have built a sturdy base of kindling, it’s time to place the logs. Start by laying two larger logs in a crisscross pattern over the kindling base. This allows airflow between the logs to feed oxygen to the fire.
The ideal log size for a campfire is around 12-14 inches long and 3-5 inches wide. This size allows the logs to burn steadily and provide sustained heat (Source). Logs that are too large may smother the kindling, while logs that are too small will burn up too quickly.
Place the thickest logs on the bottom. Continue stacking several layers of logs in a crisscross pattern, working your way up. Leave some space between the logs to allow oxygen flow. Use about 5-10 logs for a standard campfire pit.
Light Tinder
Once you have assembled your tinder into a loose bundle at the base of the kindling structure, it’s time to light it. Using a match or lighter, hold the flame to the tinder at the bottom center of the structure. The goal is to ignite the tinder so that the flame starts to spread slowly throughout the material before reaching the kindling.
Take care when initially lighting the tinder. If you light just one small section, the fire may fizzle out and fail to spread. Lighting the tinder broadly at its base helps ensure the flame catches and begins climbing up through the material. Don’t let the match or lighter flame linger too long in one spot either, as that may just burn a hole without igniting other areas.
Shield the tinder from any wind as you light it. Wind can blow the flame out before the tinder begins burning in earnest. Use your body or another object to block the wind. Some people recommend lighting tinder with your back to the wind to protect the initial kindling stage.
Once the tinder has begun smoldering and small flames appear throughout the bundle, you can stop applying your match or lighter. At this point the fire should spread on its own as the flames grow larger and transition from tinder to kindling. Enjoy watching your campfire spring to life!
Add Firestarter
Once the tinder is ignited and begins to burn, it’s time to add the firestarter. Firestarters are materials designed to help ignite and sustain a fire. Some common options include:
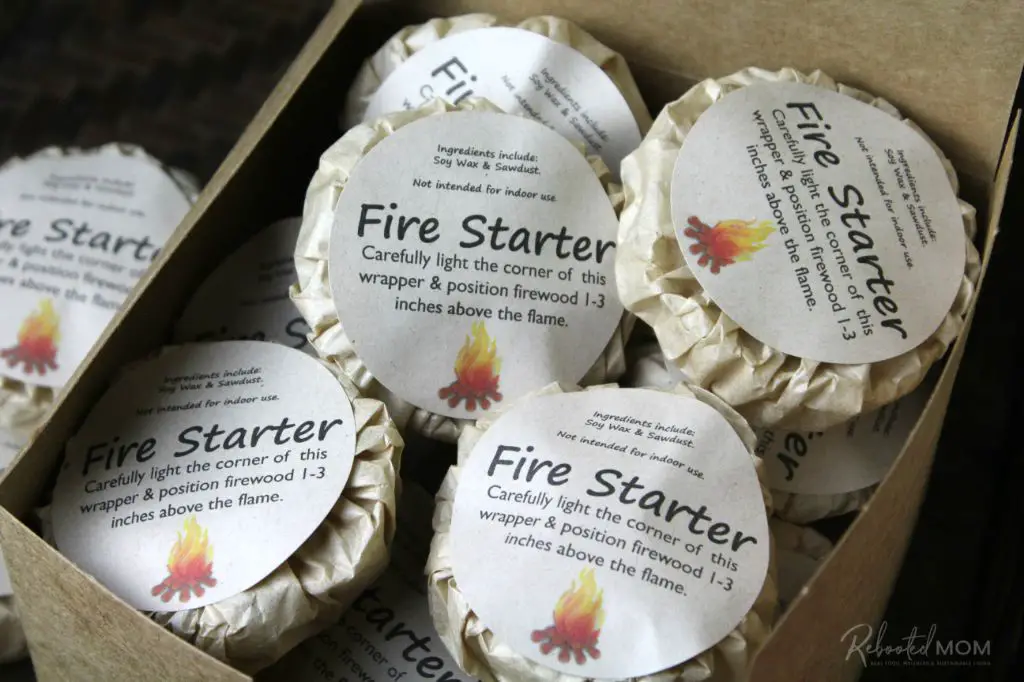
Wax and sawdust firestarters (1) – These are often sold commercially and made of wax and sawdust compressed into blocks or sticks. They burn slowly and hot to help ignite logs.

Manufactured logs (2) – Duraflame and other brands make compressed sawdust and wax logs designed specifically to start fires. These burn consistently for a set period of time, making them ideal firestarters.
To use a firestarter, place it directly on the burning tinder. Position it underneath the kindling where you want the main fire to start. The burning tinder will ignite the firestarter, which will in turn ignite the kindling above it.
Make sure to give the firestarter full contact with the flames. It may take a few minutes for the firestarter to fully ignite before it is ready to light the kindling.
Let Flames Grow
Once the tinder is lit and begins to spread to the kindling, it’s important to let the flames fully ignite the smaller pieces of wood before adding larger logs. Rushing to add more fuel before the kindling has caught fire is a common mistake. The smaller kindling needs time to heat up enough to ignite the logs you add. If you place logs on too soon, the fire may be smothered and go out.
Watch as the bright flames from the tinder grow and start licking up the sides of the kindling. The fire will spread slowing across the kindling as each piece fully ignites. Resist the urge to add more wood too quickly. Wait until the kindling is engulfed in flames before placing your first small log onto the fire. Give that log a minute or two to ignite before adding another small log.
Gradually build up the fire by letting each log fully catch fire before adding another. If you stack logs on too early, the fire will struggle to gain heat and may fizzle out. Patience is key. By waiting for each log to ignite before adding another, you’ll end up with a nicely burning campfire.
Source: https://getpocket.com/explore/item/10-mistakes-newbie-fire-builders-make
Maintain Fire
To sustain a strong campfire, you’ll need to slowly add more logs and branches over time. The key is to maintain a balance – don’t let the fire get too big or small. Monitor the flames and only add 1-2 logs at a time as needed. According to Camp Wagen, an average campfire temperature is around 900°F (482°C) but it can reach up to 1650°F (900°C) with very large fires.
Aim to keep the fire a manageable size by adding smaller logs and placing them carefully on the coals. Larger logs can smother the flames if not arranged properly. Adjust the quantity and placement of new logs based on factors like the outside temperature, wind, and your desired heat output. With some practice, you’ll get a feel for how to sustain a steady campfire by making incremental adjustments. Just be sure not to let the fire grow out of control.


