How Do You Hold A Wick When Making Candles?
Candle making dates back thousands of years and remains a popular hobby and craft today. At the core of every candle is the wick, which serves the crucial role of delivering fuel to the flame. The wick draws liquid wax up through capillary action and the wax then vapourizes at the lit end to feed the flame. Properly preparing and positioning the wick is an essential step in candle making that impacts how well the candle burns.
This article will provide a comprehensive overview of how to select, prepare, and hold a wick when making candles. We’ll cover wick materials, sizing, positioning, setting, trimming, and troubleshooting any issues that arise. With the right wick and technique, you can make beautiful and effective candles that burn cleanly down to the bottom.
Wick Materials
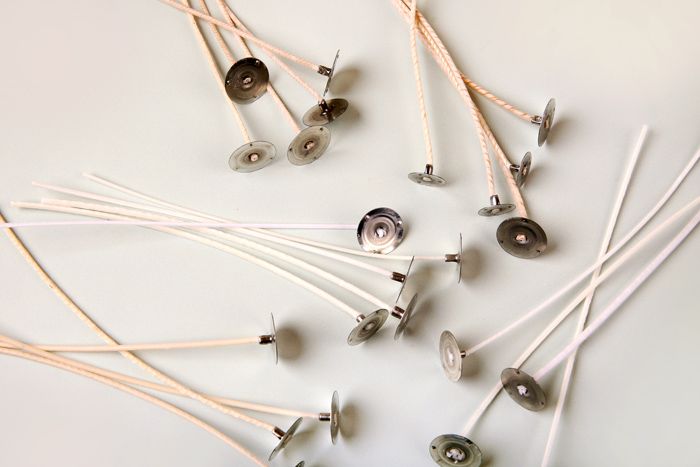
Common materials used for candle wicks include cotton, paper, and zinc core wicks. Cotton is one of the most popular and widely used wick materials due to its clean burn and lack of odor or smoke (source). Cotton wicks are versatile and work well with most candle wax types. They provide a bright even flame and efficiently draw the wax up from the candle jar during burning.
Paper and wood wicks are also commonly used. They tend to burn cooler than cotton and can add a woodsy crackling sound as they burn. Paper wicks work well in gel candles. Zinc core wicks have a cotton wick wrapped around a zinc metal core. The zinc aids in retaining the wick’s shape and provides a straight upright burn. Zinc core wicks are a good choice when you want to minimize issues like tunneling or an uneven flame.
Wick Sizing
The diameter of the wick is one of the most important factors in candle making. Thicker wicks will produce larger flame and melt pools, while thinner wicks create smaller flames and melt pools. Wick sizing impacts the burn time and melting characteristics in the following ways:
Larger wick diameters allow more wax to melt at a faster rate, creating a larger melt pool. This faster melt rate leads to a shorter overall burn time. Thicker wicks also tend to mushroom more at the tip as the wick chars.
Smaller wick diameters melt wax at a slower rate in a tighter melt pool. This slower melt leads to a longer burn time. Thinner wicks help prevent issues like mushrooming, tunneling, and smoking.
Most candle makers recommend testing multiple wick sizes to find the optimal balance of melt pool, burn time, and flame characteristics for each particular candle. Wick sizing charts provide general guidelines, but testing is key.
The right wick creates an even melt pool that reaches the edges of the container at the end of the burn. Oversized wicks lead to rapid wax consumption, while undersized wicks can create tunneling. Testing wick samples can dial in the perfect wick diameter.
Sources:
https://www.candlescience.com/learning/choosing-the-right-wick-size/
https://villagecraftandcandle.com/blogs/news/what-are-the-different-types-of-candle-wicks
Preparing the Wick
Properly preparing the wick before adding wax is an important step when making candles. This helps ensure the wick will burn slowly, evenly, and prevent tunneling.
First, cut the wick to the desired height based on the candle container’s depth. As a general rule, leave 1⁄2-1 inch of wick above the top of the container to prevent drowning and allow proper airflow. Use sharp scissors to cut the wick cleanly and avoid fraying the ends [1].
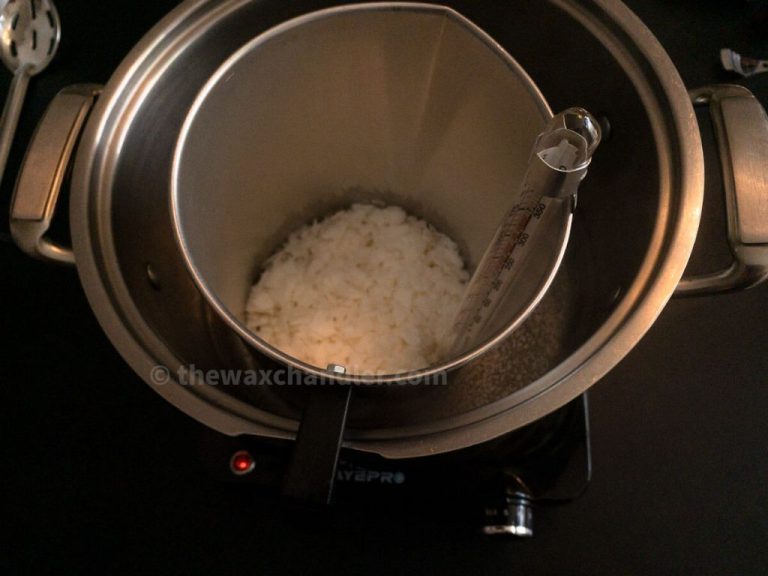
Next, prime the wick by coating it with wax. This helps stiffen and straighten the wick so it stands upright when the candle sets. Dip the wick into melted wax and allow it to fully saturate. Remove and straighten. Repeat dipping and drying until the wick holds its shape [2].
You can also prepare the wick using salted water or borax solutions. This helps reduce soot, prevent clogging, and improve burn quality. Soak the wicks briefly in the solution, squeeze to remove excess, then allow to fully dry before adding wax [1].
With the wick cut and primed, it’s now ready to be positioned properly before pouring the wax.
Wick Positioning
Proper wick positioning is crucial for a well-burning candle. The wick should be centered in the candle to promote an even burn and prevent tunneling. To center the wick, use a wick stick or skewer to poke a hole in the wax or silicone mold before pouring. Place the wick in the hole so it stands upright and remains centered as the wax fills the container.
The wick should also be positioned a proper distance from the sides of the candle container. Recommended distances are:
– 1/2 inch from the sides for containers 2-3 inches wide.
– 3/4 inch from the sides for containers 3-4 inches wide.
– 1 inch from the sides for containers larger than 4 inches wide.
Allowing adequate space prevents the flame from getting too close and overheating the container. The wick should be able to burn freely in open space above the wax pool. Follow these centering and spacing guidelines for optimal wick positioning.
Holding the Wick
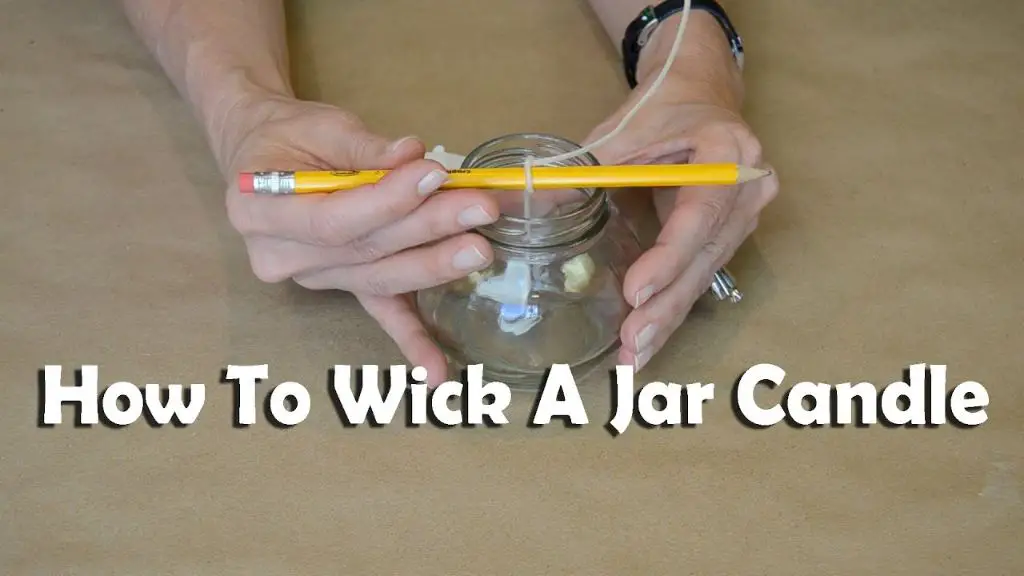
There are several techniques candle makers use to hold the wick in place when pouring wax into the candle mold:

One method is to use masking tape. Fold the tape in half with the sticky side facing out and snip a small hole in the center using scissors. Thread the wick through the hole to secure it in place (source). The tape helps keep the wick centered while pouring the wax.
Wick pins can also be used to hold the wick. Push the pin through the base of the wick then into the bottom of the candle mold. The pin holds the wick upright and prevents it from shifting when adding wax (source).
Some candle molds have small holes or grooves designed to hold wick tabs or stickers. These built-in features allow the wick to remain fixed in position during pouring.
A dab of hot glue on the base of the wick can be used to adhere it to the bottom of the candle mold. Allow the glue to cool and harden before pouring the wax.
Wooden wick rods are another option. Slide the wick into a slit cut down the side of the rod. Push the rod into the mold to stand the wick upright for pouring.
Using proper wick holding techniques keeps the wick centered while pouring wax into the candle mold, resulting in an evenly burned finished candle.
Setting the Wick
After you have held the wick in place while pouring the wax, it is crucial to allow the wick to set undisturbed as the wax cools. This allows the wick to adhere properly to the wax and prevents issues like tunneling when the candle is burned.
The cooling process can take several hours, so resist the urge to mess with the wick or move the candle before it has fully set. Patience is key. Some candle makers recommend letting the candle sit overnight before doing anything else with it. The exact cooling time will vary based on the type and amount of wax used.
As the wax cools, it will contract and pull the wick into a centered position. If you disrupt this process by moving the wick too early, it can result in an off-center wick that tunnels down the side when burned. An improperly set wick is one of the most common reasons for candle tunneling.
You’ll know the candle wax has fully cooled and set when it regains its opaque appearance and feels solid to the touch across the entire surface. At this point, you can safely trim or adjust the wick if needed before the first burn. But resist touching the wick until the candle has completely hardened and stabilized.
Allowing the wick to set undisturbed is a simple step that ensures proper wick adherance and helps prevent many common candle issues. Patience leads to a better end result.
Trimming the Wick
Before burning a new candle, it is important to trim the wick to the proper height to achieve an even burn. According to experts, trimming the wick before the first burn helps the wax melt evenly around the wick when lit. This allows the candle to burn slower and more efficiently.
The recommended wick height before lighting is 1⁄4 inch or 6mm. To trim the wick:
- Use sharp scissors and trim vertically downwards towards the wax.
- Aim for a straight cut and avoid angled or jagged trims which can lead to an uneven flame.
- Candle wicks may become extremely long during production and shipping, so trim off any excess.
Wicks should be trimmed before each use, typically after every 4 hours of burn time. Allow the wax pool to fully solidify before trimming. Regular trimming prevents emissions, tunneling, and promotes an even burn. With a neatly trimmed wick, candles burn cleaner and more efficiently.
According to candle experts at Martha Stewart (https://www.marthastewart.com/8053740/how-when-trim-candle-wick), “Approaching the wick from the top, try to cut the wick evenly across. Use a sharp pair of scissors, nail clippers, or a wick dipper.” Proper wick trimming is key for candle care and performance.
Troubleshooting
Like any craft, even experienced candle makers occasionally run into issues while making candles. Some common problems with wicks include tunneling, off-center wicks, sooty residue, and drowned wicks.
Tunneling happens when wax melts unevenly around the wick, creating a tunnel shape. This is often caused by an improper wick size. According to Practical Self Reliance, using a larger wick can help prevent tunneling. You can also try pouring candles at a lower temperature or adding wax additives like vybar or parasoy.
If your wick is off-center, first check that you are holding the wick taut and upright as the wax cools. Letting go too soon can allow the wick to shift. You may need to use a tabbed or pre-waxed wick to keep it weighted and centered. Trimming the wick after cooling also helps realign it.
Sooting occurs when a wick is too large for the wax and fragrance load. Switch to a smaller wick or adjust your wax recipe. According to candle making experts, a properly-sized wick should bend over slightly and mushroom when lit.
Drowned wicks happen when the wick gets buried in wax while pouring. Make sure to hold wicks taut until the candle sets. You can also use a wick sticker or rubber band to keep the wick centered and exposed as the wax cools.
Conclusion
In conclusion, choosing the proper wick is crucial to creating successful candles that burn cleanly and evenly. The wick acts as the engine, drawing wax up to the flame and controlling the size and shape of the melt pool. Consider the wax type, container size, and desired burn time when selecting a wick.
For best results, use wicks specifically designed for candle making. Cotton and paper-cored wicks tend to be the most reliable. Size the wick to the candle diameter, with larger candles requiring thicker wicks. Prepare wicks by priming or pre-waxing prior to use. Position wicks centered in the container before pouring wax.
When lighting, allow the wax pool to form completely before extinguishing the flame. Trim wicks to 1/4 inch before each burn to prevent smoking and promote an even burn. Adhere to these wick tips, and you’ll achieve clean burns, excellent fragrance throw, and beautiful candles every time.


