How Do You Heat A Candle Container?
Heating candle containers before pouring wax into them is an important step in candle making. Preheating the containers helps the wax adhere to the sides of the container better and reduces issues like wet spots and adhesion problems. It also helps prevent cracking or breakage that can occur when hot wax is poured into a cold container.
Heating the containers also allows the wax to spread evenly and fully reach all surfaces and edges of the container. This helps produce candles with smooth finishes and no unfilled areas. Overall, taking the time to properly preheat containers is a simple way to improve the look, burn quality, and longevity of homemade candles.
Safety Precautions
When heating candle containers, it’s important to take safety precautions to avoid burns or fires. Proper ventilation is key – make sure to heat containers in a well-ventilated area and never leave burning candles unattended (Fillmore Container, 2023). Children should always be supervised around candles. Read the manufacturer’s recommendations for safe usage. Choose heat-resistant holders and surfaces when burning candles, as standard glassware and surfaces can crack or scorch (Life and Reflection, 2022). Avoid moving a burning candle or lighting it too close to flammable materials. In general, exercise caution and common sense when heating candle containers.
Selecting Containers
When selecting a container for candle making, you have several material options to choose from including glass, metal, and silicone. Each material has its own advantages and disadvantages.
Glass containers like jars and vases are a popular choice because they allow the candle light to shine through attractively. Glass also retains heat well to fully melt the wax. However, glass can break easily. Additionally, some types of glass like thinner jam jars may get too hot and crack under the heat used in candle making. So when using glass, opt for thicker, sturdier options.
Metal tins and containers like aluminum are another common option. Tins conduct heat well to melt the wax and come in a variety of aesthetically-pleasing shapes and sizes. The metal helps the candle retain a cool outer temperature. However, the sides of a metal tin block light transmission.
Silicone is a newer material used for candle vessels. Food-grade silicone withstands the heat of melted wax. It’s flexible and durable. The material is see-through to allow light passage. Silicone candle molds are reusable. However, silicone does not retain heat as well as glass or metal. The wax also shrinks more in silicone upon cooling and may pull away from the sides.
When selecting a candle vessel, consider factors like appearance, intended use, safety, and personal preference. Test different container materials to see which works best for your needs.
Preparing the Container
Before pouring wax into a container, it’s important to properly prepare the container to ensure a smooth finish and clean burn. Here are some key steps:
First, wash the container thoroughly with soap and water to remove any dirt, dust or oils. Make sure to wash both the interior and exterior. If there are any labels, peel them off carefully.
Next, clean the interior with rubbing alcohol to remove any residue. As recommended by CandleScience, wipe out the inside with paper towels soaked in rubbing alcohol.
Some candle makers also recommend coating the interior with a mold release agent or vegetable oil. This helps the cured wax release from the container. Thinly coat the interior by wiping a paper towel soaked in oil over all surfaces.
Now the container is prepped and ready for the heating and wax pouring process!
Heating Methods
There are several effective methods for safely heating candle containers before pouring wax into them:
Oven Method
One popular approach is to use your oven to warm the containers. Preheat your oven to around 100°F and place the empty containers inside for 5-10 minutes. Be sure to use oven mitts when removing the hot containers. This gentle heat helps the wax adhere properly to the sides of the glass or metal [1]. Take care not to overheat the containers as this can cause cracking or warping.
Stovetop Method
You can also use your stovetop to warm containers. Place them in a pan with an inch of water over low heat for a few minutes. The hot water will transfer gentle heat to the containers so they are ready for pouring. Be sure to dry the outside of the containers thoroughly before filling them with wax to prevent wet spots.
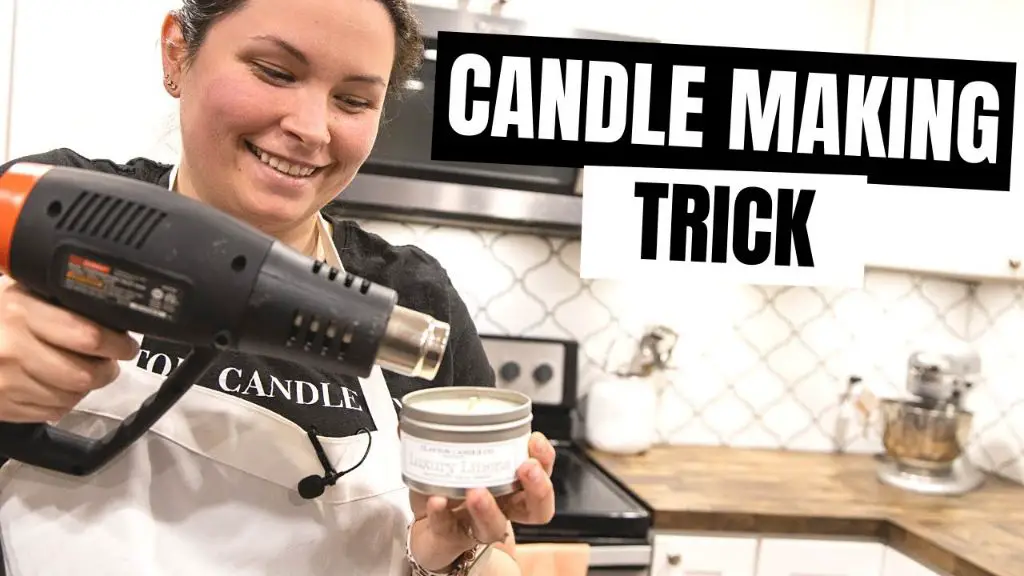
Heat Gun Method
A heat gun allows you to directly apply a stream of hot air to containers. Run the heat gun over the inside and outside of each container for 30-60 seconds before pouring in wax. This targeted heat quickly warms the containers. Be cautious not to overheat any one spot which could damage the container.
Hair Dryer Method
In a pinch, a hair dryer can also warm up containers reasonably well. Aim the hair dryer into the container and rotate it to heat all sides for 60-90 seconds. The containers will be slightly warm to the touch and ready for wax. Take care not to overheat glass containers with this method as they can crack if they get too hot.
Oven Method
One of the most popular ways to heat candle containers is using your oven. This allows you to heat multiple containers at once. When using the oven method, follow these steps:
Preheat your oven to 175°F – 200°F. This lower temperature range helps prevent glass from cracking or shattering from too much heat. According to the Craft Server forum, temperatures around 175°F are ideal.
Place candle jars on a baking sheet or oven-safe tray. Position them toward the center of the oven, away from direct top or bottom heat. The CandleScience recommendations suggest leaving racks in their original positions.
Heat containers for 5-10 minutes. Check frequently and remove once warmed throughout. Glass conducts heat well, so it won’t take long to become hot enough for pouring wax.
Use oven mitts to carefully transfer heated jars to your work surface. They should be warm but not too hot to handle. Allow to cool slightly before pouring in wax if needed.
Stovetop Method
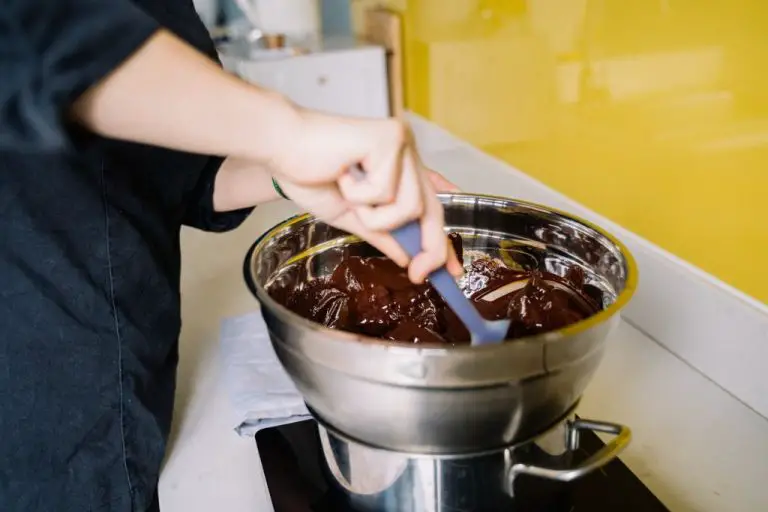
Another option for heating candle containers is to use your stovetop. This involves placing the containers in a pot of water on the stove. Here are some tips for using the stovetop method:
Fill a pot about halfway with water and bring it to a gentle simmer on the stove. You don’t want the water to be boiling rapidly. A temperature between 180-190°F is ideal. According to this Reddit thread, some people use the warming zone on their stove to gently heat their candle containers.
Place the glass containers in the pot of heated water, making sure they are fully submerged. Let them sit for 5-10 minutes, checking frequently to see if the wax has melted. You may need to leave them longer depending on the size and thickness of the candles.
Once the wax has fully melted, use pot holders to carefully remove the containers from the water. Make sure the wax isn’t too hot before pouring in fragrance or dye. Let the candles cool completely before putting on the lid.
Heat Gun Method
Using a heat gun is one of the most popular and effective ways to warm candle containers before pouring wax. Heat guns allow you to precisely control the temperature and direct heat right where you need it. When using a heat gun:
- Set the heat gun to a low or medium temperature setting, usually around 250-500°F. High temperatures can damage the containers.
- Hold the heat gun 6-12 inches above the container to evenly distribute the heat. Keep it moving in a circular motion rather than keeping it focused in one spot.
- Heat the container just until warm to the touch, taking care not to overheat it. Check the temperature often by briefly touching the container.
- Pour wax immediately after warming so the container doesn’t cool.
Heat guns provide a convenient hands-free way to get containers to the ideal 130-150°F pouring temperature. They give you precision and control compared to other heating methods. Just be cautious not to hold it in one spot too long or set it too hot. Practice on a few spare containers first to get the technique right.
Source: https://www.reddit.com/r/candlemaking/comments/1601w6s/warming_candle_jars_before_pouring/
Hair Dryer Method
Using a hair dryer to melt candle wax in containers is possible, but it’s not as effective as a heat gun. Here are some tips for trying the hair dryer method:
Set the hair dryer to the highest heat setting. You’ll need concentrated, high heat to melt the wax. Avoid any cool shot settings.
Keep the hair dryer 6-12 inches away from the wax. Get too close and you may blow wax around instead of melting it. The greater distance gives the heat time to penetrate the wax.
Move the hair dryer slowly and steadily back and forth over the wax. Don’t linger too long in one spot. Gentle sweeping motions ensure even heating.
Check the wax often. Melting will take longer than with a heat gun. Be patient and keep applying heat until the wax is fully liquid.
Let the wax cool slightly before pouring to avoid spills. Hair dryers don’t get as hot as heat guns, so wax may thicken faster.
While doable, hair dryers may take more time and effort to melt wax smoothly. For best results, invest in a heat gun designed specifically for candle making. As one candlemaker notes, “the hair dryer blows the wax everywhere. The heat gun is a game changer.” (Source)
Cooling and Pouring
Your wax may slightly overflow if you pour too hot, so let it cool down slightly before pouring. Most waxes are optimal for pouring between 160-140°F according to Lonestar Candle Supply. The wax temperature recommended for pouring soy wax is between 125-135°F according to CandleScience.
For smooth tops, pour your wax just above the top of the container so it fills completely as it cools and contracts. Let the candle sit for at least 6 hours before moving or handling. This allows the wax to fully set up and adhere to the sides of the container.