How Do You Center A Wick Perfectly?
Centering the wick is one of the most critical steps when making candles. An off-center wick can lead to issues like tunneling, poor wax pooling, uneven burning, and more. A centered wick helps ensure even wax melting, complete fragrance release, and an even burn from top to bottom. This allows the candle to burn safely all the way down to the edges of the container for full usage.
When the wick is off-center, the flame will be closer to one side of the container. This causes the wax on that side to melt faster while the other side lags behind. The wick can drift farther and farther off-center as the candle burns, exacerbating these issues. Keeping the wick perfectly centered promotes proper melt pool formation and maintains it throughout all stages of burning.
Take care to center candle wicks properly right from the start, as a centered wick is vital for optimal candle performance, an even burn, and safety.
Gather Your Materials
To make a candle with a perfectly centered wick, you will need the following basic supplies:
- Wick – The wick size should match the diameter of your container. Common wick sizes are CD, ECO, LX, HTP, and pretabbed. Choose cotton or wood. https://www.brambleberry.com/ingredient-information/fragrance-and-essential-oils/art0169-candle-making-supplies-list-for-beginners.html
- Wax – Paraffin, soy, or beeswax. Make sure you have enough wax to fill your container.
- Wick stick or pencil – To hold the wick in place while pouring the wax.
- Container – Glass or metal jar, mug, or tin. Match the wick size to the diameter.
- Ruler – To measure and center the wick.
Other helpful items include a thermometer, double boiler, and candle dye or fragrance if desired.
Prepare the Wick
First, cut the wick to the proper size. The wick should be about 1⁄2 inch to 1 inch longer than the height of the candle container. For example, a wick for a 3 inch tall candle container should be cut to 3.5 or 4 inches long. Use clean, sharp scissors to make a straight cut. Avoid cutting with jagged edges, as that can lead to uneven burning.
Next, place the wick into a wick stick. This consists of a thin, pre-waxed piece of cardstock paper with a hole in the center for the wick to go through. This helps secure and center the wick. Thread the cut wick through the hole in the cardstock paper until it comes out the other side. If the paper wick stick has tabs, make sure they face down towards the base of the candle container.
Source: https://www.wikihow.com/Make-Candle-Wicks
Attach the Wick
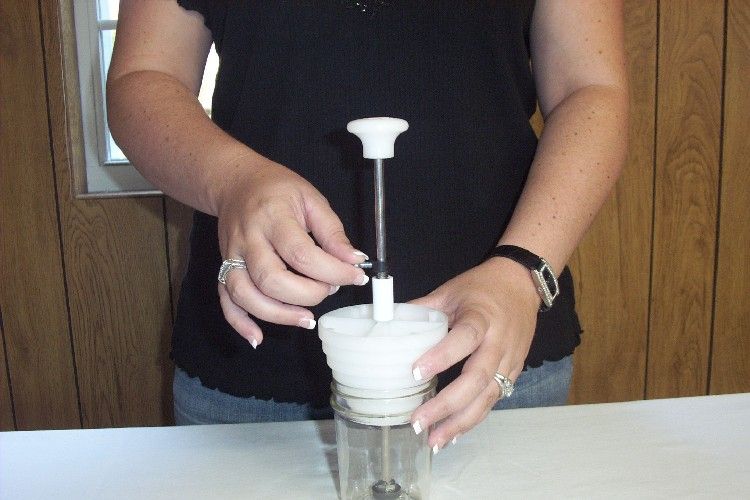
One key step in centering your candle wick is properly attaching it to the bottom of the container or candle mold. There are a couple different methods you can use:
Glue Dots: Apply a small glue dot, available at craft stores, to the bottom of the container. Then press the end of the wick onto the glue dot to adhere it. The glue dot will hold the wick in place when you pour wax into the container. Make sure to fully secure the wick so it doesn’t shift when pouring wax. Some candle makers recommend using high-temperature silicone glue dots meant for crafters.
Wax: You can also attach the wick with just wax. Melt a small amount of your candle wax and carefully apply a small drop to the bottom of the container. Then quickly press the end of the wick into the melted wax before it hardens. Hold it for about 10 seconds. The wax will cool and solidify, holding the wick firmly in place. This takes a bit of practice but avoids using glue.
Properly securing the wick to the bottom of the container is crucial for a centered wick. Take your time with this step and check that the wick stands straight up before pouring in wax. A centered wick will burn more evenly and prevent tunneling.
Source: https://suffolkcandles.co.uk/blogs/candles/how-to-secure-a-wick-in-a-candle
Center the Wick
Centering the wick is one of the most important steps when making candles to ensure proper burning. An off-center wick can create issues like tunneling, where the wax only melts around the wick and leaves the outer edges untouched.
To center the wick perfectly in a candle jar or other container:
1. Mark the exact center of the container by drawing a small dot with a pencil. Use a ruler to find and mark the midpoint on both the width and length of the container if needed.
2. Attach the base of the wick directly over the center dot using glue or a wick tab. The wick should now be positioned right in the middle of the container.
3. Visually check that the wick is centered from all angles using a ruler. Adjust the position slightly if needed until the wick is perfectly centered.
4. Let any glue or tab fully dry and secure the wick before proceeding.
With the wick placed squarely in the center of the container, it will heat and melt the wax evenly all around when lit. This allows the candle to burn properly down to the edges for full fragrance throw and an even look.
Source: https://cozyours.com/blogs/candle-making/different-ways-to-center-a-candle-wick
Heat the Wax
Properly melting the wax is a crucial step for centering the wick. The wax needs to be completely liquefied so it can be poured smoothly and evenly around the wick.
Heat the wax to the proper temperature according to the manufacturer recommendations, usually between 185-200°F (85-93°C). Most candle waxes melt between 150-170°F (65-75°C). Beeswax has a higher melting point around 144-149°F (62-65°C) [1]. Exceeding 200°F risks releasing toxic fumes or discoloring the wax.
Melt wax slowly on low heat, stirring occasionally. Microwave in short intervals, checking often. Use a thermometer to monitor the temperature and avoid overheating. The wax should be completely liquid with no lumps or crystals before pouring.
Maintaining the right temperature when melting the wax ensures it will flow smoothly around the wick for a perfect center every time.
Pour the Wax
Once the wax has reached the ideal pouring temperature, it’s time to carefully pour it into the container holding the centered wick. Pour slowly and evenly around the wick to keep it centered. Tilting and rotating the container while pouring can help distribute the wax evenly. The wax should be poured at a temperature between 180-185°F for paraffin wax, and 130-135°F for soy wax. Pouring too hot can cause the wax to shrink excessively as it cools, pulling the wick off-center. Pouring too cold can lead to imperfections on the surface. Maintaining the right pour temperature is key for keeping the wick centered as the wax sets.
As you pour, aim to keep the stream of wax about 1 inch away from the wick. This will prevent disrupting the wick’s placement. Pour in a circular motion around the wick to allow the wax to build up evenly on all sides. The circular pouring motion also helps prevent air bubbles from forming. Filling the container about 1/4 full to start, then letting the wax slightly setup before topping off the container is another technique to keep the wick centered.
Work slowly, and double check the wick position periodically as you fill the container. Adjusting a wick set in cooling wax can lead to cracks, so avoid this by taking the time to pour carefully and evenly from the start. With the right pour temperature, motion, and pacing, you can keep your wick perfectly centered as the candle takes form.
Cool and Set Wax
Once you have poured the wax into the container, it’s important to allow the candle to fully harden and cure before use. This cooling and setting process typically takes 24-48 hours. Be patient and resist the urge to light the candle right away, as this can lead to issues like tunneling.
As the wax cools, it will shrink slightly and pull away from the sides of the container. This is completely normal. To prevent cracks, avoid drastic temperature changes while cooling like moving the candle outside. Cool the candle in a room temperature area out of direct sunlight.
You can test if the candle is fully set by gently pressing on the top of the wax. If it still feels soft or sticky, allow for more cooling time. The top layer should feel solid and smooth when ready. Some makers recommend putting the candle lid on top as it finishes hardening to prevent dust or bugs from getting into the wax.
Be sure to cure soy or vegetable wax candles for at least 24 hours, while paraffin may only need 12. Curing allows the wax to fully solidify and the fragrance to stabilize within the wax. This helps ensure an even, long-lasting burn when the candle is lit. Refer to the manufacturer’s recommendations for exact cure times.
Trim the Wick
It’s important to trim the wick to 1/4 inch before lighting your candle for the first time. Long wicks can cause larger flames, which lead to uneven burning, tunneling, and dripping down the sides of the candle. According to The Harlem Candle Company, trimming the wick before each use can also help the candle burn evenly and prevent soot buildup [1].
Use scissors or a wick trimmer to snip the wick to 1/4 inch above the wax before lighting. Make sure the cut is straight and even. You can continue trimming the wick every 4 hours of burn time to maintain the proper 1/4 inch height [2]. This will help prevent excess soot and promote an even burn.
Maintaining a Centered Wick
While care is taken to center the wick perfectly when making a candle, the wick may still shift and become off-center as the candle burns down. Some potential causes of a wick moving off-center during burning include:
- The wick not being attached firmly enough to the bottom of the container during wicking.
- The wax shrinking or shifting unevenly as it cools.
- The candle holder being bumped or jarred.
- Drafts or uneven air flow causing the flame to move.
To help maintain a centered wick while the candle burns, it’s a good practice to periodically check the candle flame and re-center the wick as needed. When trimming the wick before lighting, check that it remains centered in the melted wax pool and adjust it if necessary. Gently straighten or re-position the wick so the flame will burn back to the center of the wax pool. Be very careful not to trim the wick too short. This periodic re-centering can help prevent or minimize issues like tunneling.
If significant tunneling occurs with the wick off-center in the melted wax pool, stop burning the candle. Once the wax has fully cooled and re-hardened, you can then use a wick dipping tool to re-center the wick before carefully trimming and relighting. For more tips on fixing and preventing tunneling issues, check out this helpful guide.