How Do I Start Making Natural Soap?
Natural soaps are made with plant-based ingredients like oils and herbs rather than synthetic detergents or chemicals. They offer several benefits over conventional soaps:
- Gentler on skin – Natural soaps are often moisturizing and contain ingredients that nourish skin.
- Environmentally friendly – Made with biodegradable ingredients that are less harsh on the environment.
- Customizable – Natural soaps can be personalized with various oils, colors, scents and textures.
- No harsh chemicals – Free of synthetic detergents, preservatives and artificial fragrances that can irritate skin.
- Sustainable – Handmade in small batches from renewable, ethically-sourced ingredients.
Making your own natural soap at home allows you full control over the ingredients while avoiding unwanted additives found in commercial soap products.
Ingredients
The main ingredients needed to make natural soap are oils and lye. Let’s take a closer look at each of the key ingredients:
Oils
Oils give soap its moisturizing qualities and contribute to the hardness, cleansing power, bubbly lather, and creaminess of the final bar. Some common oils used in soap making include:
- Olive oil – A conditioning, soothing oil that produces a mild, gentle bar of soap. Olive oil makes up around 20-30% of most soap recipes [1].
- Coconut oil – Adds cleansing, foaming lather, and hardness to soap. Usually makes up 15-30% of the oils in a recipe [2].
- Palm oil – Contributes hardness and cleansing qualities. Often used around 20% in recipes.
- Other common oils: sunflower, safflower, avocado, rice bran, almond, etc.
The combination and percentages of oils in a soap recipe significantly impact the final bar. Most recipes use a blend of hard, cleansing oils balanced by soft, conditioning oils.
Equipment
When making natural soap from scratch, you will need some basic equipment and tools. Here are the essential items you’ll need:
Soap Molds: The most common soap molds are made of silicone or wood. Silicone molds allow you to easily remove the hardened soap. Wood molds require lining with freezer paper. The mold determines the shape and size of your finished soap bars.
Mixing Bowls: You’ll need at least two heat-safe, non-reactive bowls – one for the lye solution and one for the melted oils. Glass, stainless steel or ceramic work best.
Digital Scale: Accurately weighing your ingredients is crucial for soapmaking. Invest in a digital kitchen scale that measures in grams.
Thermometer: A digital thermometer helps monitor the temperature of the lye solution and oils. Some recipes call for specific temps.
Stick Blender: An immersion blender makes quick work of combining the lye and oils. Look for one with a stainless steel shaft.
Spoons & Spatulas: Heat-resistant spoons and spatulas are useful for mixing and stirring.
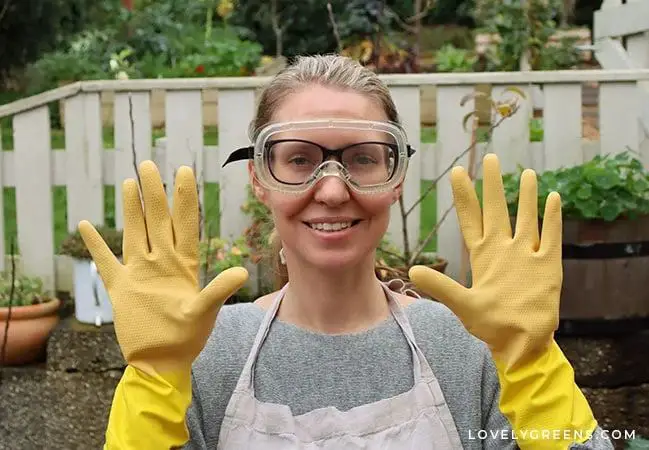
Safety Gear: Goggles, gloves, and an apron are essential for safely handling lye.
Safety
When working with lye, it is crucial to take proper safety precautions to avoid potential burns or other injuries. Here are some key tips:
- Wear gloves, goggles, and protective clothing when handling lye. Lye can quickly cause chemical burns if it touches bare skin or eyes (1).
- Work in a well-ventilated area since lye gives off fumes that can irritate lungs if inhaled (2).
- Never add water to lye, as this can cause a violent reaction. Always add lye to water slowly and stir continuously (1).
- Clean up any lye spills immediately using vinegar to neutralize it. Avoid breathing in the fumes (2).
- Keep children and pets away from your workspace while making soap.
- Have a vinegar-water solution nearby in case of contact with skin or eyes (1).
Taking proper precautions allows you to work safely with lye and avoid accidents. Investing in basic safety gear is well worth it!
(1) Life Saving Tips For Cold Process & Hot Process Soap Makers
(2) Soapmaking Safety Tips: Life Saving Video For Cold Process & Hot Process Soap Makers
Calculating Recipe
When making natural soap from scratch, the first step is calculating the proper recipe. This involves determining the right amounts of oils, water, and lye needed to saponify and create soap. Saponification is the chemical reaction between the lye and fats/oils that produces soap.
To calculate a recipe, you need to know the saponification values of the oils you plan to use. Each oil has a different saponification value based on its fatty acid content. You can find saponification charts online that list values for common soapmaking oils like olive, coconut, palm, etc. Some examples are at Modern Soapmaking and Sage Mountain.
Once you know your oil saponification values, you can use an online lye calculator to determine the amounts of oils, water and lye needed. Some recommended free lye calculators are SoapCalc, Bramble Berry, and Wholesale Supplies Plus. Be sure to double check your recipes.
Key factors in formulating recipes are the oil properties and the superfat/lye discount. The oils provide the hardness, cleansing, bubbly lather, etc. The superfat is the percentage of unsaponified oils for extra moisturizing. A 5% superfat is common. Reference saponification charts to select your oils and run them through a lye calculator. Tweak and experiment to create your ideal soap!
Mixing the Lye Solution
One of the key steps in making natural soap is mixing the lye solution. This involves slowly adding the lye to water and stirring until fully dissolved. Lye can be dangerous to handle, so it’s important to take proper safety precautions.
To mix the lye solution:
- Put on safety goggles, gloves, and protective clothing to avoid skin contact with lye. Work in a well-ventilated area.
- Weigh out the amount of sodium hydroxide lye needed for your recipe. Place the lye in a heat-safe plastic or stainless steel container. Glass is not recommended as it can crack due to the rapid heat generated.
- Measure out the correct amount of distilled or filtered water in a separate heat-safe container. The water amount is generally equal to the oil weight in your recipe.
- Slowly and carefully pour the water into the lye container. Never pour lye into water as it can violently splatter. Stir continuously as you pour.
- Stir using a stainless steel or heat-resistant plastic spoon until the lye fully dissolves and the solution is clear. This can take 5-10 minutes.
- Allow the lye solution to cool to around 100-110°F before adding it to oils.
By properly mixing the lye solution, you ensure the lye fully incorporates into the soap recipe for a safe, effective end product.
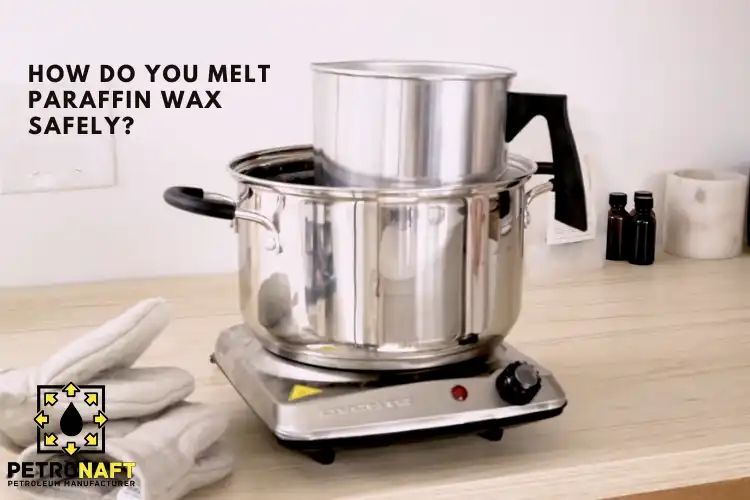
Melting Oils
When making natural soap, you’ll need to melt the oils and butters before combining them with the lye solution. It’s important to melt the oils slowly on low heat to avoid overheating. Here are some tips for properly melting oils for soap making:
– Use a double boiler or a heat-safe bowl set over a pot of simmering water to gently melt the oils. Direct heat can scorch the oils.
– Chop large pieces of oils and butters into smaller chunks before melting. This allows them to melt faster.
– Stir occasionally as the oils melt to distribute the heat evenly.
– Heat over low heat. Medium-high heat can cause the oils to overheat quickly.
– Melt until just liquefied. Don’t let oils reach temperatures over 120°F to avoid burning.
– Remove from heat immediately once completely melted.
– Check melting points if combining different oils. Melt the highest melting point oil first, then add lower melting point oils to evenly heat.
– Avoid scorching or cooking the oils! Burnt oils can discolor soap and create an unpleasant scent. Gentle, indirect, low heating is ideal.
Combining & Mixing
This is the most crucial stage of the cold process soapmaking process. Here, you will combine the lye solution and the melted oils/butters in precise amounts to facilitate the chemical reaction called saponification. This is where the soap comes together.
First, allow both the lye mixture and the oils/butters to cool to around 100-110°F. You want them to be within about 10°F of each other for best results. If one mixture is too hot it can cause the soap to “seize” and turn grainy.
Slowly and carefully pour the lye solution into the oils, gently swirling as you pour. Then, use a stick blender to mix the two together until they emulsify and thicken to trace. “Trace” is the thickened pudding-like consistency that tells you saponification has begun. Blend for 2-5 minutes. You’ll know the mixture has reached trace when you can drizzle a bit across the surface and it holds the pattern for a few seconds before sinking in.
At this stage, avoid blending too long or quickly overheating the mixture and accelerating the chemical reaction. Stick to short 5-10 second bursts of blending. Move the blender around to evenly incorporate the lye solution without creating hot spots.
Here are a few key tips when combining the lye and oils (from The Spruce Crafts):
- Add the lye to the oils slowly and gently stir as you pour.
- Use a stick blender to fully incorporate the lye solution into the oils.
- Blend in short bursts until it reaches a “light trace” consistency.
- Keep temperatures around 100-110°F for both solutions.
- Move the stick blender around to prevent overheating.
Properly combining and mixing the lye and oils is crucial for completing the soapmaking process and achieving a nice bar of handmade soap. Going slowly and carefully at this stage helps prevent issues like seizing or separation.
Pouring & Curing
Once the soap batter has reached trace, it’s time to pour it into molds. Make sure your molds are ready before mixing the soap
by cleaning and lining them. Slowly pour the batter into each mold, being careful not to create air bubbles. Once filled, gently tap the molds on the counter to release any trapped air.
Now comes the curing process. This is when the chemical reaction happens to turn the ingredients into true soap. Place the filled molds somewhere safe at room temperature, undisturbed, for 24-48 hours. This allows saponification to fully occur.
After 1-2 days, the soap can be removed from the molds. Place the bars on a drying rack, allowing airflow around each one. Curing takes 4-6 weeks during which the excess water evaporates, making the bars hard (Source: https://lovelygreens.com/how-to-cure-handmade-soap/). Patience is required at this stage. Test for hardness and monitor for drastic shrinkage before using the soap.
Customizing Your Soap
One of the best parts of making your own soap is being able to customize it to your liking. Here are some ideas for personalizing your soap:
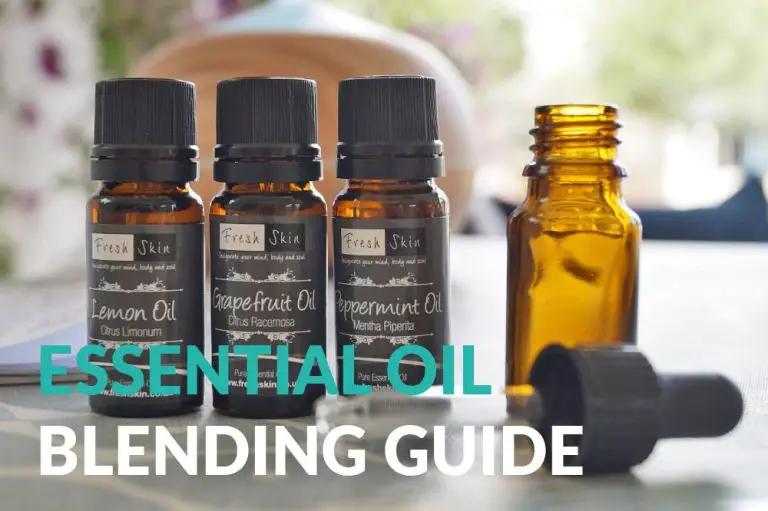
Adding scents – You can add essential oils, fragrance oils, or herbs and spices to scent your soap. Good options for essential oils include lavender, peppermint, tea tree, and lemon. Use 0.5-1 ounce of essential oils per pound of soap. https://www.thesprucecrafts.com/basic-soap-making-recipes-517179
Adding colors – Use liquid soap colorants, mica powder, herbs, spices, or clays to color your soap. Start with just a small amount, like 1 teaspoon colorant per pound of oils, and add more if needed. You can create beautiful swirls by layering colored soap batters. https://lovelygreens.com/change-customize-soap-recipe/
Adding exfoliants – Mix in dry ingredients like oats, coffee grounds, sugar, sea salt, or shea butter to give your soap an exfoliating texture. Use 1-2 tablespoons exfoliant per pound of oils. Massage the soap over skin to gently scrub away dead cells.
The options are endless when it comes to customizing handmade soap! Experiment with different oils, colors, scents, and additives to make soap that’s uniquely your own.