How Do I Get Dark Green Dye?
Dyeing fabric green is a fun and creative way to give new life to old or plain clothes and textiles. With some simple materials and techniques, you can easily dye fabrics a rich, dark green color from the comfort of your own home. There are several different methods for at-home fabric dyeing that allow you to customize the shade and pattern of green.
In this guide, we’ll cover everything you need to know to dye fabric dark green, from gathering supplies to specific dyeing techniques. Whether using your stovetop, microwave, or a dye bath, we’ll walk through each process step-by-step. With a little time and effort, you can give old garments, table linens, curtains, or any textile a fresh, emerald green makeover.
Gather Materials
When dyeing fabric at home, you’ll need to gather some common household items before getting started. Below are the main materials needed:
- Fabric – Make sure to use natural fibers like cotton, linen, silk, or wool which readily absorb dye. Polyester and nylon won’t work. Pre-wash the fabric.[1]
- Dye – Procion fiber-reactive dyes are recommended for beginners as they are easy to use and provide bright, colorfast results. Purchase powder dye in your desired shade.[2]
- Soda ash dye fixative – This chemical, also called sodium carbonate, helps the dye bond permanently with the fabric. It’s essential for dye fastness.[3]
- Salt – Table salt helps intensify and brighten colors. Non-iodized salt is best.
- Vinegar – White distilled vinegar serves as an acid regulator for dye baths.
- Pots and utensils – Stainless steel or enamel pots work well. Dedicate supplies only for dyeing.
- Gloves and apron – Dye can stain skin and clothing.
With these basic household items, you’ll be ready to move on to preparing your fabric for dyeing.
[1] https://www.dickblick.com/pdfs/catalogs/S13.pdf
[2] https://www.yumpu.com/en/document/view/6647368/free-dick-blick
[3] https://cdn.dickblick.com/pdfs/catalogs/E13.pdf
Prepare Fabric
Before dyeing, it’s important to properly prepare your fabric. Pre-washing and drying your fabric is recommended as it removes any dirt, oils or finishes that could prevent the dye from absorbing evenly. Make sure to wash the fabric in a mild detergent without any fabric softeners or dryer sheets [1].
For protein fibers like wool or silk, you’ll need to prepare the fabric differently than plant-based fibers like cotton. For wool, soak the fabric in a solution of distilled white vinegar and water prior to dyeing. The vinegar helps open up the fiber scales on wool so the dye can better penetrate the fibers [2]. For silk, use a mild detergent and cool water to wash. Start with cleaner rather than dirtier fabric for best results.
Make the Dye:
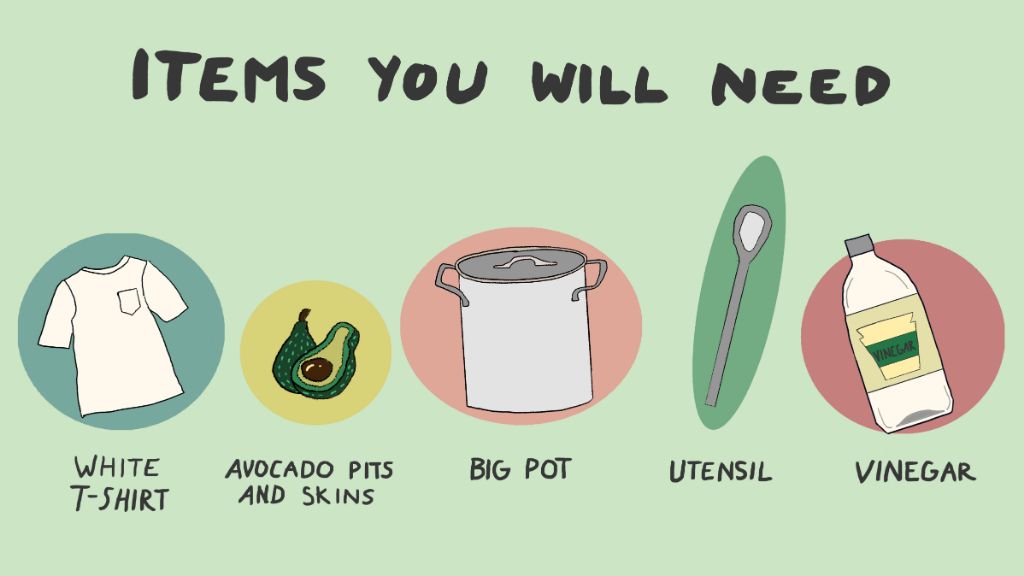
Making homemade natural dyes for fabric and other textiles is a fun DIY project that allows you to achieve beautiful green hues using common kitchen ingredients. Some easy options for making green fabric dyes at home include:
Frozen spinach: Combine 1 cup frozen spinach, 1 cup water, and 1/4 tsp baking soda in a saucepan. Bring to a boil, then reduce heat and simmer for 30 minutes until the liquid turns dark green. Strain out the spinach and you’ll be left with a rich green dye bath. Use a 1:1 ratio of dye bath to fabric for dyeing.
Avocado pits: Save pits from several avocados until you have around 10. Boil the pits in a large pot with enough water to cover for 45 minutes-1 hour. Strain and discard the pits. Add your fabric to the green dye bath and simmer for 1 hour. The color will get more intense the longer you soak the fabric.
Nettle: Simmer 1 cup of nettle leaves in 2 cups of water for 30 minutes. Strain the leaves and add pre-soaked fabric to the dye bath. Simmer for 45 minutes-1 hour until you achieve the desired shade. The longer you soak, the darker the green.
You can also mix dyes, like combining the yellow from onion skins with blue from red cabbage, to create different shades of green. Always use stainless steel pots for dyeing and wear gloves when handling plant materials to avoid stains on your skin.
Stovetop Dyeing Method
The stovetop method is a common way to dye fabric at home. Here are the steps:
1. Fill a stainless steel pot with enough water to fully submerge the fabric you want to dye. Stainless steel is recommended as it won’t react with the dye. Add 1-2 bottles of Rit All-Purpose Liquid Dye to the water, depending on how dark you want the color (source: https://www.ritdye.com/instructions/stovetop/).
2. Heat the dye bath to 140°F if using all-purpose dye. For other dyes, check the instructions on the package. As the water heats, stir constantly to fully dissolve the dye.
3. Wet the fabric in warm water first. Then place it in the heated dye bath. Make sure it is fully submerged.
4. Keep heating the dye bath, stirring constantly, for 20-30 minutes after it comes back to a gentle boil (source: https://www.tintex.ca/pages/stovetop-fabric-dyeing). The fabric will appear darker when wet.
5. Remove the fabric and rinse thoroughly in cool water until the water runs clear.
It’s important to be cautious when dyeing fabric on the stovetop. Wear gloves and work in a well-ventilated area. Avoid breathing in steam from the dye pot.
Bucket Dyeing Method
Bucket dyeing is another popular at-home fabric dyeing technique. Unlike stovetop dyeing where the dye bath is heated directly on the stove, with bucket dyeing the dye bath is prepared separately in a plastic bucket or other large container. The fabric is then immersed in the prepared dye bath.
According to instructions from RIT Dye, the basic steps for bucket dyeing are:
- Fill a plastic bucket with enough warm water to cover the fabric, using about 3 gallons of water per pound of dry fabric. The water temperature should be around 140°F. Heat water on the stove if needed to reach the ideal temperature.
- Add the desired amount of dye powder or liquid dye to the water and stir thoroughly until dissolved. Use enough dye for the amount of fabric according to package instructions.
- Submerge the damp fabric into the dye bath. Stir the fabric periodically for even dyeing. Soak for the time specified on the dye instructions, generally 30-60 minutes.
- Remove the dyed fabric and rinse thoroughly in cool water until the water runs clear.
Bucket dyeing allows dyeing larger batches of fabric compared to stovetop methods. It also gives more control over the dye bath temperature. However, it does require having a suitable container large enough to immerse the fabric. Overall, bucket dyeing is a simple and effective technique for dyeing fabric at home.
Sources:
https://www.ritdye.com/instructions/how-to-dye-using-the-sink-or-bucket-method/
http://www.bestdye.com/Bucket-Instructions.php
Microwave Dyeing
Microwave dyeing is possible but comes with some risks. The intense, direct heat from microwave radiation can potentially damage fabrics or cause uneven dyeing if not done carefully. However, it’s a much faster dyeing method requiring only 5-15 minutes total. Follow these precautions when microwave dyeing:
Use a dedicated microwave-safe container, as the dye may permanently stain other dishes. Glass or ceramic bowls work best.
Make sure the dye bath completely covers the fabric. The fabric must stay wet during the entire microwave time to prevent uneven heating.
Microwave in short intervals of 1-2 minutes, checking frequently. Allow time for the fabric to fully absorb the heated dye between sessions.
For consistent results, stop microwaving once the water reaches 180°F or light boiling. Check with a food thermometer.
Never microwave fabric dye with metal items like spoons or zippers, which can damage the microwave or cause sparks.
Wear heat-resistant gloves when removing containers from the microwave, as the dye liquid will be extremely hot.
To microwave dye fabric:
1. Add 1-2 tablespoons of dye powder or 1-2 packets of liquid dye to 1 cup of very hot water in a microwave-safe bowl. Stir to dissolve the dye.
2. Add your damp fabric and make sure it’s fully submerged.
3. Microwave on high in 1-2 minute intervals, checking frequently, until the dye bath reaches 180°F or light boiling. Allow the fabric to soak in the hot dye between sessions.
4. After the final heating, allow the fabric to soak for 5+ minutes. Check for even dye coverage.
5. Remove fabric and rinse thoroughly in cool water until the water runs clear.
Dyeing Tips
When dyeing fabric, it’s important to take some precautions to ensure success. Here are some useful dyeing tips:
First, always test your dye on a small swatch of fabric before dyeing a larger piece. This will allow you to see how the color develops and make adjustments to the dye bath if needed. It’s better to find out on a test swatch if the color isn’t quite right rather than ruining a whole project.
Make sure to stir your dye bath frequently during the dyeing process. This helps the dye circulate and absorb evenly into the fabric. Stirring regularly prevents uneven coloring or blotchiness.
Wear gloves! Dye can stain your hands, so protect them with rubber gloves. Rinse any spills or splashes off your skin immediately.
Follow the exact dyeing time recommended. Don’t leave fabric in too long or pull it out too soon. Setting a timer can help.
When immersion or vat dyeing, make sure the fabric is fully submerged and moving around in the dye bath. This allows maximum and even absorption of color.
Always wash dyed fabrics separately from other laundry at least the first time. Excess dye can run or bleed, so wash with similar colors.
These simple precautions will help you achieve beautiful, vivid and professional-looking results when dyeing fabric at home!
Rinsing and Drying
Rinsing thoroughly is a crucial step after dyeing fabric to ensure excess dye is removed. According to WikiHow, you should rinse the dyed fabric in cold water first. This allows any loose dye to slowly rinse out before washing, preventing the fabric from bleeding too much color. Rinse the fabric until the water runs clear.
Once rinsed, Sarah Maker recommends washing the fabric in hot water a couple times with detergent. This further removes excess dye. After washing, rinse again in cool water until water runs clear.
For drying, lay the fabric flat or hang it up to dry. Do not wring it out or place in the dryer, as this can cause dye to run. Let it air dry fully before wearing or washing again. Proper rinsing and air drying ensures the dye sets and your fabric retains its rich, vibrant color.
Conclusion
In this article, we covered the main methods for dyeing fabric green at home. This includes stove-top dyeing, bucket immersion dyeing, and microwave dyeing techniques. Each method has its own advantages – stove-top allows you to actively monitor the dyeing process, bucket dyeing lets you dye large batches, and microwave dyeing is the fastest option. The key steps we covered included preparing your fabric, making the green dye solution, adding fixatives, submerging your fabric, and properly rinsing and drying. I encourage you to get creative and try dyeing some old clothing or fabrics you have around your home. Adjust the dye quantities and immersion times to achieve light, medium or dark green shades. Dyeing fabric is an enjoyable way to refresh old items and give them new life!

