How Can You Make Wax For Candles?
Candle making dates back thousands of years, with the earliest use of candles attributed to the Ancient Egyptians who used rushlights made from pithy reeds soaked in animal fat. Throughout history, candles have served as one of the most common sources of artificial light in homes before the invention of electricity.
While methods and materials have evolved over time, wax remains the key component of candle making. When choosing the right wax, considerations include the melting point, texture, color, and scent compatibility. The wax provides the fuel source for the candle flame, allows fragrance and dyes to be incorporated, and enables the candle to be formed into different shapes and sizes.
This guide will provide an overview of making candles from start to finish, with a focus on understanding the different types of wax available and how to prepare, dye, scent, and pour wax to make quality candles.
Types of Wax
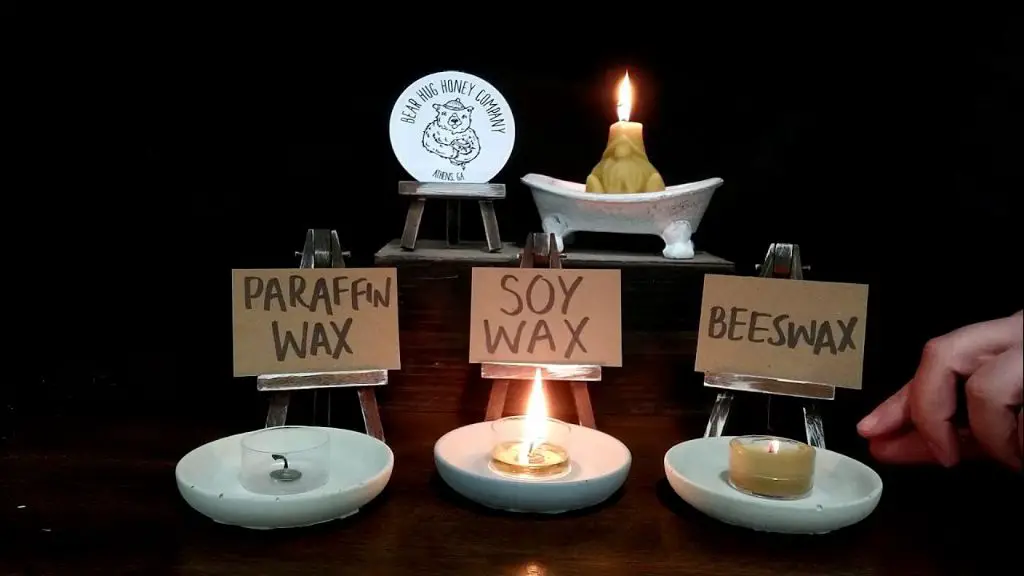
There are several different types of wax that can be used for candle making. Some of the most common types include:
Beeswax
Beeswax is a natural wax made by honey bees. It has a sweet, honey-like scent and creates candles that burn brightly and cleanly. Beeswax candles also have a longer burn time compared to other waxes. However, beeswax is more expensive and can be challenging to work with (https://shoparchipelago.com/blogs/blog/types-of-candle-wax).
Paraffin
Paraffin wax is a petroleum-based wax made from crude oil. It is the most commonly used candle wax due to its low cost and easy workability. Paraffin wax creates candles that burn long and slow with little smoke or residue. However, paraffin candles do not contain natural ingredients (https://fraendi.com/blogs/blog/best-wax-for-candle-making).
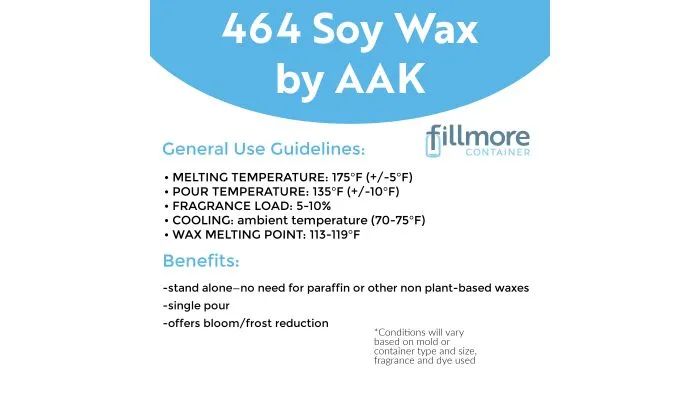
Soy Wax
Soy wax is made from hydrogenated soybean oil. It is a clean-burning, renewable and biodegradable wax. Soy candles have no petroleum ingredients and a lower melting point than paraffin. However, soy wax is softer and can be prone to frosting (https://www.marthastewart.com/8061950/candle-wax-type-guide).
Other Natural Waxes
Some other natural waxes used in candle making include coconut wax, palm wax, bayberry wax, and rapeseed/canola wax. These provide eco-friendly, non-toxic alternatives to paraffin, but may be more expensive or challenging to work with.
Choosing the Right Wax
When making candles, the type of wax you choose is one of the most important decisions. There are a few main options, each with their own pros and cons:
Paraffin Wax
Paraffin wax is derived from petroleum. It has a high melting point (130-150°F) which allows it to retain scent and burn cleanly. Paraffin is inexpensive and readily available (Candle Wax Guide). However, some consider it less environmentally-friendly than natural wax options.
Soy Wax
Soy wax is made from hydrogenated soybean oil. It has a lower melting point (115-135°F) so the scent may not throw as strongly. Soy wax is renewable and biodegradable, making it a popular eco-friendly choice (A Guide to Types of Candle Wax). It does cost more than paraffin.
Beeswax
Beeswax is harvested from beehives. It has a high melting point (140-150°F) and burns cleanly with a bright flame. Beeswax nicely holds both scent and color. However, it is one of the most expensive waxes, and can be challenging for beginners to work with.
Preparing the Wax
Cleaning and filtering the wax is an important first step in preparing wax for candle making. Impurities in the wax can lead to bubbling, discoloration, or irregular burning. One effective method is to heat the wax to melt it, then pour it through a coffee filter or fine screen to catch any debris (Source: https://blog.mountainroseherbs.com/how-to-make-your-own-candles). Cheesecloth or a mesh strainer can also work well for filtering melted wax.
When melting wax, bring it up to the manufacturer’s recommended temperature – typically between 150°F to 200°F. Higher temperatures can scorch the wax. Combine different types of waxes as needed while melted. Most candle makers recommend mixing waxes, such as adding 10-15% beeswax to paraffin wax. This helps modify properties like burn rate, scent throw, and viscosity. Thoroughly stir melted waxes to fully incorporate them. Check the temperature again before pouring the wax into containers or molds (Source: https://lonestarcandlesupply.com/prepare-wax-for-pouring/).
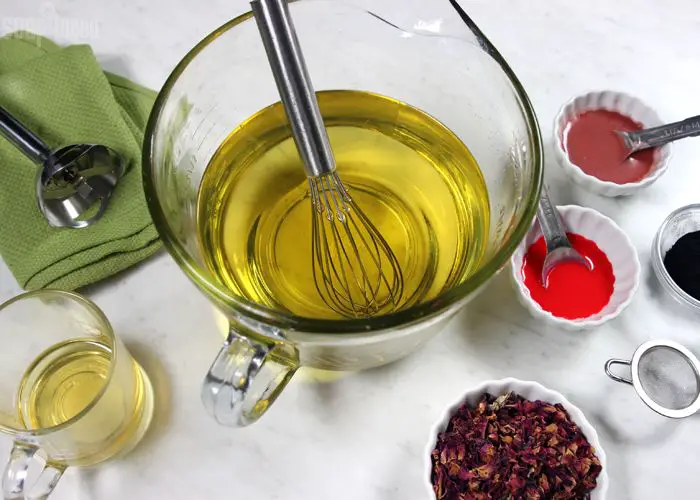
Adding Fragrances and Dyes
There are a few different options for adding scents and colors to homemade candles:
Fragrance Oils
Fragrance oils are specially formulated for candle making. They are mixed with a carrier oil so the fragrance will burn off evenly. Popular fragrances include floral, fruit, baked goods, and seasonal scents like pine or pumpkin spice. Use 0.5-1 ounce of fragrance oil per pound of wax. Adding too much fragrance oil can cause issues like soot or tunneling. Purchase fragrance oils from candle making suppliers like Brambleberry.
Essential Oils
Essential oils are very concentrated and give a nice natural scent. Since essential oils are thinner than fragrance oils, add a small amount like 0.1-0.3 ounces per pound of wax. Popular options include lavender, lemon, and peppermint. Essential oils are usually more expensive than fragrance oils.
Liquid or Powder Dyes
For coloring candles, liquid dyes give the brightest, boldest colors. Add just a few drops per pound of wax. Powder dyes are also available but produce more muted tones. Opt for candle-specific dyes from suppliers like Life and Reflection. Avoid using food coloring, which can clog wicks.
Preparing the Wick
Choosing the right wick is crucial for proper candle burning. The wick acts as the fuel line for the candle, so it must be sized appropriately for the diameter of the candle. Common wick materials include cotton, paper, zinc, and hemp.
For container candles 2-3 inches wide, a good starting point is CD 6-8 cotton wicks. For larger pillars 3-4 inches wide, CD 10-12 wicks work well. The wick should be approximately 1/3 the diameter of the candle. Too small of a wick can lead to drowning, tunnels, or poor flame production. Too large of a wick can create sooting or an uncontrolled flame.
Once you’ve selected the proper wick, it helps to tab or pre-wax the base so it stands upright while pouring candles. To tab a wick, dip 1-2 inches of the base in melted wax and let it dry before attaching it to the wick holder. The dried wax “tab” acts as an anchor to keep the wick centered as you pour wax into the container. This prevents the wick from falling over.
You can also find pre-tabbed wicks for convenience. Just make sure the tab fits snugly in your candle vessel before pouring.
Pouring the Candles
Proper pouring temperatures are crucial for a quality candle. Soy wax typically should be poured between 135-165°F to ensure proper pouring viscosity and complete melt pool coverage. Paraffin wax is often poured around 150-160°F. Double check your wax’s specifications before pouring.
Choose containers and molds carefully based on your desired candle design. Glass and metal containers work well for container candles. Silicone molds are popular for shaped candles. Clean containers thoroughly before pouring to prevent bubbles and adhesion issues.
After pouring, allow candles to cool completely before handling. This ensures the wax properly adheres to the container and achieves full opacity. Cool candles at room temperature out of direct sunlight. Soy candles may need 12-24 hours cooling time. Paraffin candles can fully cure within 4-6 hours. Be patient – never rush the cooling process.
For more tips, see: https://lonestarcandlesupply.com/prepare-wax-for-pouring/
Troubleshooting
Some common problems that can occur when making candles include:
Wet Spots
Wet spots, or “sink holes,” occur when an area of wax does not adhere properly to the container. This can be caused by pouring the wax at too high of a temperature or not allowing the wax to cool properly before pouring. To avoid wet spots, pour soy wax between 110-135°F and allow candles to cool completely undisturbed for at least 24 hours before re-pouring or adding a second pour [1].
Frosting
Frosting happens when wax crystals form on the surface of a candle. It can occur if the wax is cooled too quickly or jarred during the cooling process. To minimize frosting, cool candles slowly away from drafts and vibrations. Gently warming the candle with a heat gun can also help melt away some frosting [2].
Sooting
Sooting results from the wick being too large for the wax pool, causing incomplete combustion. Trim wicks to 1⁄4” before each burn to prevent excess soot. For severe sooting, scrape off the surface wax or replace the wick with a smaller size [1].
Storing Candles
Proper storage and curing are important for maximizing the burn time and scent throw of homemade candles. After pouring candles, allow them to cure for at least 1-2 weeks before burning. As the wax cools and sets, molecular crystals form which helps anchor fragrance oils and contributes to an even, full melt pool when burned. Storing candles in a cool, dry location between 55-80°F will prevent the wax from getting soft and losing its shape. Avoid storing candles in areas that experience temperature fluctuations or direct sunlight that may cause melting, sweating, tunneling, and fragrance loss over time. Consider storing candles in breathable containers like boxes or bags, while sealing especially fragrant candles more tightly.
According to Harlem Candle Company, things to avoid when storing candles include placing them near heating vents, ovens, or anywhere with excessive heat that may liquefy the wax (source). The fragrance may also dissipate more quickly if left in hot environments. Better Homes & Gardens also recommends storing candles away from cold drafts that can cause cracking or sweating as the wax contracts. Keeping candles in a closet or cupboard with stable temperatures around 60-72°F helps maintain the integrity of homemade candles between uses (source). Proper storage conditions ensure candles have a longer shelf life and provide the best performance.
Safety Tips
When making candles, it’s important to keep safety in mind to avoid injuries or accidents. Here are some key tips:
Working with hot wax can lead to serious burns. Wear long sleeves, pants, closed toe shoes and heat resistant gloves when pouring wax. Work slowly and carefully. Allow wax to slightly cool before pouring. Have a fire extinguisher on hand in case of spills or wax ignition. Keep a first aid kit nearby in case of burns.
Proper ventilation is critical when working with candle wax. Work in a well-ventilated area to allow wax vapors to dissipate. Open windows and use fans. Avoid breathing in wax vapors which can cause respiratory irritation. Take breaks to get fresh air if needed.
Practice fire safety when burning candles. Never leave a burning candle unattended. Keep candles away from flammable items like curtains or paper. Place candles in sturdy fireproof holders on a stable, heat-resistant surface. Burn for limited periods per the manufacturer’s guidelines. Extinguish candles when leaving a room or before sleeping. Keep out of reach of children and pets.