Can You Use Liquor Bottles For Candles?
The appeal of liquor bottle candles lies in their ability to repurpose and give new life to bottles that might otherwise be discarded. Turning liquor bottles into candles is an innovative way to transform an ordinary bottle into something creative and unique. Reusing the elegant and attractive shapes of wine and liquor bottles creates decorative candles perfect for enhancing any space. The nostalgic aesthetic of liquor bottle candles makes them popular options for adding cozy, vintage vibes to a room.
Liquor bottle candles allow the bottles from meaningful occasions or special memories to live on in a new form. They provide an opportunity to relive memories associated with the bottle each time the candle is lit. The scent, flicker of the flame, and sight of the bottle brings back fond recollections. For many, repurposing liquor bottles into functional home decor items gives them a second life and prevents waste.
Selecting Bottles
When choosing liquor bottles for candles, opt for glass bottles without paper labels. Clear glass bottles work best as they allow the candlelight to shine through beautifully. Avoid green or brown tinted glass as these can mute the candlelight. Look for bottles with interesting shapes like those used for vodkas, gins, whiskies or rums as they have more visual appeal than basic wine bottles. Standard 750ml and 1 liter liquor bottles are good sizes, but more unique, smaller bottles like those used for airplane bottles can also make nice candles.
According to Deconstructed Candles (https://deconstructedcandles.com/collections/liquor-bottle-candles), some excellent liquor bottles to use are those from Ketel One vodka, Bombay Sapphire gin, Patron tequila, and Jack Daniel’s whiskey. Their unique shapes and lack of paper labels make them perfect for upcycling into beautiful candles. Just be sure to remove any remaining glue from paper labels by soaking bottles in hot water before using.
Preparing Bottles
Before you can transform liquor bottles into candles, you’ll need to properly prepare the bottles. Here are the key steps for getting bottles ready for candle making:
First, wash and thoroughly dry the bottles. Use warm soapy water to clean the inside and outside. Make sure to rinse away any soap residue. Allow bottles to air dry completely before moving to the next step. Any moisture left inside can ruin your candle wax.
Next, you’ll want to remove any labels. Soak the bottles in warm water mixed with a little bit of vinegar or rubbing alcohol to help loosen the glue. Then use a plastic scraper to gently peel off labels. Avoid using metal scrapers or razors that could scratch the glass. For stubborn glue residue, try using cooking oil or nail polish remover.
After labels are removed, you’ll need to etch or sand the surface so the wax adheres properly. Use sandpaper, steel wool, or an etching cream specially made for glass. Rub the etching material against the bottle surface using circular motions. This roughs up the smooth glass surface so wax can grip it. Take care not to apply too much pressure, which can cause deep scratches or cracks.
Make sure to thoroughly wash bottles again after etching to remove any residue. The bottles are now prepped and ready for you to add wicks and wax to complete your upcycled liquor bottle candles!
Choosing Wicks
Selecting the right wick is crucial for getting the perfect flame and ensuring your bottle candle burns cleanly. There are a few key factors to consider when picking wicks:
Wick Types and Materials
Wicks come in different materials like cotton, paper, and wood. Cotton wicks are the most common choice for bottle candles. They’re affordable, easy to find, and burn cleanly without producing excess smoke or soot. Paper and wood wicks also work well, but may require more trimming during use.
You can also find wicks in different styles like cored, braided, and square. Cored wicks have a cotton strand wrapped around a stiff center for added structure. They’re good for holding their shape in melted wax. Braided wicks give a brighter flame and are less likely to bend. Square wicks offer high stability and are ideal for containers and jar candles.
Wick Sizing for Different Bottles
Choosing the right wick thickness is key. Thinner wicks (like size #1 or #2) work well for votives and narrow-necked bottles. Wider mouth jars and bottles can accommodate thicker wicks (like #4 or #6) since the flame has more room. Always match the wick size to the opening; too small and the candle may tunnel, too large and the flame will smoke and soot.
As a general guideline, opt for a wick approximately 1/3 the diameter of the bottle opening. Wicks that are too small for the container won’t melt all the wax, while oversized wicks can pose a fire hazard. Test different widths to find the perfect balance for each bottle shape and size.
Melting Wax
To melt wax for pouring into bottles, use a double boiler method. Fill a pot halfway with water and place it over low-medium heat. Place a glass or metal pouring pitcher in the water and add wax chunks, beads, or wax melts. As the water heats up, the wax will melt slowly.1
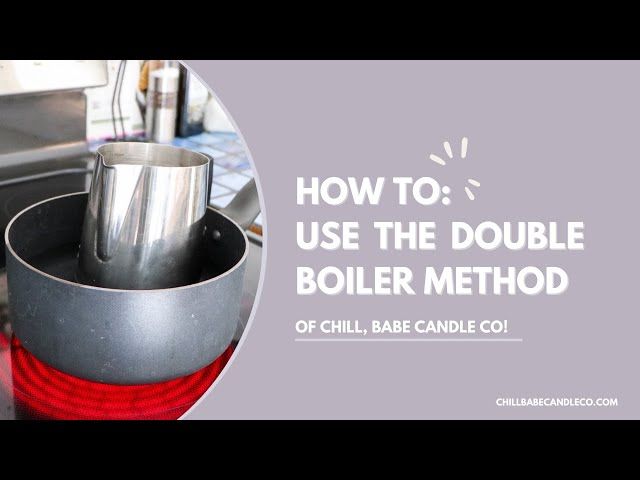
Stir occasionally with a wooden spoon or silicone spatula to help the wax melt evenly. The temperature of the water should remain around 180-200°F. Be very careful not to overheat the wax, as this can cause it to discolor or lose its fragrance.1
Good waxes to use for bottle candles are soy wax or a soy-paraffin blend, which adhere well to glass. Avoid 100% paraffin wax as it can sweat or leak from bottles over time. If adding fragrance oil, add .5-1 oz per pound of wax and stir thoroughly before pouring.2 Liquid candle dye can also be added starting with 1-2 drops per pound of wax.
Pouring Wax
Once the bottle is prepared, it’s time to pour the melted wax. When pouring wax into bottles, it’s important to account for shrinkage. As the wax cools and hardens, it will shrink and create empty space at the top of the bottle. To allow for this, only fill the bottle about three-quarters full with wax. This leaves room for contraction (source).
Pour the wax in layers, allowing each layer to fully cool and harden before adding the next. Pouring too much hot wax at once can cause cracking or damage as it cools. Let each layer cool for at least 2 hours before adding more wax. Insert the wick into the wax after each pour to keep it centered (source).
Adding wax in thin layers produces a smooth finish and helps prevent sinkholes. Take your time with the pouring and cooling process for best results. Patience is key for creating evenly filled wine bottle candles.
Finishing Touches
Once your candle wax has fully hardened and cooled, there are some final touches you can add to give your liquor bottle candles a more polished, decorative look. Here are some ideas for finishing off your homemade candles:
Trim the wicks to 1⁄4 inch length before lighting to prevent excess smoking and promote proper wax melting. Use sharp scissors or nail clippers to snip the wicks straight across.
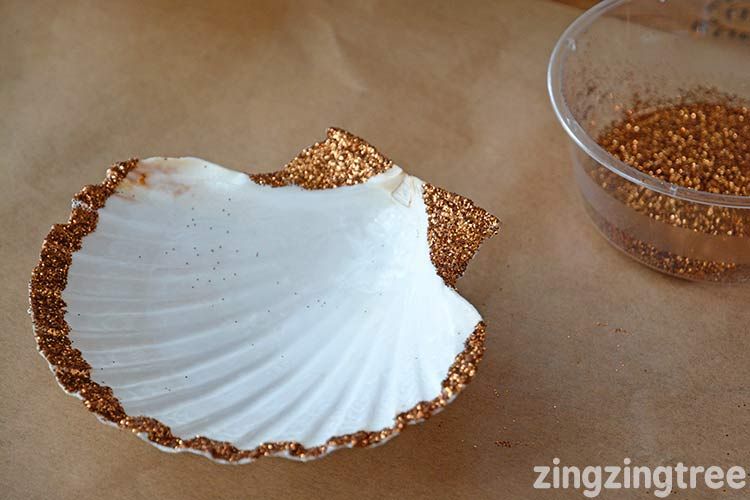
Add embellishments like raffia, twine, shells, beads, or dried flowers around the bottle neck to accessorize your candle holders. Get creative with different materials to personalize the look. Twine or raffia tied in a bow adds a nice rustic touch.
Make customized labels for your liquor bottle candles to give as gifts or identify the scent. Print or hand letter labels on cardstock, then adhere to the bottles with a glue dot or tape. List the candle scent as well as any special occasion or recipient’s name.
Cleaning the outside of the bottles also gives them a nicer polished appearance. Use mild dish soap and water, then wipe dry with a lint-free cloth. Avoid submerging the bottles to prevent water getting inside.
Safety Tips
When burning liquor bottle candles, it’s important to keep safety in mind. Here are some tips for safely enjoying your homemade candles:
Use a candle lighter to light the wick. This allows you to ignite the wick from a distance without risking burns. According to candlemaking forums, lighters are safer than matches which can break and fall into the wax (Source).
Avoid drafts which can cause the flame to tunnel down into the wax or glass. Don’t place liquor bottle candles near windows, vents or fans where drafts are common. Consider using a candle shelter or hurricane glass to protect the flame.
Never leave a burning candle unattended. Stay in the same room to monitor the candle. The bottoms of bottles can get very hot, so place the candle on a heat-safe surface. Extinguish the flame before going to sleep or leaving home.
Troubleshooting
Fixing tunnels:
Sometimes the wax around the wick will melt faster than the outer wax, causing a tunnel to form. There are a few ways to fix candle tunnels:
Heat the candle with a hair dryer or heat gun to melt the wax around the tunnel, then pour more wax into the hole to fill it while the wax is still liquid (https://www.reddit.com/r/explainlikeimfive/comments/56hezr/). Use a popsicle stick to hold the wick in place as you pour. Let cool completely before lighting.
Trim the wick so it’s 1/4 inch long before relighting to reduce excess heat. Tunneling often happens from having too long of a wick.
Relighting blown out wicks:
If the wick goes out in the wax while burning, use a long match or lighter to carefully relight it. Avoid excessively long wicks that will blow out often. Trim wicks to 1/4 inch before every use.
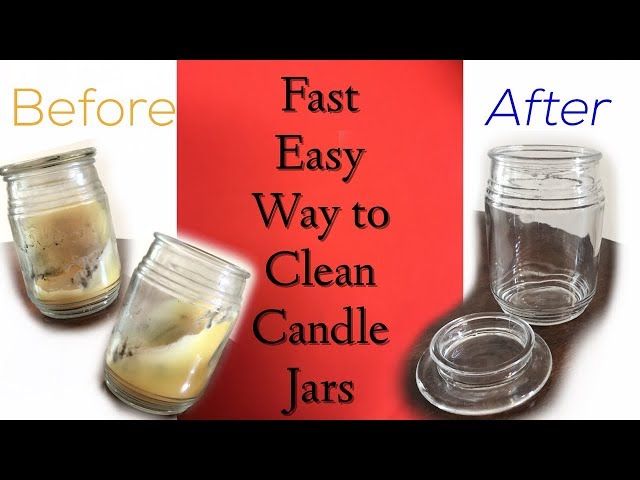
Removing wax from bottles:
To remove cooled wax from inside a bottle, first heat the bottle gently with a hair dryer or heat gun. This will help soften the wax. Then, use a narrow tool like a chopstick to scrape wax from the sides. Wipe away softened bits with a paper towel or rag. Avoid scratching or damaging the bottle when scraping.
Creative Ideas
Liquor bottle candles create a great opportunity for creativity in both bottle selection and display. Here are some ideas to spark your imagination:
Different bottle styles, shapes, and colors allow for lots of variety. Short and tall, skinny and wide – explore using differently shaped bottles together for visual interest. Clear and colored glass bottles offer beautiful options when the candle is lit. Mix and match colors and styles to create your own signature look.
Themed collections make for great gifts or ways to decorate your home. Make a set of candles using bottles from a certain liquor brand or type, like whiskey or wine. You can also create fun themes like “beer bottles of the world” or “margarita night”. Get creative with colors and scents that match your theme.
Arrange grouped candles in interesting ways to display them. Try clustering them on trays, hanging them at different heights, or alternating them with other decor items. Use lighting like string lights or lanterns to create a magical ambiance when your bottle candles are all aglow.