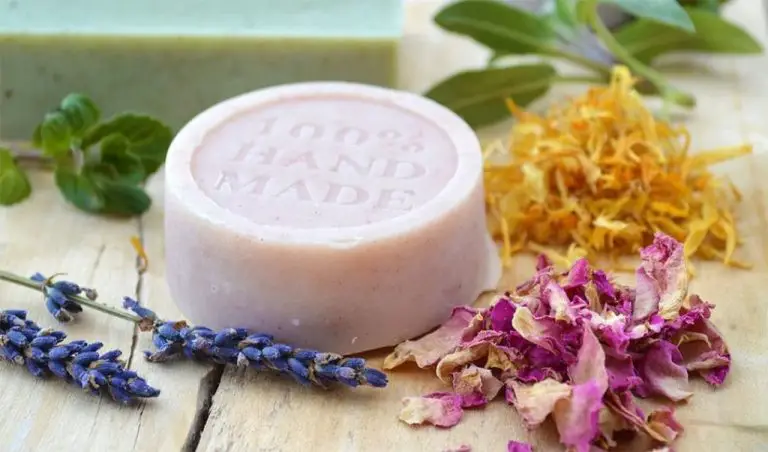
Can You Make Your Own Tea Lights?
Tea lights are small candles in metal or glass containers that are approximately 1 inch wide by 1⁄2 inch high. They get their name from their original use of heating teapots, but today they are popularly used in luminaries, candle holders, and on their own as small sources of light and ambiance.
Making your own tea lights allows you to customize colors, scents, shapes of the container, and other aspects. It can be a fun craft activity or hobby that results in beautiful candles you can use yourself or give as gifts. You also get more control over the ingredients, often at a lower cost than buying pre-made tea lights.
Making tea lights only requires a few inexpensive supplies, basic techniques like melting wax and preparing wicks, and imagination to decorate and scent them. With some trial and error, you’ll be making professional-looking and great-smelling tea lights to enjoy.
Supplies Needed
The main supplies you’ll need to make your own tea lights are:
Wax – The most common waxes used are paraffin, soy, or beeswax. Paraffin wax is derived from petroleum, while soy wax is made from soybeans. Beeswax is a natural wax made by honeybees. Each type of wax has different properties in terms of burn time, melting point, and environmentally friendliness.
Wicks – Pre-tabbed or pre-waxed wicks specifically made for container candles work best. The wick size should match the diameter of the container so it burns properly.
Containers – Small glass or metal containers like jars, tins, or votives are ideal. Make sure they are heat safe. The container’s opening should be wide enough for the wax and wick.
Fragrance Oils (optional) – Essential oils or candle fragrances can be added for scent. Use oils designed specifically for candle making.
Dyes (optional) – Candle dyes in liquid or block form can add color. Use dyes made for candle wax.
Choosing a Wax
When making your own tea lights, you have a few options for the type of wax to use. Here are some of the most common types of candle wax and their pros and cons:
Paraffin Wax
Pros:
– Affordable and widely available
– High melting point around 130-150°F
– Easy to use
Cons:
– Made from petroleum so not considered eco-friendly
– Can produce more soot
Soy Wax
Pros:
– Made from soybeans so renewable and biodegradable
– Low melting point around 115-135°F
– Produces less soot
Cons:
– More expensive than paraffin wax
– Can be trickier to work with
Beeswax
Pros:
– 100% natural from honeycomb
– Has a nice natural honey aroma
– Melts at around 140-150°F
Cons:
– Expensive compared to other waxes
– Limited supply
Each type of wax has different properties, so consider what’s most important to you. The melting point ranges are important to know for properly melting the wax. Paraffin and soy waxes are readily available at craft stores. Beeswax can be found at natural food stores or purchased from beekeepers.
Adding Fragrance
One of the best parts of making your own tea lights is choosing a beautiful fragrance. You’ll need to add fragrance oil or essential oils to your melted wax before pouring to give your tea lights their scent.
The general guideline is to use 1-2% fragrance oil per pound of wax. So for example, if you are melting 16 ounces (1 pound) of wax, you would add around .15 to .3 ounces of fragrance oil. Add on the lower end first, test the scent, and add more if desired.
You can simply drop the fragrance oil directly into the melted wax. However, for best results, first blend the oil with a teaspoon of melted wax before adding. This helps prevent the fragrance from sinking to the bottom or floating to the top of the tea light.
For a more natural scent, use essential oils like lavender, lemon, or mint in place of commercial fragrance oils. Since essential oils are more concentrated, only use .5 to 1% essential oil per pound of wax.
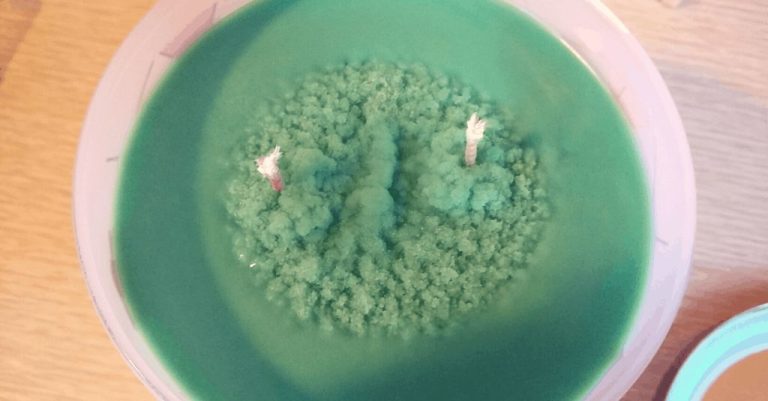
Coloring the Wax
There are two main methods for coloring your homemade tea lights – liquid candle dyes and color blocks. Liquid dyes provide more flexibility and control over the final color, while color blocks are easier to use. Here are some tips for each method:
With liquid dyes, start with just a few drops mixed into the melted wax. The color will get deeper the more you add. It’s best to add just a little at a time, stirring well after each addition. Too much dye can make the color overwhelming or uneven. For a standard tea light, usually 3-5 drops is plenty.
Color blocks are convenient because you just add them directly to the melted wax. However, it’s harder to achieve a precise color this way. The amount of dye released depends on factors like the wax temperature and how long the block soaks. In general, use 1-2 pieces per pound of wax. More will create a darker color.
No matter which colorant you use, make sure to stir well to distribute the color evenly throughout the wax. Continually check the color as you add more, until you achieve the desired tone and intensity.
Preparing the Wick
The wick is a crucial component of homemade tea lights. The right wick will ensure your tea light burns properly. Here are some tips for preparing the perfect wick:
Choose the right wick size. For standard tea lights, a #1 or #2 square braided cotton wick works best. The wick should be wide enough to absorb the wax as it melts but not so wide that it drowns the flame.
Center and stabilize the wick. Poke a hole in the bottom center of each tea light cavity before pouring the wax. Thread the wick through and pull it taut so it stands upright. Tie a knot or use a bead or washer to anchor the wick in place.
Trim the wick tab. Leave enough of a tab, about 1/2 inch, above the tea light cavity so it’s easy to light the wick. Trim the rest so the wick ends just below the top surface of the wax once poured.
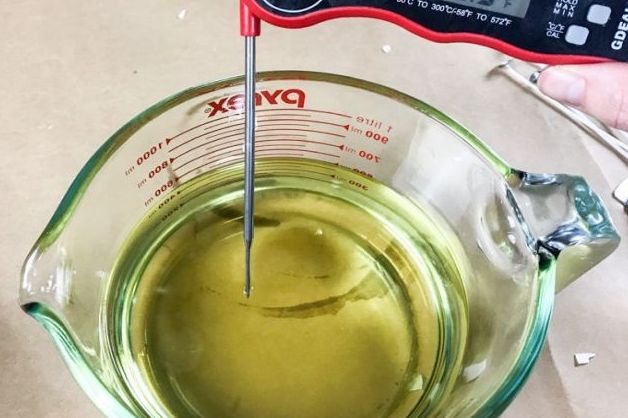
Melting the Wax
Melting wax requires careful temperature control to avoid overheating. The double boiler method is recommended for DIY tea lights. This involves placing your wax in a heatproof container set over a pot of simmering water.
Heat the water until it reaches 175-185°F. At this temperature range, the wax will fully melt without getting too hot. Going over 185°F risks discoloration, burning, and degradation of the wax. Stir the wax occasionally as it melts to maintain an even temperature.
Melt all the wax pieces fully before removing from the heat. Visible leftover wax chips means the melting process isn’t complete. Take care not to let the bottom of the container touch the simmering water, and watch closely to prevent boiling over.
Once entirely liquid, remove the wax container from the double boiler. It’s now ready for adding fragrance, coloring, and pouring into molds.
Pouring the Wax
Once you’ve melted the wax, you’ll need to carefully pour it into the tea light tins. The ideal temperature for pouring wax into tea light molds is between 150-165°F. If the wax is too hot, it can scorch or warp the molds as it cools. If it’s too cool, the wax may start to solidify before fully filling the molds.
Use a pouring pot or measuring cup with a spout to carefully fill each tea light cavity just shy of the rim. Allow the wax to cool for at least 2 hours before the second pour. Then, top off each cavity to ensure a smooth, level surface. The first pour creates the base of the candle, while the second pour tops it off once the wax has begun setting up.
Pour slowly and deliberately to prevent spills and splashing. Keep the pouring vessel close to the mold to minimize drips. Allow the filled molds to fully cool and harden overnight before removing the finished tea lights.
Troubleshooting Homemade Tea Lights
Making homemade tea lights is generally quick and easy, but you may run into some issues like sinking, cracks, or discoloration. Here are some common causes and fixes for problems with your final tea lights:
Sinking: This happens when the wax doesn’t properly adhere to the container. Causes include not waiting for the wax to cool enough before pouring, using too much fragrance oil, or choosing a container with a slippery surface. To prevent sinking, wait until the wax is below 175°F before pouring, use less than 1 oz of fragrance per pound of wax, and choose a container with a matte finish.
Cracks: Cracks occur when the cooling wax shrinks. Rapid temperature changes, inadequate wick support, and impurities in the wax can cause cracks. Avoid sudden temperature fluctuations, ensure the wick is centered, and filter melted wax before pouring to minimize cracks. Gently re-heat and re-pour cracked candles in clean containers.
Discoloration: This happens when dyes morph color at high temperatures. To fix, avoid mixing dyes and maintain wax under 200°F when adding color. If discoloration occurs, try adding a touch of vanilla extract to even out the tone.
With some trial and error, you’ll get the technique down for making perfect, professional-looking tea lights you’ll be proud to gift or display.
Decorating and Using
Once your tea lights have cooled and hardened, it’s time for the fun part – decorating and using them! Here are some ideas for making your homemade tea lights extra special:
Label or decorate the outside of the glass or metal tea light holders. You can use permanent markers, paint pens, stickers, ribbon, raffia, lace, or other embellishments. Get creative with colors, patterns, designs, and words that represent the scent, occasion, or intention for your candles.
Consider tying on tags with a message, poem, or blessing written. These make great gifts! Printable tea light labels are available online for free or for purchase.
To store finished tea lights, keep them in a cool, dry place away from direct light to help preserve the scent and color. Leaving lids off can help fragrances stay stronger.
When ready to use, place your homemade tea lights in appropriate holders – never burn them directly. Trim wicks to 1⁄4” before lighting to avoid getting too much smoke. Enjoy your custom creations!