Can I Make My Own Wood Wick?
What is a Wood Wick?
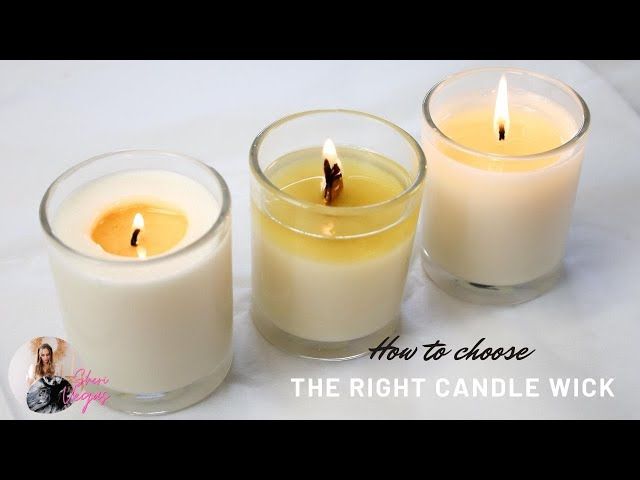
A wood wick is a special type of wick used in candles and wax melts that crackles when lit. Unlike regular cotton or paper wicks, wood wicks contain wood shavings or particles that are tightly wrapped in cotton threads. When the candle burns, the wood particles burn and crackle, creating a pleasant crackling sound.
The wood particles provide more surface area for the wax to melt and vaporize, allowing the candle to burn hotter and produce more fragrance. The crackling sound and dancing flame create a more visual and auditory sensory experience compared to regular wicks.
Wood wicks are made by taking natural wood shavings or sawdust and compressing them into a thick cord. This wood cord is then wrapped tightly in cotton threads to create the finished wick. Quality wood wicks will have an even distribution of wood particles throughout the wick for consistent cracking and burning.
While wood wicks can be purchased pre-made, many candle makers prefer to make their own custom wood wicks. Creating your own wood wicks allows you to control the wood type, thickness, and crackling level. With some basic materials and practice, you can easily make wood wicks at home.
Benefits of Wood Wicks
Wood wicks have several advantages over regular cotton or paper wicks that make them appealing for homemade candles. Some key benefits include:
Crackling Sound
As the flame burns the wood wick, it creates a natural crackling or popping sound reminiscent of a cozy fireplace. This audible charm is part of the sensory appeal of wood wick candles.
Better Scent Dispersion
The wooden knit pattern of a wood wick helps facilitate wax and fragrance oil movement through capillary action. This allows the scent to disperse more efficiently when burning compared to regular wicks.
Wooden Aesthetic
Wood wicks have an attractive natural appearance, adding visual interest and accentuating the homemade artisanal look of the candle. The wood grain visible at the top of the wick complements natural soy, beeswax, or other organic waxes.
Materials Needed
Making your own wood wicks from scratch requires just a few key materials:
Wooden Wick – The wooden wick is the core component that makes these candles unique. You’ll need wooden wick material, which can be purchased from craft stores or online suppliers. Look for 100% natural wooden wicks without any chemical treatments.
Wax – You can use standard candle waxes like paraffin, soy, or beeswax. Make sure to get wax with a melting point appropriate for your climate.
Fragrance Oils – Essential oils or candle fragrances are added to give your candle a nice scent. Use oils designed specifically for candle making.
Candle Jars and Lids – You’ll need a glass container to hold the melted wax. Make sure to get jars and lids that fit properly.
Thermometer – A thermometer with a clamp is useful for monitoring the wax temperature while melting.
Double Boiler – Use a double boiler pot to gently melt the wax at the proper temperature range to avoid overheating.
Choosing Wood
When selecting wood for your homemade wood wicks, you’ll want to consider a few factors:
Hard vs. Soft Woods – Hard woods like oak, maple, and hickory are denser and will burn slower and more evenly than softer woods like pine, cedar, or aspen. The denser hard woods tend to be better for wood wicks.
Grain – The grain of the wood impacts how quickly it absorbs wax. Wood with a tighter, straighter grain will absorb less wax, while wood with a more open, porous grain will absorb more wax. Typically a moderate absorption is best.
Moisture Content – Wood blank or dowel rods with too high a moisture content can crack or warp as the wood dries. Look for kiln dried wood blanks with a moisture content of 6-8% for the most stable wood wick material.
Opt for untreated, non-aromatic hard woods with a straight, moderately tight grain. Local woodcraft or hobby stores can be a good source for small wood dowels or blanks suitable for homemade wood wicks.
Making the Wick
Once you have chosen your wood, the next step is preparing it to become a wick. This involves cutting the wood to the proper size, sanding it smooth, and treating it so it will burn properly.
First, cut your wood into thin strips using a sharp knife or fine saw. The strips should be approximately 1/8 to 1/4 inches thick. Cut them into 6-8 inch lengths to start. You can always trim them down later if needed.
Next, sand the wood strips. Use a fine grit sandpaper, at least 120 grit or higher. Sand them until the wood feels smooth and any rough edges are removed. The smoother the wood, the better it will burn.
After sanding, you’ll want to treat the wood to help it burn slower and more evenly. There are a few options for treating. You can soak the wicks in a borax solution overnight, brush them with a borax and water paste, or quickly pass them through a flame to carbonize the wood slightly. Treating them will reduce any unwanted smoking or popping sounds when the candle burns.
Once treated, your wooden strips are ready to become wicks! Cut them to size based on the candle or container you are making.
Choosing Wax
When making your own wood wicks, you have a few options for which type of wax to use. The most common waxes for candle making are paraffin, soy wax, and beeswax. Each has its own pros and cons to consider.
Paraffin wax is derived from petroleum. It’s relatively inexpensive and makes a good hard candle with a high melting point. However, paraffin releases more soot and fumes when burning compared to natural waxes. Some find the scent unpleasant.
Soy wax comes from soybeans. It’s a renewable and sustainable resource. Soy wax makes a smooth, clean-burning candle, though the melting point is lower than paraffin so soy containers can’t hold tall pillars. Soy wax also needs to be heated to a higher temperature for pouring.
Beeswax is all-natural wax made by honeybees. It has a lovely honey aroma when burning and produces minimal soot and smoke. Beeswax candles burn brighter and longer compared to paraffin or soy. However, beeswax is quite expensive and difficult to source.
Consider your priorities – cost, performance, and sustainability when choosing which type of wax to use for making wood wick candles. Many candle makers use a blend of waxes to get the desired properties. Test out different wax combinations to find your perfect homemade wood wick candle.
Adding Scent
One of the best parts of making your own wood wick candles is choosing your own custom scents. You can add fragrance using synthetic fragrance oils or natural essential oils.
Fragrance oils are artificially created scents designed for candle making. They come in an endless array of options from fruits and flowers to baked goods and seasonal scents. Fragrance oils tend to be stronger than essential oils and more cost effective since a little goes a long way. Use .5 to 1 ounce of fragrance oil per pound of wax.
Essential oils are distilled from plants and capture the plant’s natural aroma. Popular options include lavender, eucalyptus, peppermint and lemon. Essential oils are often preferred by people looking for a more natural scent. Since they are not as strong as synthetic fragrance oils, use 1-2 ounces of essential oil per pound of wax.
No matter which scent option you choose, do not exceed the recommended usage rate or the fragrance may seep through the wax and make the candle unpleasant to burn. Test different scent combinations in small batches to find your perfect custom candle scent.
Melting and Pouring
Use a double boiler to melt wax at the proper temperature. Don’t heat the wax too far beyond its melting point or it could scorch. For candles, the wax temperature should be between 150°F to 180°F, depending on the wax type. Soy wax melts at lower temperatures around 115 to 135°F. Some melt and pour bases have even lower melting points around 110 to 130°F.
Slowly pour the melted wax into the container holding your wick. Pour from a height of a few inches above the jar to prevent bubbles. Fill the jar most of the way but leave room at the top for the melted wax to pool out when the wick is lit.
Allow the wax to cool completely before moving the finished candle. This will take at least a few hours. Some waxes like soy and paraffin will need 6-12 hours to fully set up and cure.
Curing and Testing
Once your candles have been poured and left to cool and harden, the next step is to test them to ensure they burn properly before use. Allow the candles to cure for at least 24-48 hours after pouring to allow the wax to fully set up and stabilize. Longer cure times can result in an even better burn. Here are some tips for curing and testing your homemade wood wick candles:
Cool the candles away from drafts and direct sunlight. This helps prevent cosmetic issues like frosting, sweating, and sinkholes. Let candles cool undisturbed at room temperature. Once cooled and hardened, you can move the candles if needed.
To test the wick, do a burn test. Trim the wick to 1⁄4” length and light it, allowing it to burn for a few hours. Monitor the flame occasionally. An ideal flame will be steady, not smoking or sooting, and the top third of the flame will bend over slightly. If needed, trim the wick longer or shorter until the proper burn is achieved.
Burn tests help ensure your homemade candles burn cleanly and safely. Doing testing now prevents issues like tunneling and poor wax pooling when the candles are used. Be patient during testing and make wick adjustments as needed. This helps create candles that look and burn beautifully when lit.
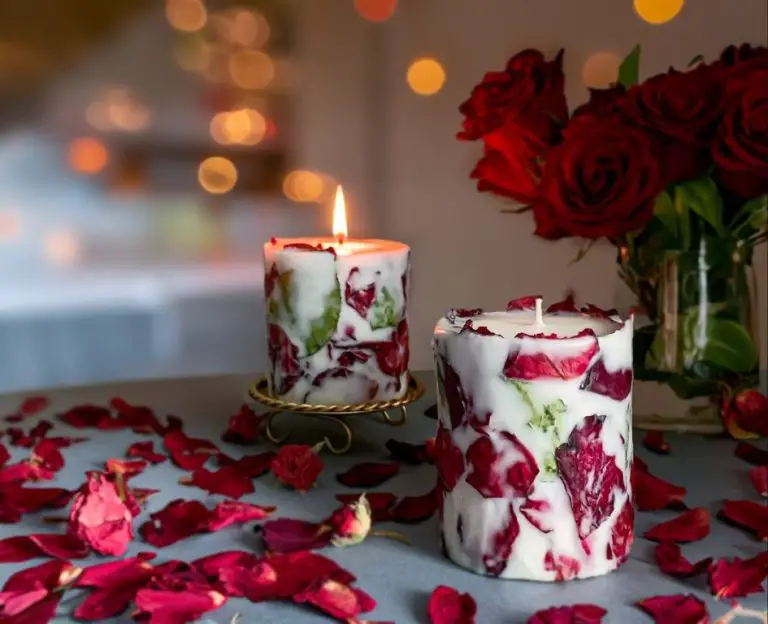
Decorative Touches
Once your homemade wood wick candle has fully cured, you can add some decorative touches to make it look extra special. Here are some ideas for embellishing your candle:
Add Labels: Design custom labels with your name, a cute saying, or artwork. Print them out and adhere to the outside of the glass container. You can find printable candle label templates online or design your own on your computer.
Attach Embellishments: Glue flatbacked gems, beads, buttons, or charms along the top edge or around the outside of the glass container. You can find all kinds of fun embellishments in craft stores. Space them evenly for a clean, stylish look.
Get creative with different decorative touches like raffia, twine, pinecones, sand, seashells, dried flowers, and more. The options are endless for making your homemade candle look special.