Can You Make A Mason Jar Into A Candle?
Transform an Ordinary Mason Jar into a Lovely Candle
Candles make a wonderful addition to any home. Not only do they provide a lovely glow, but they can also fill a room with a delightful scent. While you can certainly buy candles at the store, making your own candle can be an extremely rewarding DIY project. Turning a mason jar into a candle is an easy way to create a customized, homemade candle on a budget.
In this guide, we’ll walk through the simple steps for transforming an ordinary mason jar into a beautiful scented candle. We’ll cover everything you need to know, from prepping the jar to melting the wax to adding customized scents. You’ll learn tips for choosing the right wax, wicks, and fragrance so you can create stunning candles with your favorite scents. Whether you want to make homemade gifts or simply decorate your home, this guide will show you how to make professional-looking candles using supplies you likely already have at home.
What You’ll Need
To make a mason jar candle, you’ll need just a few simple supplies:
- Mason jars – These are the glass jars that will hold the candle wax. Canning jars work well. Make sure they are clean and dry before using.
- Wax – The most common waxes used are soy wax, beeswax, and paraffin wax. Soy wax is often preferred as it’s natural and clean burning. Beeswax also burns cleanly but can be more expensive (source).
- Wicks – Pre-tabbed candle wicks work best as they have an adhesive tab that sticks to the bottom of the jar. This helps keep the wick centered as the wax hardens.
- Fragrance oil (optional) – Essential oils or fragrance oils can be added to scent your candle. Start with 0.5-1 ounce of fragrance per pound of wax.
- Decorations (optional) – You can decorate the outside of the jar with twine, ribbons, dried flowers or other embellishments. Make sure decorations are securely attached before pouring wax.
These basic supplies are all you need to transform a mason jar into a lovely homemade candle. The process is quite simple as you’ll see.
Prep the Jar
Before you can make a candle in a mason jar, you’ll need to thoroughly clean and dry the jar. Any dirt, dust, or moisture left inside can affect how well the wax adheres to the glass. According to https://makethisuniverse.com/blogs/the-diy-minute/3-ways-to-clean-your-used-candle-jars, one of the easiest methods is to fill the jar with boiling water, which will melt away any old wax or residue. Allow the jar to fully dry upside down on a towel before moving to the next step.
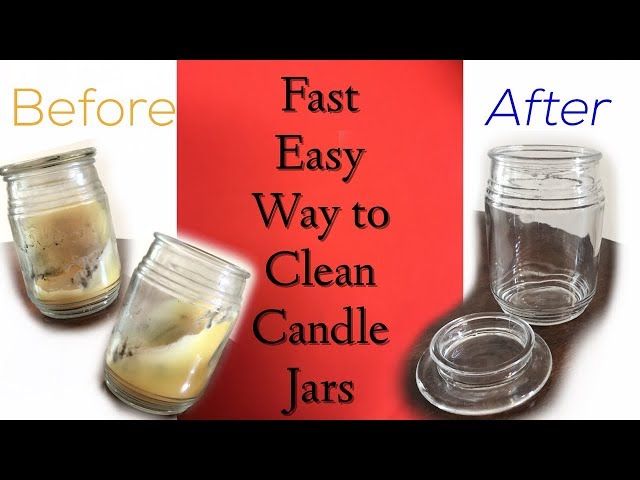
You’ll also want to remove any labels or glue from the outside of the jar, as this can become a fire hazard. Use a razor scraper, steel wool, or warm, soapy water to get rid of any stickers or residue. Make sure the jar is completely clean and dry before adding wax.
Choose Your Wax
There are a few main types of wax that can be used to make candles in mason jars:
Paraffin Wax
Paraffin wax is derived from petroleum. It’s inexpensive and easy to find. The pros of paraffin wax are that it holds fragrance well and produces a bright, long-lasting flame. The cons are that it can release more smoke and soot as it burns compared to natural waxes (source). Paraffin wax melts at 130-150°F. Use a smaller wick with paraffin wax.
Soy Wax
Soy wax is made from hydrogenated soybean oil. It’s a renewable and environmentally-friendly choice. The pros of soy wax are that it has a lower melting point, produces less soot, and blends with essential oils well. The cons are that it doesn’t hold fragrance as long as paraffin. Soy wax melts at 115-135°F. Use a larger wick with soy wax.
Beeswax
Beeswax is a natural wax produced by honey bees. The pros are that it’s all-natural and produces less smoke as it burns. The cons are that it is more expensive and challenging to work with. Beeswax melts at 143-170°F. Pair beeswax with a larger wick.
Add Decorations
Decorating your mason jar candle adds personality and makes it a fun DIY craft. Some popular decorating ideas include:
Dried flowers – Press or glue dried flowers like lavender, roses, or baby’s breath to the outside of the jar for a natural, floral look. They’ll add beauty and fragrance (source).
Glitter – Add some sparkle by coating the outside of the jar with glitter glue or glitter paint. Let it dry fully before pouring wax (source).
Seashells – For a beachy vibe, attach seashells around the jar using hot glue. Real seashells or even fake ones work great.
Paint designs – Get creative by painting patterns, shapes, stripes, or words on the outside of the jar. Use acrylic craft paint and let dry before adding wax.
Washi tape – Wrap colorful strips of washi tape around the jar for a bold, graphic look. The wax won’t stick to the tape.
Prepare the Wick
Determining the proper wick length and securing it to the bottom of the jar are important steps when making mason jar candles. The wick length impacts how well your candle burns. As a general rule, the wick should be approximately 1 to 2 inches longer than the height of the jar so that it sticks out of the melted wax pool to burn properly.
To prepare the wick, first cut your candle wicking to the desired height based on your jar size. Next, adhere the wick to the bottom of the clean, empty jar using hot glue or another strong adhesive. Make sure the wick is centered and straight. Some people prefer using a hot glue gun to secure the wick since the glue dries quickly. Let the adhesive cure fully before pouring wax.
Properly preparing the wick helps ensure your homemade mason jar candle will burn evenly all the way to the bottom of the jar. Taking the time to determine the right wick length and firmly adhere it to the glass bottom is an important first step in the candle making process.
Melt and Pour Wax
When making candles in mason jars, you’ll need to melt wax to pour into the jar. There are a few common methods for melting wax:
Double Boiler Method
A double boiler gently melts wax using steam heat. Fill the bottom pot with a few inches of water and place wax in the top pot. Heat the water until the wax melts to the proper pouring temperature of 175°F – 185°F (according to Candlescience). The indirect heat prevents scorching.
Microwave Method
You can melt wax quickly in the microwave in short 1-2 minute bursts, stirring in between. Use a glass measuring cup and microwave wax for 1 minute, stir, then continue microwaving in 30 second increments until melted (about 175°F). Be very careful as wax can overheat and catch fire in the microwave (per Village Craft & Candle).
Pouring Temperature
Pour wax into the mason jar between 175°F – 185°F. This allows the wax to fully coat the inside of the jar before starting to harden. If wax is too hot, fragrance may burn off; if too cool, wax could harden too quickly and not adhere properly.
Add Fragrance
When making candles, you have two main options for adding scent – fragrance oils or essential oils. Fragrance oils are synthetic scents made for candle making. They offer a wide variety of fragrances, are affordable, and hold up well to the high heat of burning candles. Essential oils are from plants and more natural but can lose their scent when burned or be more expensive. For jar candles, fragrance oils are the most popular choice.
When using fragrance oils, a standard amount to use is 6-8% of the total weight of wax. So if your candle uses 10 oz. of wax, you would add 0.6 – 0.8 oz. of fragrance oil. Always weigh your wax and oil to get precise measurements. Too much fragrance can make the candle unsafe to burn or leave oily spots on the glass. Too little may lead to no scent at all. After adding the fragrance oil, be sure to stir slowly and thoroughly to fully incorporate it into the wax before pouring. This helps the scent throw become consistent throughout the candle. Some recommend letting the wax and fragrance mixture sit for 4-6 hours before pouring to allow it to fully bind together.
According to candle-shack.com, when working in metric units, use up to 10% fragrance for 100g of wax. And scandinaviancandle.com says 5-10% is a safe amount for soy wax candles. No matter what percentage you aim for, stir well to fully blend in the fragrance oil before pouring into jars.
Troubleshooting
Making candles may seem easy, but problems can still occur even when you follow all the right steps. Here are some common issues when making candles in mason jars, and how to fix them:
Fixing Sinkholes
Sinkholes are dents or holes that form in the center of the candle wax as it cools. This happens because the wax around the wick and edges cools faster than in the middle. To fix sinkholes, remelt the wax and pour additional wax into the hole to fill it. Allow the candle to cool completely before lighting to prevent more sinkholes (source: https://villagecraftandcandle.com/blogs/news/top-10-candle-making-problems-and-how-to-solve-them).
Removing Bubbles
Bubbles in candle wax are caused by air getting whipped into the wax while pouring. To remove bubbles, apply heat using a heat gun to make them rise to the surface. Let the wax cool slightly so it thickens, then smooth over the bubbles with a spoon or knife. Reheating too much can cause more bubbles, so heat gently (source: https://www.lifenreflection.com/how-to-fix-candle-problems/).
Wick Issues
Wicks that are too small can cause poor wax pooling, tunneling, or smoking. Wicks that are too large can create excess sooting. Trim wicks to 1⁄4 inch before lighting, and monitor flame. Adjust wick height or thickness if needed. Center wicks properly to prevent tunneling. Use wick stickers or support bars in large containers (source: https://www.lifenreflection.com/how-to-fix-candle-problems/).
Enjoy Your Candle!
Before lighting your new mason jar candle, it’s important to allow adequate curing time. Curing refers to allowing the wax to fully harden and settle after pouring. This helps ensure an even burn and longer burn time. Most experts recommend waiting at least 1-2 weeks before burning a new candle.
Once cured, mason jar candles typically have a burn time of 50-100 hours. According to Shackteau Interiors, a 16 oz mason jar candle has approximately 100 hour burn time, while an 8 oz candle has around 50 hours [1]. To maximize burn time, allow the wax pool to fully melt across the surface before extinguishing the flame.
For safety, keep the candle away from drafts, vents, windows and air currents. Trim the wick to 1⁄4 inch before lighting to prevent excess smoking. Never leave a burning candle unattended. Extinguish the flame if it gets too close to the jar’s rim. Enjoy your homemade mason jar candle and exercise caution as you would with any open flame.


