How Do I Craft Water Candles?
Water candles, also known as floating candles or pool candles, are a unique type of candle designed to float on water. As the name suggests, they are made from wax but contain internal components that allow them to float when placed in water.
The floating effect creates an ethereal and magical ambiance, which makes water candles popular for decorating pools, spas, bathtubs, and other water features, especially for romantic occasions. They also have a practical purpose of providing light and ambiance without the fire hazard of traditional candles around water.
Water candles date back centuries and were traditionally made by melting wax around materials like cork or wood to provide buoyancy. Modern mass-produced versions often contain paraffin wax shells around floating wicks, frames, or pillars. The floating component allows the flame to remain above the waterline as the candle melts down.
Their beautiful glowing effect on water has made water candles a staple for events, parties, and ambient lighting. They continue to grow in popularity as an affordable way to create a magical atmosphere around pools, spas, bathtubs, and ponds.
Materials Needed
The key materials needed to make water candles include:
- Wax – Paraffin wax is commonly used as it has a low melting point and is inexpensive. Soy wax or beeswax can also be used for a natural option.
- Wicks – Cotton or paper wicks work best as they absorb the wax and provide a consistent flame. The wick thickness should match the candle diameter.
- Jars or Containers – Heat-resistant glass jars or containers are ideal to hold the water and suspended wick. The jar opening should be wide enough for the wick.
- Dyes – Optional liquid candle dyes can be added to the wax to create colored water candles. Use food-grade dyes.
- Fragrance Oils – Essential oils or fragrance oils can provide pleasant scents. Use a small amount diluted in the wax.
These basic materials allow you to make simple but attractive water candles. The wax helps stiffen and support the wick while the wick absorbs wax to burn steadily when lit. The jars securely contain the water while keeping the wick upright and centered.
Preparing the Wax
The first step in preparing the wax is to choose the type of wax you want to use. Popular options include paraffin, soy, beeswax, or blends. Paraffin wax is commonly used for candle making because it is inexpensive and easy to work with. Soy wax is made from soybeans and is a renewable and environmentally friendly option. Beeswax produces candles with a natural honey aroma.
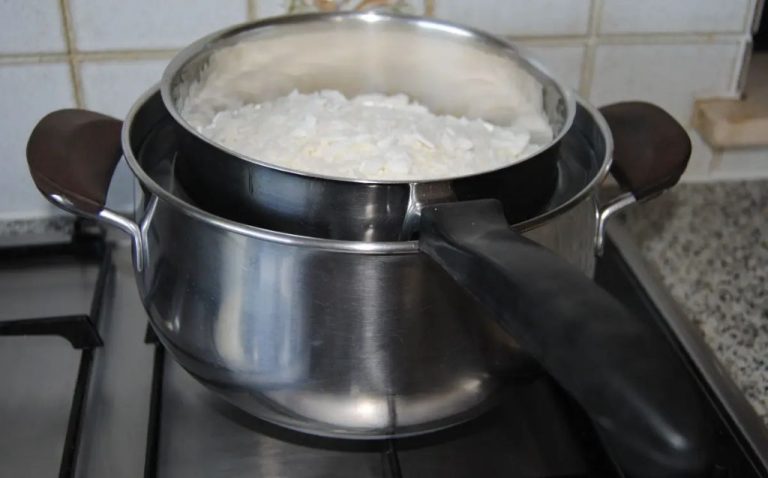
Once you’ve chosen your wax, melt it slowly on low heat. You’ll want to avoid overheating the wax, so melt it slowly and stir it frequently. Use a double boiler or a slow cooker set on low to gently melt the wax. The wax should be completely melted and liquified with no remaining pieces or clumps. Remove the wax from heat before adding any dyes or fragrances.
If you wish to color your candles, add liquid or powder dyes a little bit at a time, stirring to fully incorporate the color. Add essential oils or fragrance oils for scent, following the manufacturer’s recommended amount. Generally 1-2 ounces of fragrance oil per pound of wax is a good starting point. Stir thoroughly to evenly distribute the scent. Allow the wax to slightly cool before pouring into molds or containers. The wax should be around 125-165 degrees F when poured depending on the type of wax used (Mountain Rose Herbs).
Preparing the Wick
Proper wicking is essential for container candles to burn evenly and safely. The wick must be sized appropriately for the diameter of the candle container. A wick that is too small will produce a weak flame and leave wax unmelted, while an oversized wick can lead to sooting, mushrooming, or even a dangerous flare-up. Standard wick sizes range from #1 (small) to #16 (large). Refer to a candlemaking guide to determine the ideal wick width for your particular candle container size.
Once you have the proper wick, trim it to 1⁄2 inch longer than the depth of your candle container so it stands up above the melted wax pool. This extra length provides space for the wick curl to form as the candle burns. Use sharp scissors to cut the wick cleanly.
To anchor the wick in place while pouring, it helps to secure a metal wick tab around the base of the wick. Simply pinch the legs of the tab together with pliers to grip the wick. Position the tab in the center of the bottom of the candle vessel. The wick tab prevents the wick from moving around when the wax is poured.
For more details on preparing wicks, see the step-by-step instructions from WikiHow.
Setting Up the Mold
Before pouring the wax, you will need to set up the candle mold. Choose an appropriately sized container to hold the mold while pouring. Glass and metal work well as they withstand heat. Make sure the container is taller than your candle mold so wax does not overflow.
Next, secure the wick in place. For silicone molds, thread the wick through the hole at the bottom using a wick rod or needle. Pull it all the way through so the wick is centered. For plastic molds without a hole, anchor the wick to the bottom with hot glue.
Prepare the mold by coating the sides with a mold release like petroleum jelly so the candle releases easily. Only apply a thin layer as too much oil can disrupt the wax surface. Make sure to completely cover all sides and the bottom. Any overlooked spots may cause the wax to stick.
Your mold is now ready for the wax to be carefully poured. Work slowly and deliberately to prevent spills and splashing. Refrain from moving the mold until completely set. Proper wick placement and mold lubrication will ensure clean results.
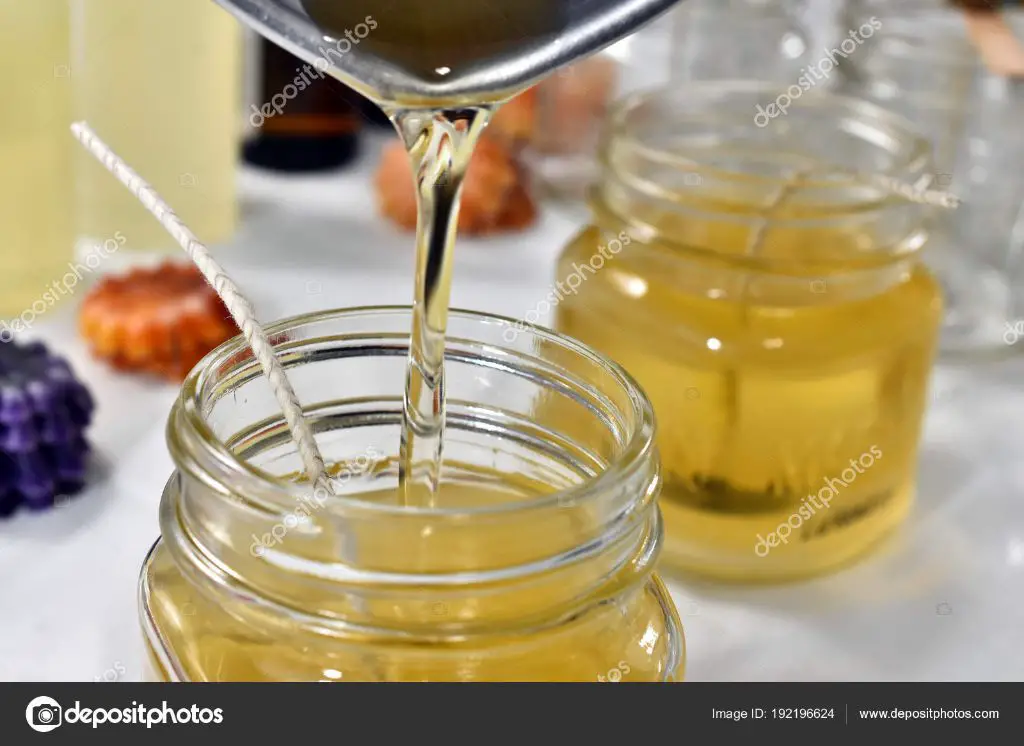
Pouring the Wax
The pouring process is very important for creating a high quality water candle. You’ll want to heat your wax to the proper pouring temperature – around 150-165°F is ideal for soy wax (How To Prepare Wax for Pouring). Pouring when the wax is too hot can cause issues like sinkholes or frosting on the candles as they cure. Allow the wax to slightly cool down from the melting point before beginning to pour.
Set up your mold on a flat, stable surface. Carefully pour the wax into the mold, going slowly and steadily in one spot rather than moving around as you pour. This helps prevent air bubbles. Pour to about 1/4 inch from the top of the mold. Allow the candles to cure undisturbed as they cool completely, which can take up to a few hours (Perfect Candles Every Time!! The Alex Method – YouTube). Do not try to rush the cooling process.
Unmolding and Finishing
Once the candle has cooled completely, which can take 6-8 hours, it’s time to unmold it. Start by gently loosening the edges of the candle with a butter knife. Then, turn the mold over onto a flat surface and tap it gently to encourage the candle to drop out. If it doesn’t release, firmly tap all sides of the mold.
If tapping isn’t enough, you can try placing the mold in the freezer for 15-30 minutes before trying again. The contraction of the wax from the cold temperatures should help release the candle. As a last resort, tug the wick very gently, taking care not to pull too hard and risk snapping the wick.
Once unmolded, use a sharp knife to trim the wick to 1⁄4 inch length. This helps prevent excess smoking and dripping when the candle is burned. Smooth any uneven spots or imperfections on the surface with a knife or file. Then wipe away any dust with a lint-free cloth before decorating or packaging.
Source: https://www.wikihow.com/Remove-a-Candle-from-a-Mold
Decorating and Packaging
One of the most fun parts of making water candles is decorating and packaging them. There are endless creative possibilities for making your candles look beautiful. Some popular decorating ideas include:
- Pressing seashells, sand dollars, starfish, or other beach-themed items into the wax before it fully hardens. This adds natural embellishments that go with the water candle theme. [1]
- Drying and pressing flowers or leaves into the wax as ornamentation. Dried lavender and roses are especially lovely. [2]
- Painting or drawing designs on the hardened candles with acrylic paint pens. Nautical themes like anchors, shells, or fish work well.
- Gluing on dried botanicals, seashells, stones, glitter, etc. for decoration.
When designing your packaging, opt for materials that fit the oceanic motif like burlap, seashells, sand, etc. Some creative packaging ideas include:
- Placing the candle in a glass jar and decorating the lid with shells or starfish.
- Bundling the candle in a net bag with other beach-themed items as a gift set.
- Packing it in a box or pouch made from burlap or recycled materials.
- Pairing it with natural elements like sand, shells, driftwood, or sea glass to make a stunning presentation.
With some creativity, you can make your water candles into beautiful, nautical works of art to enjoy or give as heartfelt gifts.
Troubleshooting
Making water candles can sometimes lead to issues like bubbles, sinkholes, or discoloration. Here are some common problems and solutions:
If you notice bubbles or holes in your candle, this is likely due to water droplets getting trapped in the wax as it cools. Try pouring your wax at a lower temperature around 150-165°F to reduce bubbles [1]. You can also try double pouring your candles in two layers to eliminate air pockets.
Sinkholes can form if the wax cools too quickly or the wick is too large. Use a slower cooling wax like soy wax rather than paraffin [2]. Trim your wicks to 1⁄4” before lighting to prevent excess melting. You can also re-melt and repour wax over sinkholes to fill them.
Discoloration can occur from fragrance oils, additives, or soot buildup. Use an appropriate vessel like aluminum for water candles, as tin can discolor wax. Make sure to give candles a full melt pool while burning to prevent soot [2]. Test fragrance oils for bleeding prior to use.
Usage and Storage
Water candles should be burned in containers of water to prevent the wax from melting onto surfaces. Make sure the candle is floating freely and not touching the sides or bottom of the container. Never leave a burning water candle unattended. Trim the wick to 1⁄4 inch before lighting to prevent smoking and promote steady burning. Water candles produce minimal smoke and can be burned indoors, but should not be left burning for more than 4 hours at a time.
To extinguish, gently slide the candle to the edge of the container and snuff out the flame. Store unused water candles in a cool, dry place out of direct sunlight. Keep them in their original containers with lids fastened. Avoid subjecting them to extreme temperature changes. Properly stored, water candles can last 1-2 years before the scent starts to fade.
Over time, water candles may develop frosting, discoloration, or lose their shape. This is part of the natural process as the wax expands and contracts. Gently reshape as needed. If the candle becomes too misshapen, it’s best to discard it. With proper care, water candles can provide many hours of tranquil ambiance.


