How Do You Melt Candle Wax Without A Warmer?
The purpose of this article is to explain the different methods for melting candle wax without using a wax warmer. Properly melting candle wax is an essential first step in candle making, as the wax needs to be fully liquefied before adding fragrance oils or pouring into containers. This article will cover gathering the necessary materials, preparing your workspace, cutting candle wax into smaller pieces, and melting the wax using a stove, microwave, or hot water method. We will also discuss testing the wax temperature and pouring the melted wax into containers. With the right materials and preparation, you can easily melt candle wax for candle making or other projects without needing a dedicated wax warmer.
Gather Materials
Before melting candle wax, you’ll need to gather a few basic supplies. The main item is, of course, the candle wax itself. Make sure you have enough leftover wax from used candles to make your desired melted wax projects. Scrape off any wick or other debris embedded in the wax before melting. You’ll also need an old pot or saucepan that you don’t mind getting wax in, as this will be your melting vessel. Avoid using any nonstick pans for this. Gather a heat-safe glass measuring cup and a spoon or spatula for pouring and stirring the wax. With the wax and supplies assembled, you’re ready to start melting.
Prepare Workspace
Before melting candle wax, it’s important to prepare your workspace properly. This involves clearing the area of any clutter and protecting surfaces from spilled wax. According to How to prepare your work space for candle making, you’ll want to cover your countertops with butcher paper or wax paper to guard against wax drips. The Scandinavian Candle article also recommends laying down old towels you don’t mind getting wax on. Make sure to have baking soda on hand as well – this can help clean up any wax spills quickly. Don’t forget to tie back long hair and remove any hanging jewelry that could get into the melted wax. The workspace should be clear of any appliances, dishes or other items that could get damaged. With the proper preparation, you’ll be ready to melt candle wax safely.
Cut Candle Wax
Cutting the candle wax into smaller pieces before melting makes the process easier and faster. Chunks of wax melt quicker than large blocks. Use a knife to cut off sections of the candle wax. Aim for 1-2 inch chunks, avoiding anything much larger. Lay the pieces out in preparation for the next step of melting. Smaller pieces also allow you to melt only the amount you need for a project. Leftover wax can be saved for later use.
As an example, one source recommends cutting wax into 1 inch cubes before melting in the microwave. This allows the wax to melt evenly and prevents scorching (Source). The chunk size helps maximize efficiency when melting the wax.
Melt in Water
One simple way to melt candle wax without a wax warmer is to use a double boiler method with water. To do this:
- Bring a pot of water to a boil on the stove. The pot should be large enough to place a glass measuring cup or metal bowl inside.
- While the water is heating, cut the candle wax into smaller chunks using a knife. This will help it melt faster.
- Place the cut candle wax pieces into a glass measuring cup or small metal bowl that fits inside the pot.
- Once the water is boiling, set the glass or metal bowl containing the wax gently into the water. Make sure no water gets into the bowl of wax.
- Stir the wax occasionally as it melts. The hot water will safely melt the wax without burning it.
- Once fully melted, carefully remove the glass or bowl containing the liquid wax using pot holders or oven mitts.
Melting candle wax in hot water provides gentle, even heat to smoothly liquefy the wax. Just be sure to use a bowl that can withstand boiling water temperatures. And always melt wax this way with supervision, removing it once fully liquefied. For safety tips, see source.
Melt on Stove
One of the most common methods for melting candle wax is using the double boiler method on the stove. This involves placing the candle wax in a heatproof container or pouring pot, then putting that container into a pot of simmering water (double boiler). It’s important to melt the wax over low heat, ideally between 120-150°F, to avoid overheating.
To melt wax on the stove:
- Fill a large pot about halfway with water and place it on the stove over medium-low heat. Bring the water to a gentle simmer.
- Place your hardened wax chunks, wax flakes, or grated wax in a smaller heat-safe container such as a glass measuring cup, pouring pot, or metal bowl.
- Set the smaller container inside the simmering water so it floats. Make sure the bottom of the smaller container does not touch the bottom of the pot.
- Stir the wax occasionally as it melts down. Remove the melting container if the water starts boiling.
- Once fully melted, check the temperature with a thermometer. It should be around 120-150°F. Turn off the heat.
- Carefully pour the melted wax into molds or containers as needed for candles or other projects.
The double boiler method brings the wax up to the proper temperature gradually and evenly. It helps prevent hot spots that could scorch the wax. Using low heat avoids overheating the wax beyond its flashpoint, which can create an unwanted smell or smoke. As an extra precaution, always watch the melting wax to prevent boiling over or spillover.
Melt in Microwave
One of the quickest and easiest ways to melt candle wax without a warmer is to use a microwave. When melting wax in the microwave, it’s important to heat it in short bursts and stir in between to prevent overheating.
Cut or break candle wax into small chunks no larger than 1-inch. Place the wax pieces in a microwave-safe container like a glass measuring cup or bowl. Microwave the wax on high in 30-second intervals, stirring vigorously in between each burst. Repeat until the wax is fully melted. The stirring helps distribute the heat evenly so no one section overheats.
Take caution not to heat the wax much beyond the proper melting point, which is generally between 120-170°F depending on the wax type. Overheating can burn the wax, creating an unpleasant smell and smoke. Melting too rapidly in the microwave can also cause splattering when the wax bubbles up quickly. Always monitor wax closely and stop heating if it begins to smoke. Stirring regularly prevents uneven hot spots.
With the right precautions, the microwave allows melting wax quickly without extra equipment. Just remember to heat in short intervals with stirring to avoid burning the wax. Test temperature periodically with a thermometer as microwaves can heat unevenly. And take care to avoid splashing melted wax when removing from the microwave.
Test Temperature
Before pouring melted candle wax into containers, it’s important to test that the temperature is ideal. The recommended pouring temperature for most candle waxes is between 175-185°F (79-85°C) according to https://lonestarcandlesupply.com/heating-and-pouring-waxes/. If wax is too hot, it can cause issues like sinkholes or frosting on the candle surface. If wax is too cool, it may set up too quickly and adhere poorly to the wick and container.
To test the temperature, you can use a thermometer specifically designed for wax and candle making. Look for a thermometer ranging from at least 100-200°F. Glass thermometers or digital thermometers with long probes work best to get an accurate reading of the melted wax. Submerge the probe into the wax, stir gently to evenly distribute heat, and wait for the temperature reading to stabilize before removing from the wax. The ideal target is 175-185°F to achieve the best pour.
Pour into Containers
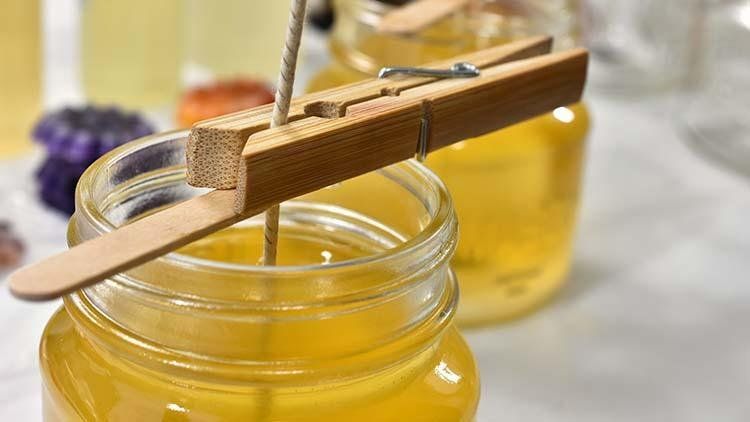
Once the wax has melted, it’s time to carefully pour it into containers. Pouring melted wax can result in spills so it’s important to go slowly and focus on preventing any messes.
Position your container on a flat, stable surface. Carefully pick up your melting container holding the wax and slowly begin pouring it into the container. Tilt the container gradually to control the pour. Go very slowly, especially when the container is almost full. Wiping the lip of the pouring container with a paper towel can help prevent drips running down the sides.
If pouring multiple containers, pour just a little wax into each one first before filling them up. This “primes” the containers so the wax adheres to the sides rather than immediately pooling at the bottom. Continue pouring the wax steadily in a circular motion until each container is filled to the desired level.
Allow the wax to cool and harden completely before moving the containers. The wax needs time to set so it doesn’t spill. Putting the containers in the refrigerator speeds up the cooling process.
Cleanup
After pouring your melted candle wax, you’ll want to clean up the leftover wax and supplies. Scrub any wax drips or spills while the wax is still warm, as it hardens quickly. According to reddit users on r/candlemaking, apply a wet soapy paper towel to any wax spills and it will help break down the wax so you can wipe it away. For any wax left on your wax melting supplies, allow them to cool completely and then the wax should peel off easily. If needed, you can place the supplies in the freezer for 10-15 minutes to harden the wax for easier removal.
Don’t throw away any unused melted wax! Pour it into a heat-safe container and allow it to harden. Then you can reuse this wax for your next candle making project. Properly storing leftover wax preserves the quality and allows you to reduce waste.

