What Not To Do When Making Candles?
Using the Wrong Wax
The type of wax used to make candles is extremely important for both safety and performance. One of the biggest mistakes beginner candle makers make is using the wrong type of wax. Paraffin wax, derived from petroleum, is commonly used for candle making because it is inexpensive. However, paraffin wax comes with some major downsides.
According to some sources, burning paraffin wax releases compounds like toluene and benzene into the air, which have been linked to asthma and cancer risks [1]. However, research on the health effects of burning paraffin wax has been inconclusive [2]. Regardless, paraffin wax is a byproduct of fossil fuels, which many environmentally-conscious consumers want to avoid.
Instead, consider using natural wax alternatives like soy, beeswax, or coconut wax. These natural waxes burn cleaner and are renewable and sustainable. Beeswax and soy wax, in particular, have excellent scent throw. Natural waxes also hold scent better over time compared to paraffin. Just be sure to use wicks specifically designed for the type of natural wax you choose.
Failing to Use Proper Wick
Using the right candle wick size is crucial for a properly burning candle. The diameter of the candle jar or mold determines the wick size that should be used. A wick that is too small for the candle diameter will not provide a full melt pool or allow the wax to burn efficiently. The flame will be weak, smoke, tunnel down the center, or go out completely. On the other hand, a wick that is too large will result in an overly large flame that creates soot, burns too quickly, or can even cause the candle to catch fire outside the container. As CandleScience notes, within a wick series, the larger the number, the larger the wick. So a CD-12 is larger than a CD-10.
To choose the proper wick size, consult manufacturer guidelines or a sizing chart based on candle diameter. It’s also a good idea to test wicks before mass producing candles to ensure you select the optimal wick for the wax, fragrance, and container. Testing involves burning sample candles for several hours and evaluating factors like melt pool diameter and flame height and brightness. With testing, you can dial in the perfect wick before committing to large-scale production.
Pouring at the Wrong Temperature
The proper pouring temperature is crucial for making quality candles. Each wax type has an optimal temperature range for pouring:
- Paraffin wax: 130-150°F
- Soy wax: 120-135°F
- Beeswax: 130-140°F
- Palm wax: 115-130°F
Pouring wax too hot can cause cracks, sinkholes, and discoloration as the candle cools and contracts. According to candlescience.com, pouring temperatures above 145°F for soy wax can cause issues.1
Conversely, pouring wax too cold can lead to imperfections and seams on the finished candle. The wax can start to solidify before fully covering the container. For soy wax, temperatures below 115°F are not recommended.2
Using a thermometer takes the guesswork out of proper pouring temperatures. Measure the temperature of melted wax before adding fragrance or dye to get an accurate reading. Carefully monitor the temperature as the wax cools to hit the ideal pouring range.
Not Allowing Proper Cure Time
Candle cure time refers to the period after candles are poured and cooled when no disturbance occurs, allowing candles to fully harden and stabilize. According to The Spruce Crafts (source), cure time enables the wax to completely solidify, essential oils and fragrance to fully blend, and allows air bubbles to rise to the top.
Why is cure time so crucial for candle making? As Blaze and Foam (source) explains, curing gives the wax time to form strong molecular bonds critical for proper burning and scent throw. Rushing this process can lead to issues like crumbling, cracking, bumps, sinkholes, and muted aromas. Allowing time for curing results in smooth tops, vivid scents, and stable structures.
Cure times vary depending on the wax type:
- Soy wax: 10-14 days
- Paraffin: 3-5 days
- Beeswax: 7-14 days
- Coconut wax: 3-5 days
Adhering to recommended cure times based on the wax produces the highest quality candles.
Using Low Quality Fragrance Oils
One common mistake when making candles is using low quality fragrance oils. Fragrance oils are used to provide candles with pleasing scents, but not all oils are created equal.
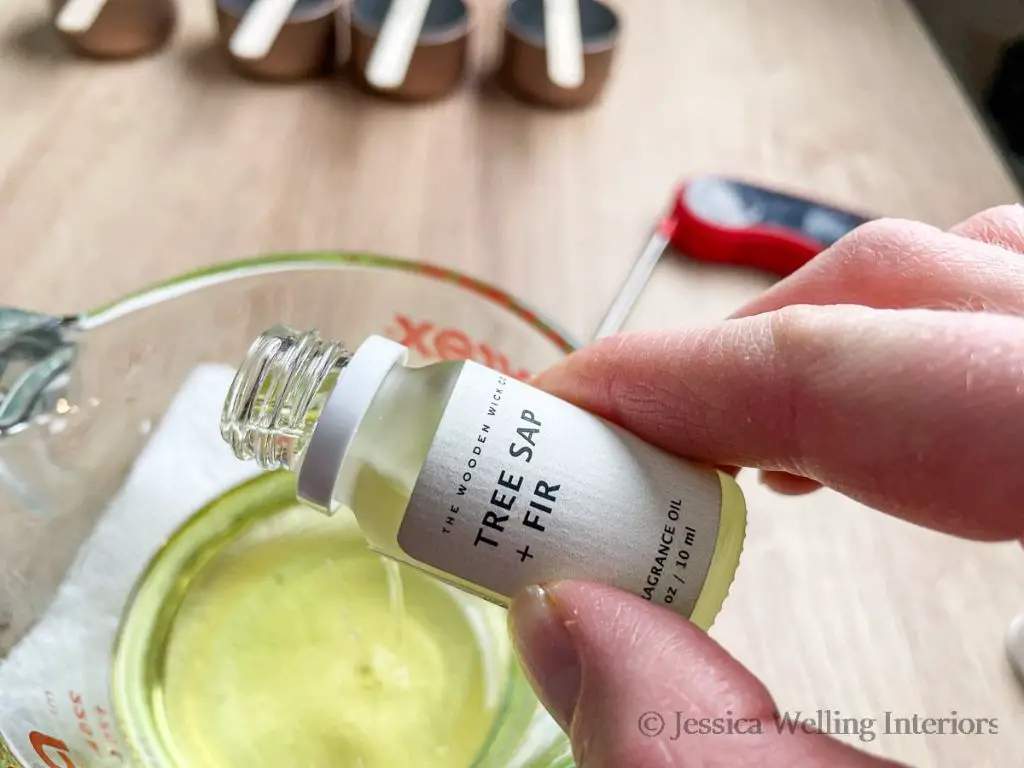
High quality fragrance oils are derived from natural ingredients like essential oils, absolutes, resins, and isolates. They contain a high percentage of fragrance components and have bold, complex scents that hold up well during the candle making process. Low quality fragrance oils are often synthetic blends or contain diluted fragrance components. They tend to have harsh, chemical smells with poor scent throw.
When making candles, it’s important to source fragrance oils from reputable suppliers that specialize in candle making supplies. Recommended vendors like Lone Star Candle Supply and The Flaming Candle carry a wide selection of top-quality fragrance oils formulated for excellent scent throw and burn performance. Investing in high grade oils will result in strongly scented, pleasing candles.
Failing to Adhere to Fire Safety
Making candles can be extremely dangerous if proper fire safety precautions are not taken. According to the National Fire Protection Association (NFPA), candles cause an estimated 7,000 house fires every year, resulting in approximately 80 deaths. Source
When making candles, it is crucial to adhere to fire safety guidelines to prevent accidents and injuries. Some key tips include:
- Work in a clean, clutter-free, and well-ventilated area. Clutter and lack of ventilation increase the fire risk.
- Use proper equipment like thermometers, double boilers, and pouring pots. This allows you to maintain proper wax temperatures. According to the NFPA, wax that is too hot can result in spills and splashes once cooled. Source
- Allow candles to cure in a dry, room temperature area for at least 48 hours before burning. Burning too soon can cause “tunneling” where the candle burns unevenly.
- Trim wicks to 1⁄4 inch before lighting to prevent dangerous flare-ups. The NFPA recommends extinguishing candles after 4 hours and allowing 2 hours before relighting.
- Keep candles away from flammable objects and out of reach of children and pets.
Taking proper safety precautions allows you to enjoy candle making while minimizing the risk of fires and burns.
Not Cleaning Surfaces Properly
It’s crucial to properly clean all surfaces before pouring candles to prevent adhesion issues. If old wax residue or other contaminants remain on your candle jars, molds, or pouring pitchers, it can prevent the new wax from adhering correctly. This can lead to candles that release from their containers too easily or have issues with bubbles, cracking, or frosting.
Experts recommend thoroughly washing any candle-making surfaces with a mild detergent and water before use. Hot water is ideal for removing all traces of wax and oils. For glass containers, many candle makers prefer using isopropyl alcohol for a streak-free clean [1]. Avoid just wiping surfaces with a dry paper towel, as this may not fully eliminate contaminants [2]. Be sure to fully rinse and dry any surfaces after cleaning.
Proper pre-pour cleaning takes a bit more time but helps ensure your finished candles have an optimal appearance and burn performance. Don’t cut corners here – take the time to thoroughly clean all pouring surfaces before making each new batch of candles.
Reusing Old Candle Jars
Reusing old candle jars can seem tempting to save money, but it carries some risks. Old jars may still contain wax residues or fragrance oils from the previous candle. These residue can negatively impact how a new candle burns or smells (NYTimes).
To reuse candle jars, they must be thoroughly cleaned to remove all old wax and oils. This involves removing any visible wax, washing with hot soapy water, and then washing again with a solvent like rubbing alcohol to break down leftover residue. Allow jars to fully dry before pouring new wax (LaurelTwist).
Even with cleaning, some residue may linger, so reusing jars is riskier for scented candles. Absorbent materials like wood, paper, and fabrics are especially prone to retaining old scents. For best results, use new jars for scented candles whenever possible.
Ignoring Curing Conditions
Proper curing conditions are critical for candle quality and performance. Candles cure best at relatively low temperatures between 68-73°F with low humidity around 50% (Armatage Candle Company). Curing in temperatures above 80°F or high humidity can lead to issues like wet spots, sweating, frosting, poor fragrance retention, and tunneling (Reddit r/candlemaking).
Ideally, candles should cure in an environment with stable conditions, away from direct sunlight or drafts that could cause temperature fluctuations. Many candlemakers use dedicated curing boxes or rooms with climate control to maintain the ideal curing environment. Proper airflow is also important to allow the release of any residual solvents. Ignoring curing conditions and allowing candles to cure in improper temperatures or humidity can negatively impact the finished candle quality and burn performance.
Making Unstable Candle Designs
One of the common mistakes when making candles is creating designs that are prone to tipping or leaning. Top heavy candles like pillars or taper candles can easily fall over if the base is too small. According to creativecandles.com, “Using standard shapes for your candles is usually best. Traditional cylindrical pillars, tapers, vases and jars don’t require as much testing.”
To improve stability, make sure to test your candle designs before mass production. Burn a prototype and observe how steadily it stands. Consider increasing the diameter of the base or using a heavier material for the bottom portion if instability is observed. Placing candles in holders can also help prevent tipping issues.
When selecting a holder, choose one with a wide, flat base. The opening should be slightly larger than the diameter of the candle to allow for expansion from heat. Glass holders work well for pillar candles while taper candles do best in holders designed specifically for their shape. With the right holder and a stable design, you can avoid the frustration of fallen candles.

