What Is Candle Pooling?
What is Candle Pooling?
Candle pooling refers to the melted wax that gathers around the wick of a burning candle. As the candle burns down, the wax closest to the wick melts from the heat of the flame. However, the melted wax often does not reach the outer edges of the candle. This leaves shallow edges around deeper pooled wax in the center. The result is a “pool” of wax appearing in the candle holder.
Candle pooling happens when the candle is not burning hot enough to melt the wax all the way to the edges. If the melted wax pool does not reach the sides, the candle will tunnel down the center. The wick burns faster than the pool can enlarge. This leaves wax around the edges unburned. Proper pooling occurs when the melted wax reaches all sides of the candle in an even pool as the candle burns.
Is Candle Pooling Bad?
Candle pooling is a natural phenomenon and is neither inherently good nor bad. Some key considerations around candle pooling include:
Pros
- Pooling can help the candle burn more efficiently, making it last longer.
- It creates a visually appealing melted wax pool.
- The pooled wax can hold fragrance better, releasing more aroma.
Cons
- Excessive pooling can impact candle performance, creating an uneven burn or tunneling effect.
- Deep pooling may be a fire hazard if the wax gets too close to the candle holder or edges.
- Pooled wax may spill over if the candle isn’t on a stable, level surface.
Overall, some pooling is normal and even desirable. But monitoring the depth and ensuring safe practices can help avoid potential downsides.
What Causes Candle Pooling?
There are a few key factors that contribute to candle pooling:
Wick Size
The size of the wick is one of the main reasons candles can pool. A wick that is too wide or long will burn the wax too quickly. This creates a hot flame that melts the wax around the edges faster than it can be absorbed by the wick. The result is a pool of melted wax around the edges of the container.
Room Temperature
Room temperature also plays a big role. If the room is too warm, such as over 70°F, the heat will cause the candle wax to melt quicker than it burns. This excess melted wax will pool around the edges. Cooler room temperatures below 65°F will cause the wax to harden, which prevents pooling.
Candle Diameter
Wider candles with a large surface area also encourage pooling. As the candle burns down, the melted wax has farther to travel horizontally across the container. This can result in wax pooling around the outer edges because the wick cannot absorb it quickly enough.
How to Prevent Candle Pooling
Candle wax pooling can be prevented and minimized with some simple tips. Here are some easy methods to reduce the amount of wax that pools around the wick:
Trim the wick – Before lighting, make sure to trim the wick to 1⁄4 inch size. Long wicks produce larger flames that melt wax faster than the wax can be pulled up the wick. Keeping wicks trimmed prevents the candle from burning too quickly in one spot.
Warm the candle – Wax can pool from burning too long in one spot if the wax is cold. Prior to lighting, warm the entire candle with a hairdryer set on low heat. This helps soften and evenly distribute the wax so it melts from the heat of the flame rather than just from the bottom.
Move to a warmer area – Beeswax and soy candles in particular can form pools due to the higher melting points. Placing the candle in a warmer spot in the room helps the wax melt more readily when lit. Avoid excessive heat near things that can easily catch fire.
Embrace the Beauty of Candle Pooling
While some may see candle pooling as an imperfection, it can actually create an interesting visual effect as the wax melts. When a pool of wax forms around the wick, it allows the candle to burn slower since only a portion of wax is liquified at once. This makes the candle last longer. Candle pooling also shows the natural characteristics and textures of the wax, with patterns emerging on the surface as it melts. The pooling effect highlights the complexity and depth of the wax color. Each pool forms unique circular shapes and designs based on the type of wax. Rather than seeing it as a flaw, view candle pooling as bringing out the candle’s inherent beauty.
Safety Tips for Candle Pooling
While candle pooling can add ambience and fragrance to a space, it’s important to practice safety when dealing with melted wax. Here are some tips to prevent hazards:
Avoid leaving pooled candles unattended – Never walk away from a lit candle, especially one that is exhibiting pooling. The melted wax is flammable and could spill over or ignite if left alone.
Keep wicks trimmed – Long wicks tend to produce more soot and smoke, which can collect in candle pools. Trim wicks to 1⁄4 inch before lighting to minimize this.
Use candleholders to contain pools – Choose holders made of heat-safe materials that will surround and contain melted wax. This prevents spills and contains the candle while pooling occurs.
With the right precautions, you can safely enjoy the unique visual effect of candle pooling. Just be sure to never leave the candle unattended, keep wicks neat, and use appropriate holders.
Creative Uses for Candle Wax Pools
If you don’t want to throw away the wax left over after candle pooling, there are some creative ways to reuse it. Here are a few fun projects to put your leftover wax to good use:
Make Wax Melts
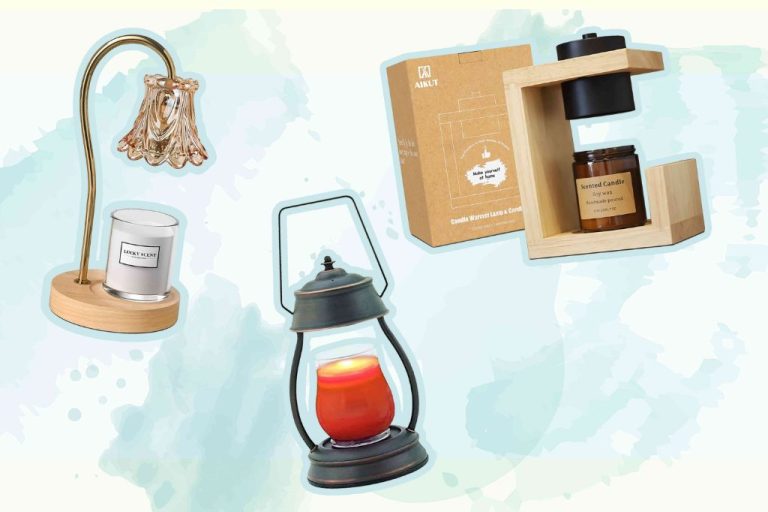
One of the easiest ways to reuse candle wax is to make your own wax melts. Simply pour the melted wax into silicone molds and let it fully harden. Then pop the wax melts out of the molds and you have custom scented wax for your wax warmer. This lets you enjoy the scent again without having to light the candle.
Create Candle Art
You can get creative and make candle art projects with leftover wax. Try pouring colored wax into Embeded different shapes or textures into the wax. Or pour wax into molds to make custom candles, beads, or other wax crafts.
Cast Small Objects
Molten wax can be used to make molds of small objects. Let the candle finish pooling and then pour the liquid wax into a container. Place a small object like a shell, coin, or leaf into the wax and let it fully harden before removing. This leaves behind a wax cast of the object.
How to Clean Up Candle Pools
Cleaning up after candle pooling is easy if you follow a few steps:
First, let the wax fully harden and cool before attempting to remove it. This may take several hours after blowing out the candle. Trying to remove still-warm wax can make more of a mess.
Once hardened, place some ice cubes directly on top of the wax pool. After 5-10 minutes, the ice will help solidify the wax and make it easy to lift off the surface.
Gently scrape off the wax pool with a plastic card, being careful not to scratch any wood or glass surfaces. The majority of the wax should lift off intact. For any remaining residue, wipe it away with a soft cloth and warm water, taking care not to smear it.
Avoid using any soap or cleaners, as they may react poorly with remaining wax. With some patience, the wax should lift off cleanly, leaving behind a pristine surface with no sign of pooling.
When to Worry About Candle Pooling
Candle pooling is a normal part of candle burning. However, sometimes pooling can be a sign of bigger issues. Here are some red flags to watch out for:
Sooting or smoking – If you notice your candle producing black smoke or soot, something is not right. This can happen if the wax pool gets too hot, which is often caused by burning the candle for too long. Sooting can dirty your walls or furniture, and the smoke can set off smoke alarms.
Unusually large or off-center pools – In most candles, the wax pool should be about 1/2 inch deep when melted all the way across. Larger or off-center pools mean the candle is burning unevenly, which can tunnel down the side or make the glass crack from heat stress.
Wax leaking down side of candle – If wax melts too quickly, it can overflow down the side of a candle. This makes a mess and essentially wastes the candle by burning too fast. It usually happens with lower quality candles.
If you notice any of these issues, blow out the candle and troubleshoot the problem before lighting it again. It’s best to trim wicks, move drafts, or adjust burn time to create the perfect pool.
Achieving the Perfect Candle Burn
Getting that perfect, even burn when lighting a candle takes a bit of trial and error. However, there are some tips you can follow to help achieve candle nirvana.
First, pay attention to the size of the wick. The wick should be wide enough to allow the wax to liquefy into a pool, but not so wide that it billows smoke or gets dangerously large. Follow the manufacturer’s guidance on wick size. For containers, CD votives usually use a zinc core wick, while larger jars use cotton core wicks.
The size and shape of the candle vessel also impacts how well the candle burns. Deep, narrow containers can lead to tunneling, while wide, shallow ones increase pooling. Generally, the wider the candle diameter, the wider the wick should be. Match the wick size to the jar for best results.
Wax type makes a difference too. Softer waxes like soy wax need a smaller wick than harder paraffin blends. Beeswax and palm wax also burn at different rates. Testing out wick sizes with each new wax blend is key.
Candle placement is also important. Avoid drafty areas that will make the flame flicker and smoke. Keep the candle out of direct sunlight which can accelerate uneven burning. Trim the wick to 1⁄4 inch before each lighting for cleanest burns.
Finally, allow the wax pool to form fully from edge to edge before extinguishing the flame. This helps prevent tunneling. Adhering to these tips will help you achieve that perfect, even burn and wax pool every time you light a candle.


