What Ingredients Do I Need To Make Melt And Pour Soap?
Melt and pour soap is a crafting product that allows anyone to create handmade soap bars without having to handle lye or go through the complex cold process soap making technique. Melt and pour soap bases are pre-made soap bases that are ready to melt, customize, and mold into creative designs.
The melt and pour process simply involves melting down a premade soap base, adding colorants, fragrances, and other additives, and pouring the soap base into molds to set up. Once cooled and hardened, the soap can be popped out of the molds and is ready to use!
Some key benefits of using melt and pour soap bases include:
- No need to use lye or other hazardous chemicals
- Fast and easy soapmaking process with no cure time
- Customizable with colors, scents, and additives
- Endless design possibilities using creative molds
- Suitable for soapmaking beginners and children
Melt and pour soap is a fun, safe way to create handmade soaps without the complexity of cold process soapmaking. The endless variety of melt and pour bases, colors, scents, and molds makes it easy to create completely customized soaps.
Equipment Needed
Melt and pour soap making requires some basic equipment to get started. Here are the key pieces of equipment you’ll need:
Double boiler or crockpot
You’ll need some way to gently melt the soap base. The easiest options are a double boiler on the stovetop or a crockpot. The double boiler allows you to precisely control the temperature while a crockpot offers hands-free melting.
Mixing bowls
You’ll need bowls in various sizes to melt your soap base and mix in colors, scents, and additives. Glass or stainless steel bowls work best since the soap mixture can get quite hot.
Mixing spoons
Spoons and spatulas for stirring the melted soap base and incorporating additives. Again, stainless steel or heat-resistant silicone spoons are ideal.
Melt and Pour Soap Bases
The foundation of melt and pour soap is the soap base. This is a premade soap that has already undergone saponification, which is the chemical process that turns oils and fats into soap. Melt and pour bases contain oils, water, and sodium hydroxide (lye).
There are several types of melt and pour soap bases to choose from:
- Glycerin – A versatile, clear base made primarily from glycerin. It results in a hard, long-lasting bar.
- Goat’s Milk – Goat’s milk adds creaminess and moisturizing qualities. It’s gentle for sensitive skin.
- Shea Butter – Made with added shea butter which is ultra-moisturizing. Great for extra dry skin.
- Honey – Honey helps retain moisture and has antibacterial properties. Leaves skin smooth.
You typically need around 1 pound of melt and pour base per standard soap mold. Bulk options are available ranging from 5-12 pounds. Check local craft stores or online retailers like Amazon and Bramble Berry. Prices range from $5-$15 per pound.
Opt for a natural base free of detergents and harsh chemicals. Make sure it’s skin safe if adding exfoliants or planning to go without gloves during pouring.
Additives
There are many types of additives that can be used in melt and pour soap to enhance the aesthetic qualities and skin benefits. Some of the most common additives include:
Essential Oils
Essential oils not only provide wonderful scents, but many have skin nourishing properties as well. Some popular essential oils for melt and pour soap include lavender, lemon, peppermint, tea tree, rosemary, and eucalyptus. Essential oils should be added at 0.5-1% of the weight of your soap base.
Botanicals
Dried flowers, herbs, oats, seeds and more can be used to decorate and exfoliate melt and pour soaps. Some ideas are lavender buds, rose petals, calendula flowers, oatmeal, poppy seeds, etc. Use about 1 tablespoon of botanicals per pound of soap base.
Colorants
Liquid soap dyes, mica powder pigments, and natural colorants like clays can tint melt and pour soaps. Use about 1/8 tsp pigment or up to 1 tsp of liquid dye per pound of soap base. See recommended colorants.
Exfoliants
Add scrubby texture with ingredients like oatmeal, salt, sugar, coffee grounds, etc. A good guideline is 1 tablespoon of exfoliant per pound of soap base.
Melting the Soap Base
The first step in making melt and pour soap is melting the soap base. The soap base comes in solid blocks that need to be melted down before adding color, scent, and other ingredients. According to the Bramble Berry melt and pour soap tutorial (https://www.brambleberry.com/articles/soap-making/melt-and-pour-soap/melt-and-pour-soap-base/), the ideal temperature for melting melt and pour soap is 160°F to 180°F.
It’s important not to overheat the soap base, as too much heat can scorch the ingredients and change the properties of the soap. Most soap makers recommend melting the soap base in a crock pot or double boiler to allow for gentle, even heating. Make sure the soap base is fully melted and smooth with no lumps before moving on to the next steps. Stir regularly as the soap base melts to prevent hot spots and ensure even melting according to Humblebee & Me (https://www.humblebeeandme.com/how-to-make-melt-and-pour-soap/).
When melting more than one block of soap base, it’s best to melt each separately and then combine once fully melted as recommended by Lovely Greens (https://lovelygreens.com/how-to-make-melt-and-pour-soap/). This helps prevent the soap base from scorching. Be patient during the melting process and avoid rushing things. Melting the soap thoroughly is an essential first step in creating handcrafted melt and pour soap.
Adding Color and Scent
Adding color and scent is an important step when making melt and pour soap. It’s best to add colorants and essential oils once the soap base has melted and cooled slightly to 130-140°F (54-60°C). At this temperature, the base is fluid enough to mix thoroughly but cool enough that the fragrance won’t evaporate quickly.
Make sure to stir well after adding colorants or essential oils to fully incorporate them. Mixing too vigorously can cause air bubbles, so aim for a calm folding motion. If using micas or clays, it’s best to disperse them in a lightweight oil like fractionated coconut oil before adding to prevent clumping.
As for how much fragrance to use, a usage rate of 0.5-1 ounce per pound of soap base is standard. Start with 0.5 ounces and increase to 1 ounce for a stronger scent. Be careful not to overdo it as too much fragrance can seize or accelerate trace.
Natures Garden provides a handy fragrance chart for melt and pour soap that lists usage rates for different essential oil and fragrance oil blends.
Pouring the Soap
Once the soap base has fully melted and you’ve added colors, scents, and any other additives, it’s time to pour it into the molds. Proper preparation of the molds and pouring technique will help ensure your finished soaps come out smoothly with minimal defects.
Make sure your molds are clean and dry before pouring. Lightly spraying them with alcohol can help the soap release more easily after curing. For layered looks, pour a thin layer and allow it to partially set up before adding the next layer. This prevents the colors from bleeding together.
The ideal pouring temperature is between 90-100°F. Any hotter and you risk air bubbles forming. Cooler and the soap may start to thicken and set up too quickly while pouring. Reheat if needed to maintain the ideal temperature.
Pour your soap slowly and steadily in one spot at the edge of the mold. Tilting the mold slightly can help spread the pour across evenly. Tap the mold gently on the counter after pouring to release any trapped air bubbles before they set.
Let the soap sit undisturbed as it firms up in the mold, typically for 4-6 hours. Avoid moving or handling the molds until fully set to prevent cracks or dents forming.
Unmolding and Curing
After pouring your melt and pour soap into the molds, you’ll need to let it cure completely before unmolding. Curing allows the soap to harden and solidify properly. The curing time can vary based on factors like the size and shape of your soap, but generally it takes 6-24 hours.
Test the firmness of the soap by pressing gently on the surface. If it feels solid, it should be ready for unmolding. Avoid unmolding too soon, as the soap may not hold its shape properly. When ready, turn the silicone molds over and flex the mold to release. Plastic molds may require running under warm water or placing in the freezer for easier release.
Once unmolded, allow the soap bars to finish curing for 1-2 weeks before use. This helps evaporate any remaining moisture and allows the bars to harden fully. Cured melt and pour soap should have a smooth, non-tacky feel.
Store cured melt and pour soap in a cool, dry area away from excess moisture and heat to help preserve the quality. Properly cured and stored, melt and pour soaps can last 6 months or longer.
Troubleshooting
Melt and pour soap making has fewer variables than cold process soap making. However, there are still some common issues that can occur. Knowing how to prevent and troubleshoot them will lead to better results.
Preventing Soda Ash
Soda ash is a powdery white deposit that can form on the surface of melt and pour soap. It is caused by the saponified oils in the soap base reacting with carbon dioxide in the air. To prevent soda ash:
- Avoid overheating the soap base
- Pour the soap at temperatures between 110-120°F
- Spritz the surface with rubbing alcohol right after pouring
- Cover the soap after pouring until it hardens
If soda ash does form, it can be washed off with water or rubbing alcohol once the soap has fully hardened. Light cases can also be buffed off with a microfiber cloth.
Fixing Seized Soap
Seizing occurs when too much fragrance, color, or additives are added to the melted soap base, causing it to harden in the pot before it can be poured into the mold. To fix seized soap:
- Reheat the soap slowly and gently, adding small amounts of vegetable oil if needed to get it melted again.
- Pour immediately at a higher temperature around 140-160°F.
- Avoid adding any more color, fragrance, or additives.
Rebatching Soap
If a batch doesn’t turn out well, whether due to seizing or just an unappealing design, it can be rebatched. To rebatch:
- Grate or chop up the soap into small pieces.
- Melt it down with a bit of water, oil, or fresh soap base.
- Add color, fragrance, or design elements as desired.
- Pour into molds and allow to harden again.
Rebatching gives soap a second chance with a new look!
Fun Designs and Ideas
Melt and pour soap offers many possibilities for creative designs. Here are some fun ideas to try:
Layering colors is a simple way to create an eye-catching look. Try pouring thin alternating layers of differently colored soaps. Or make a gradient by pouring small amounts of progressively darker colors. In horizontal layers or vertical stripes, this technique adds visual interest.
Mix in embeds like dried flowers or coffee beans to give a natural, spa-like feel. Herbs like lavender buds or rose petals make elegant soaps. For a more rustic look, embed twigs, seeds, or oats. Just make sure any botanicals are fully dried first. Dried citrus peels or loofah pieces also make refreshing soaps.
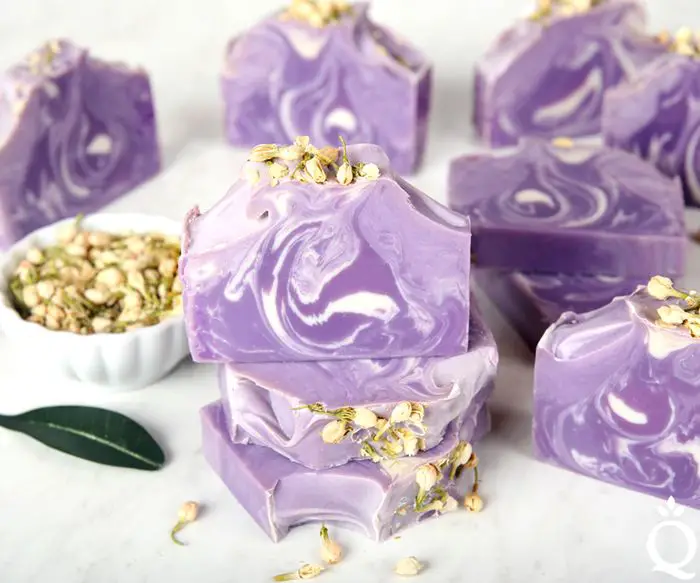
Festive soaps can brighten up the holidays. Make Christmas trees, wreaths, or candy canes by pouring green, red, and white layers. Add mica powder shimmer for a magical wintery look. Or make Halloween soaps with layers resembling gravestones, jack-o-lanterns, or witches’ hats.
Melt and pour soap offers endless room for invention. Let your imagination run wild with colors, shapes, and textures. Pay attention to current trends and seasons for fresh inspiration. With some creativity, you can design fun soaps your friends and family will love.

