Moon Pillow Crochet Pattern
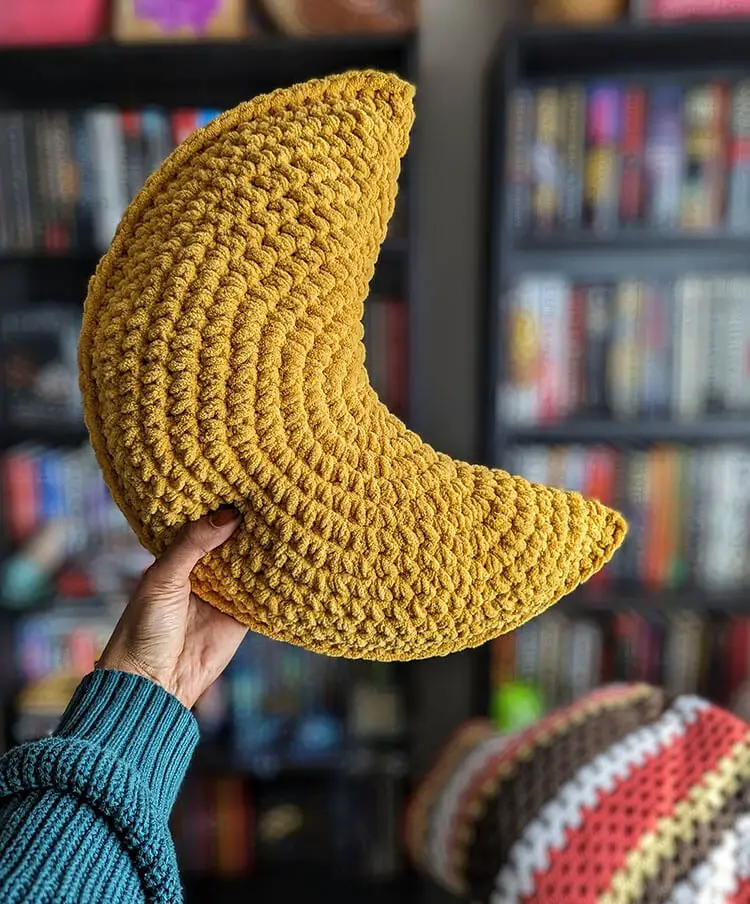
To bring a sense of cosmic wonder into your living space, I’m delighted to share a unique crochet pattern for a charming moon-shaped pillow that exudes a soothing ambiance. This cozy creation is the perfect addition to any room, inviting relaxation and serenity.
Moon Pillow Pattern
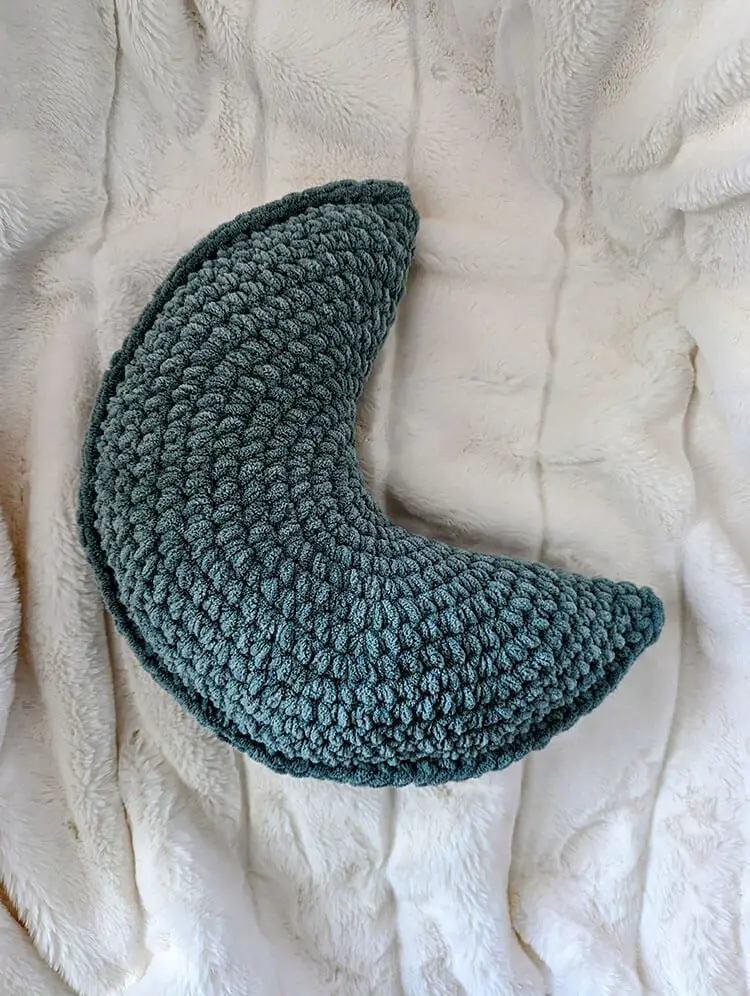
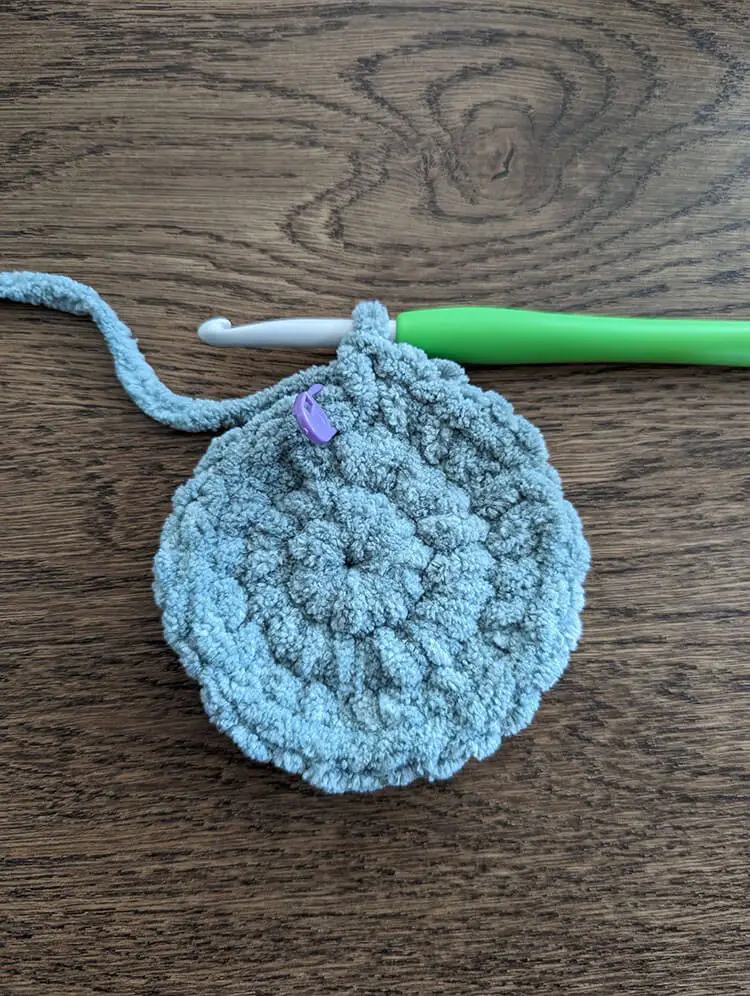
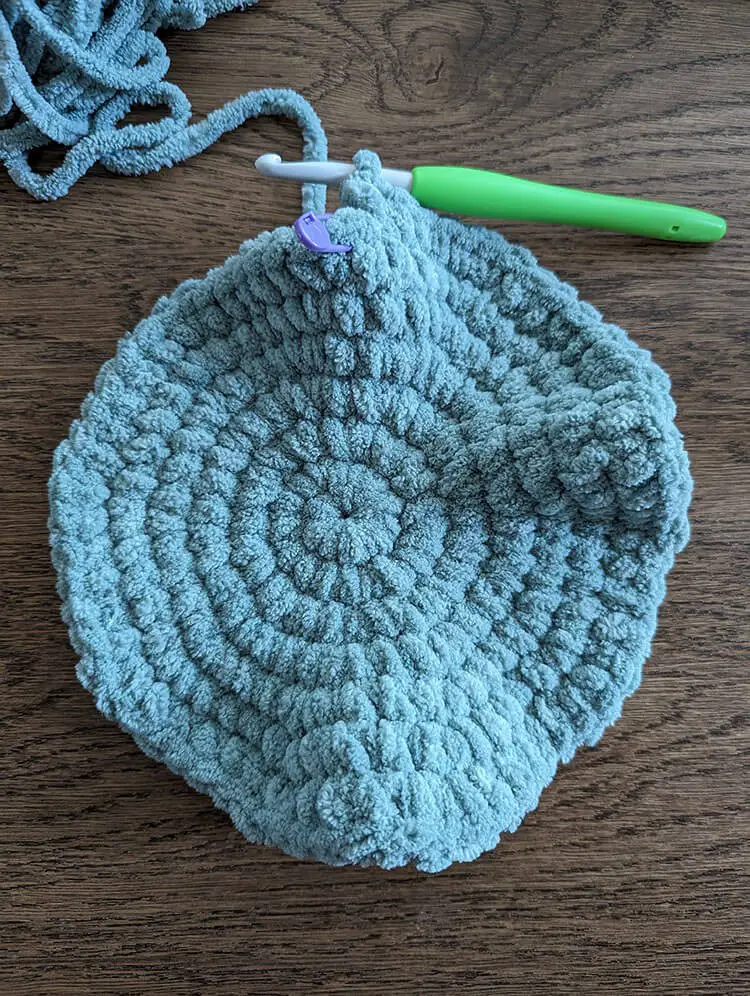
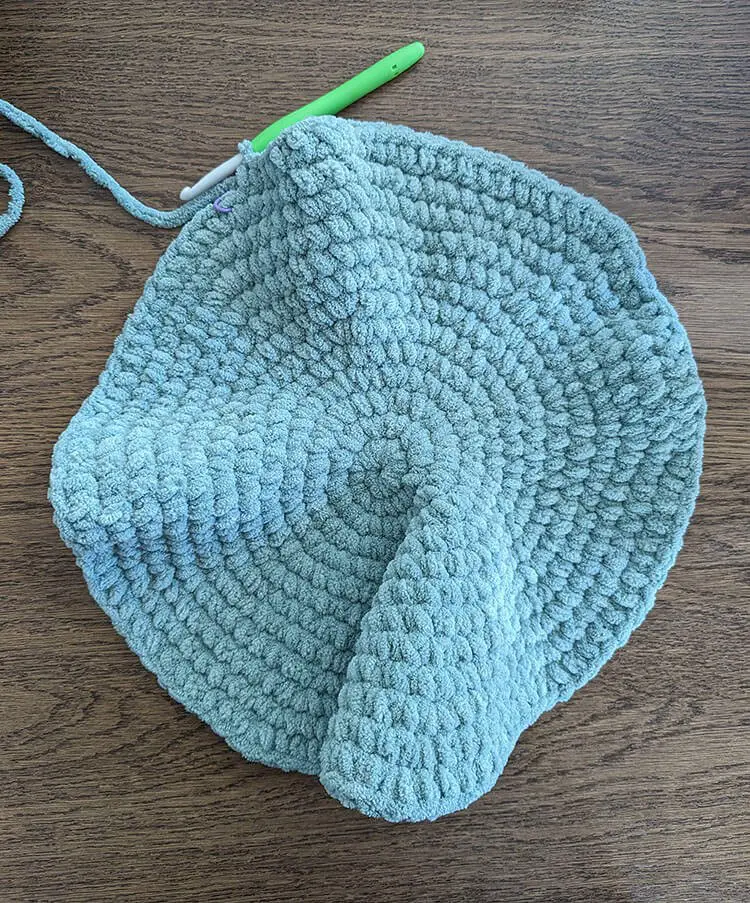
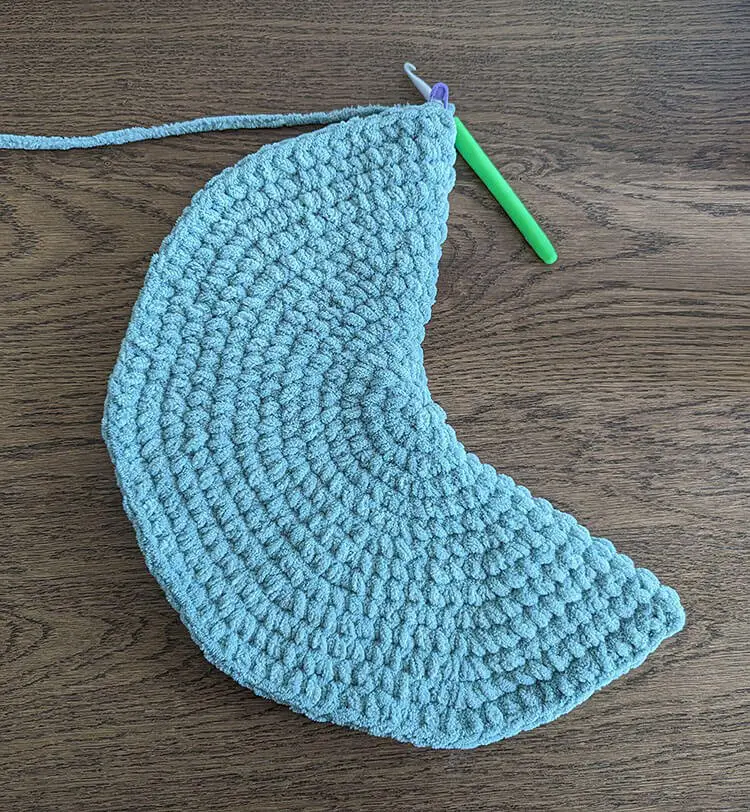
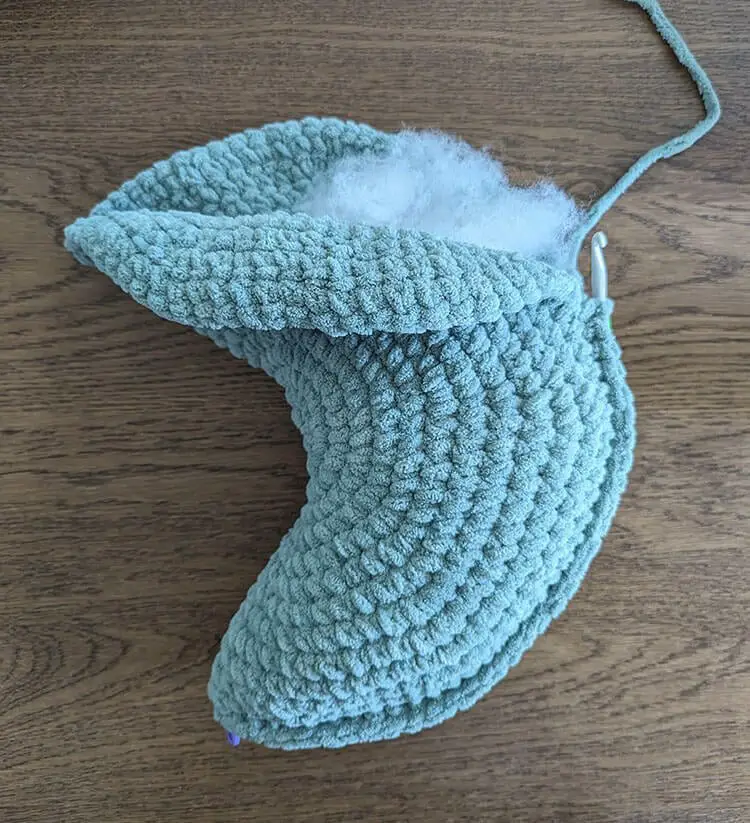
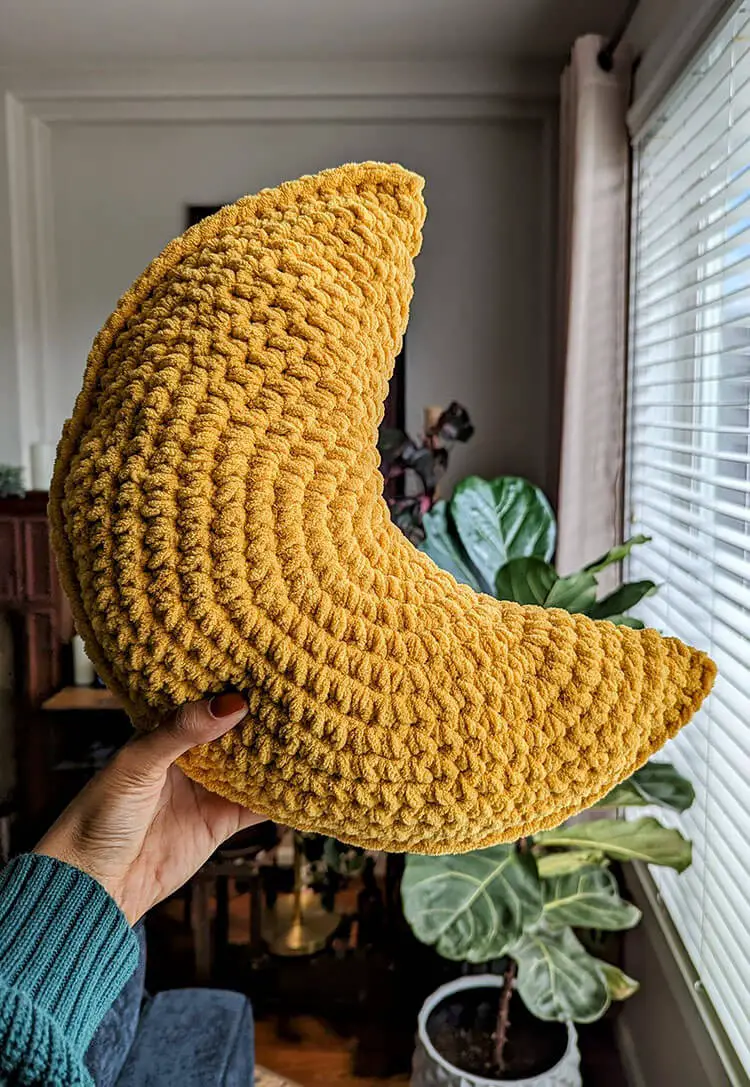
Get ready to blast off into the world of crochet with this out-of-this-world moon pillow pattern! Whether you’re a seasoned pro or just starting out, this easy-to-follow guide will have you creating your own celestial cozy in no time.The best part? You can customize it to fit your unique style by choosing your favorite yarn colors and making one (or several!) of these adorable pillows. And if you want the full, ad-free printable version, head on over to my Etsy shop!Want to show off your crochet creations? Join my new Crochet Facebook Community to share your projects with fellow crafty enthusiasts! Now, about those materials… You’ll need:* Bernat Big Ball Blanket yarn in Burnt Mustard and Bright Sage (220 yds, #6 Super Bulky)* US size K 6.5 mm crochet hook* Poly-fil for stuffing* Stitch marker* Scissors* Tapestry needle to weave in endsThe finished pillow will be approximately 15 inches tall. Here are the pattern notes:* We’ll be working in continuous rounds, so don’t worry about joining at the end of each round.* Feel free to use your choice of yarn and hook size – just keep in mind that this might affect the final size of your pillow.* To adjust the size, simply add or reduce rounds as needed. Just make sure you maintain the correct stitch count for each round.Now, let’s get started with the abbreviations:* ch: chain* st(s): stitch(es)* sl st: slip stitch* sc: single crochet* inc: increase (work 2 stitches in the next stitch)Here’s how it all begins:Round 1: Ch 2, 10 sc into 2nd chain from hook (10 sts)Place your stitch marker in the first stitch of each round to keep track.Round 2: Inc in each stitch around (20 sts)And then we’ll work our way up:Round 3: *Inc, sc in next. Repeat from * around (30 sts)Round 4: *Inc, sc in next 2 sts. Repeat from * around (40 sts)Round 5: *Inc, sc in next 3 sts. Repeat from * around (50 sts)Round 6: *Inc, sc in next 4 sts. Repeat from * around (60 sts)Round 7: *Inc, sc in next 5 sts. Repeat from * around (70 sts)And if you notice your circle getting a little wavy, don’t worry – it’s supposed to happen!Round 8: *Inc, sc in next 6 sts. Repeat from * around (80 sts)Round 9: *Inc, sc in next 7 sts. Repeat from * around (90 sts)Round 10: *Inc, sc in next 8 sts. Repeat from * around (100 sts)Round 11: *Inc, sc in next 9 sts. Repeat from * around (110 sts)Round 12: *Inc, sc in next 10 sts. Repeat from * around (120 sts)Round 13: *Inc, sc in next 11 sts. Repeat from * around (130 sts)Now it’s time to finish things off:Round 14: Sc around, sl st to first st. Don’t fasten off yet! (130 sts)Fold your moon in half with the wrong sides facing and line up the stitches on the outer edge. Then, sc the sides together.As you go, start filling your pillow with poly-fil – about halfway through is a good time to begin. Continue crocheting until you’re done, then fasten off and weave in those ends.Finally, use your hands to gently shape your pillow into its final form. And that’s it! Enjoy your adorable moon pillow!