Is Melt And Pour Soap Good For Your Skin?
What is Melt and Pour Soap?
Melt and pour soap, also known as glycerin soap base, is a soap base that has already undergone the saponification process. This means the oils and lye have already reacted, forming a ready-made soap that can be easily melted down and customized with colors, scents, and additives (1).
To make melt and pour soap, manufacturers start with a vegetable oil base. The oils, usually a blend of coconut oil, palm oil, olive oil, and other plant oils, are combined with lye in a controlled environment to create saponified oils or soap (2). Once saponification is complete and the soap has hardened, glycerin is added. The process results in a glycerin soap base that melts at relatively low temperatures.
The main ingredients in melt and pour soap bases are (3):
- Vegetable oils like coconut, palm, olive, sunflower, or safflower
- Lye
- Glycerin
- Purified water
- Sorbitol
- Sugar
- Citric acid
The glycerin content helps keep the soap moisturizing. Manufacturers may also add natural ingredients like shea butter, cocoa butter, essential oils, or goat’s milk to create customized soap bases.
Benefits of Melt and Pour Soap
Melt and pour soap base provides many benefits that make it a great choice for skin. Because it starts with a premade soap base, melt and pour contains gentle cleansers like glycerin that moisturize as they clean. Glycerin is a natural humectant that helps draw moisture to the skin, leaving it feeling soft and hydrated (source).
Another major benefit is the ability to customize melt and pour soap however you like. You can add skin-nourishing oils, moisturizing butters, exfoliating ingredients, essential oils, colors, and fragrances. This makes it a fun DIY crafting activity for all ages.
Because it doesn’t require handling lye or a complex cold process method, melt and pour soap base is beginner-friendly. You simply melt, mix in any additives, pour into molds, and allow it to harden. The end result is a gentle, moisturizing soap personalized just how you like it.
Potential Drawbacks
While melt and pour soap offers many benefits, it also has some potential drawbacks to be aware of:
Melt and pour soap can dry out skin if not formulated properly. Since the soap base already contains glycerin, extra moisturizers like oils, butters, aloe vera, or honey need to be added to prevent the soap from being drying on the skin.1
The preservatives used in commercial melt and pour bases can cause irritation for people with sensitive skin. Those with allergies or sensitivities may prefer to make their own soap from scratch using ingredients they can control.
There are a limited number of ingredients that can be added to melt and pour soap compared to cold process soap. The soap base already contains oils, lye, and additives, restricting what else can be included. Creative freedom is reduced compared to blending a cold process recipe from scratch.
Melt and Pour vs Cold Process Soap
Melt and pour soap has some key differences from cold process soapmaking. Cold process involves combining oils/butters and lye to trigger saponification and create soap. This gives the soapmaker more control over the ingredients and qualities of the final bar. However, lye is caustic and cold process requires handling safety precautions (https://botaniesoap.com/blogs/product-faq/cold-process-vs-glycerin-vs-melt-soap).
Melt and pour soap uses a premade soap base that has already undergone saponification. The soapmaker simply melts the base, adds colors/scents/additives, and pours it into molds. This makes the process much faster, easier, and safer than cold process. But it offers less customization of the soap recipe.
Many hobbyists and small businesses choose melt and pour for the convenience and lower barrier to entry. It allows creativity in soap designs without the complexity of cold process. However, cold process devotees cite greater control and ability to use all-natural ingredients as advantages (https://www.soapqueen.com/bath-and-body-tutorials/tips-and-tricks/pros-cons-of-soapmaking-methods-cold-process-melt-pour-hot-process-and-rebatch/).
Tips for Choosing Melt and Pour
When selecting a melt and pour soap base for sensitive skin, there are a few key things to look out for:
- Opt for moisturizing oils like olive, coconut, and shea butter which can help nourish skin without irritation (https://www.thehealthymaven.com/how-to-make-homemade-bar-soap/).
- Avoid soap bases with sulfates or parabens, as these ingredients may strip away natural oils or trigger reactions.
- Check reviews to see if others with sensitive skin have had positive experiences using the product.
- Look for soap bases marketed as gentle, moisturizing, or formulated for sensitive skin types.
Taking the time to find the right melt and pour soap base will help ensure a nourishing, soothing experience for your sensitive skin. Always patch test on a small area first when trying a new soap.
Using Melt and Pour Safely
When working with any soap product, it’s important to follow safety precautions to avoid potential risks or irritation. Here are some tips for safely using melt and pour soap bases:
Always follow the manufacturer’s usage instructions. Melt and pour soap bases vary in ingredients, melting points, coloring additives, and more. Refer to individual product details to understand proper melting methods, soap additives, and usage guidelines.
Avoid contact with eyes as the soap base or lye can cause irritation. Wear protective eyewear when handling dry soap base. If contact occurs, flush eyes with water for 15 minutes. Seek medical help if irritation persists.1
Store melt and pour soap properly to avoid bacterial growth. Keep unused soap base tightly sealed, away from heat and humidity. Refrigeration can extend shelf life. Discard any soap base that smells odd or shows discoloration.2
Work in a well-ventilated area since heating the soap base releases steam and fumes. Avoid inhaling vapors directly.
Allow finished soaps to fully cool and cure for 4-6 weeks before use. This allows the soap to harden completely and become milder for skin over time.
Overall, melt and pour soap is considered gentler than cold process soap. But always test a small amount on skin first to check for irritation before full use.
DIY Melt and Pour Recipes
One of the best parts of working with melt and pour soap is all the room for creativity when making your own recipes. You can customize melt and pour soap in lots of fun ways:
Mix in oils and butters like coconut, olive, or shea butter to add extra moisturizing qualities. Try swirling in some honey for a sweet touch. Or sprinkle in dried flowers, oats, seeds, or coffee grounds to exfoliate.
Layer different colors and fragrances to create beautiful designs. Start with a plain base, then pour contrasting colors over the top, alternating colors and scents. Use a skewer to swirl the layers together.
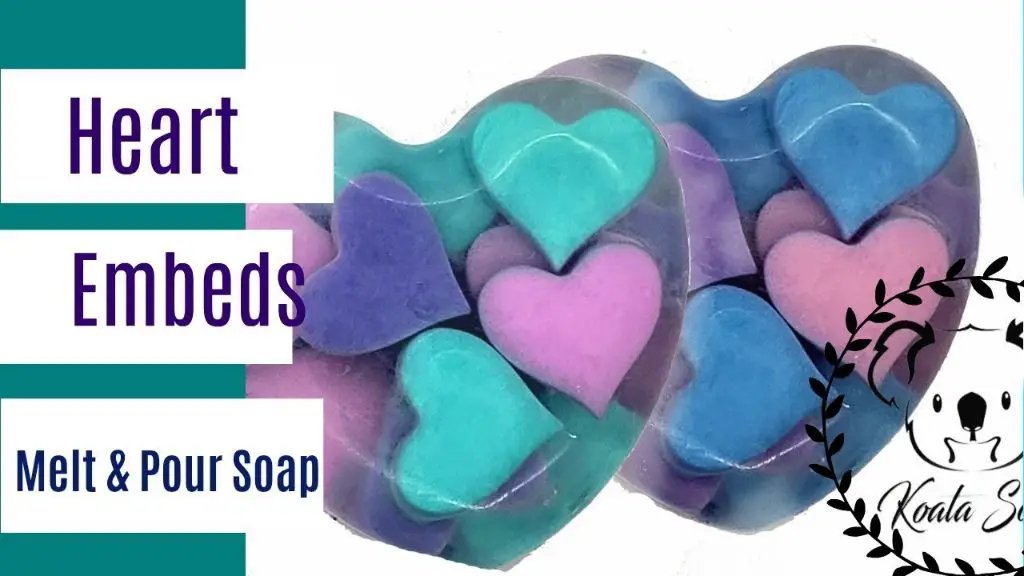
You can also decorate the top with embeds – small decorative pieces pressed into the top of the soap. Make embeds by pouring colored soap into molds and letting them set up. Then pop them out and press into the top of your finished bars.
For fun textures, try mixing in chunky ingredients like salt, sugar, or beeswax granules. Or spray the top with rubbing alcohol to create cool crackle effects as the bars set up.
The possibilities are endless when making custom melt and pour soap recipes. Experiment with colors, scents, textures, and designs to create fun homemade soaps.
Curing and Storing Melt and Pour
Proper curing and storage are important steps for maximizing the quality and longevity of melt and pour soap. After removing finished melt and pour soap from the molds, it’s crucial to allow adequate time for curing before use or storage.
Curing allows moisture to evaporate from the bars, helping them become firmer and last longer. Most sources recommend curing melt and pour soap at room temperature for at least 24-48 hours before packaging or using. Allowing the bars to cure in a well-ventilated area is ideal. Placing them in the refrigerator can help speed up unmolding but should not be used for long-term storage or curing.
For storage, keep melt and pour soap in a cool, dry area away from excess heat, moisture, and direct sunlight. Properly cured and stored melt and pour soap can last 6 months to a year before quality deteriorates. Allowing any water to pool or condense on the bars can lead to issues like discoloration, sweating, and dissolution. Storing the soap in sealed packaging or containers helps prevent this.
Taking the time to properly cure and store melt and pour soap helps retain its quality, fragrance, shape, and appearance for longer. Following these best practices allows you to maximize the lifespan of your handmade creations.
Sources:
https://www.soapqueen.com/bath-and-body-tutorials/tips-and-tricks/how-to-store-handmade-bath-products/
https://botaniesoap.com/blogs/misc/melt-and-pour-soap
Fun Ideas for Melt and Pour
Melt and pour soap offers a fun, easy way to get creative with soapmaking. Here are some fun ideas for using melt and pour soap:
Make soap as gifts. Melt and pour is perfect for making homemade soaps to give as gifts for birthdays, holidays, housewarmings, and more. You can pour soap into silicone molds to make fun shapes like hearts, stars, or flowers. Personalize soaps by adding colorants, essential oils, dried flowers, or other add-ins. Make a batch of soap just for a special friend or family member.
Craft with kids. Since melt and pour soap doesn’t require handling lye or high temperatures, it’s an ideal soapmaking project for kids. Let them pick their favorite colors and smells to create their own custom soaps. Add in small toys, glitter, or other safe objects to make embed soaps.
Create soap cupcakes or other shapes. Use mini cupcake molds, ice cube trays, or silicone baking molds to shape melt and pour soap into fun designs. Make soap cupcakes frosted with whipped soap or melt and pour embeds. Or pour soap into shaped molds like stars, hearts, gems, and more.
For more fun ideas and recipes, check out this collection of melt and pour soap recipes.
The Bottom Line
Melt and pour soap has its pros and cons when compared to cold process soap. On the plus side, it’s faster and easier to make since there’s no need to handle lye. The process is more beginner-friendly and has lower risks of failure. Melt and pour soaps come pre-formulated with oils, so there’s no need to create recipes from scratch.The downsides are less creative control and personalization in the soap recipes. The ingredients are limited to what’s already formulated in the soap base.
To get the best results with melt and pour soap, avoid overheating the soap base when melting it as this can alter the properties. Move quickly once melted to incorporate colors, scents, and additives before it starts setting up. Allow adequate time for curing once poured into molds. Wrap cured soaps tightly to prevent sweating.
Melt and pour soap is ideal for beginner crafters, kids’ projects, and anyone interested in making soap without handling lye. The convenience and ease of melt and pour makes it more accessible for casual hobbyists. With creativity, it’s possible to make fun and artistic soaps using melt and pour bases.

