Is It Worth It To Wax Yourself?
Waxing has been used as a form of hair removal for thousands of years. The ancient Egyptians first used wax to remove unwanted hair. This painful yet effective process involved covering the skin with a sticky resin. When the resin hardened, it would take the hair with it upon removal. Greeks later adopted this method, using honey and sugar to create the sticky wax mixture. They considered body hair to be barbaric and only appropriate for slaves or soldiers. In the Middle Ages, wealthy people opted for more sophisticated methods like shaving with straight razors or depilatory creams. The use of waxing declined until the early 20th century when new commercialized wax products came onto the market, making hair removal more accessible.
Today, waxing remains a common way to get rid of unwanted body hair for longer periods of time compared to shaving. It pulls the hair out by the root so it takes weeks to grow back. While professional waxing is popular, more and more people are choosing to wax themselves at home to save money and time. This article will explore the benefits and drawbacks of at-home waxing. It will cover the tools and techniques needed to wax safely and effectively on your own.
Pros of Waxing at Home
There are several benefits to waxing at home instead of going to a salon or professional waxing center. The most notable pro is cost savings. Home waxing kits and supplies are significantly cheaper than paying for professional waxes repeatedly. A basic starter kit may cost $20-50 whereas a single salon Brazilian wax may be $60-100. Home waxing means spending less money over time on hair removal.
Another pro is convenience. Scheduling appointments and traveling to salons takes time. At home, waxing can be done whenever it fits someone’s schedule. There’s no need to book waxing services days or weeks in advance either. Waxing can be performed at home spontaneously as needed.
Waxing at home also provides more privacy. Some people feel shy or embarrassed about having intimate areas waxed by a stranger in a public salon setting. Self-waxing allows for more modesty and discretion. There’s no need to disrobe or expose private zones to a waxing professional.
Sources:
https://www.webmd.com/beauty/features/pros-and-cons-of-diy-waxing
https://bellatory.com/hygiene-grooming/10-Smooth-Benefits-of-Waxing-at-Home-Vs-Salon
Cons of Waxing at Home
While waxing at home can save money and be more convenient, there are some downsides to consider before taking the DIY route. The biggest con that deters many people is the potential for pain. Waxing pulls hair out from the follicle, which can be quite uncomfortable, especially in sensitive areas. At home, you don’t have a professional esthetician there to help minimize discomfort. You’re also on your own in managing the mess created from waxing. The wax can drip and stain surfaces if you’re not careful. There’s also a higher risk of skin irritation or injury if proper technique is not used. You have to be cautious applying the right temperature wax and removing it properly to avoid burns or bruising.
According to this article, waxing first-timers often run into issues like applying wax against hair growth or failing to pull off wax strips swiftly. At a professional salon, the esthetician will have experience avoiding these mistakes to make waxing as safe and comfortable as possible.
Waxing Methods
There are several main types of wax used for hair removal at home:

Hard wax – This wax does not require strips or cloth. It is applied in thicker layers and hardens as it cools, allowing it to be pulled off and remove hair. Hard wax adheres only to hair, not skin, so it is good for sensitive areas. It can be more time consuming to apply and remove. Source
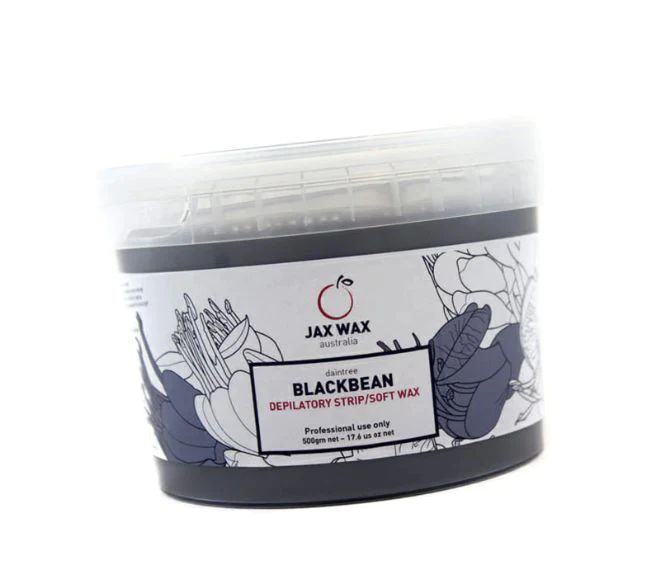
Soft wax – This thinner, stickier wax requires the use of cloth or paper strips. It is applied warm in a thinner layer over the skin and hardens as it cools. The strip is then pulled off quickly in the opposite direction of hair growth, removing the hair. Soft wax adheres to skin so can cause more irritation. Source
Sugar wax – This natural wax alternative is made from sugar, water and lemon juice. It can be applied and removed just like soft wax. Sugar wax adheres mainly to hair not skin, so it is gentler. But it can be more messy and take practice to use. Source
Preparing to Wax at Home
Properly preparing your skin beforehand is an essential step for a smooth waxing experience at home. Here are some tips to prep before waxing:
Exfoliate the area 24-48 hours before by gently scrubbing with a loofah or exfoliating scrub. This removes dead skin cells and allows the wax to grip hair better. Focus extra exfoliation on commonly waxed areas like the legs, arms, and bikini line.
Trim longer hair to about 1⁄4 inch length. Hair that is too long can make waxing more painful. Use trimmers or scissors to trim just long enough for the wax to still grip.
Powder the skin, especially in sweat-prone areas. cornstarch or baby powder helps absorb moisture so wax adheres properly. Avoid using oil-based lotions or moisturizers before waxing.
Work in small sections of about 2-4 square inches at a time during the waxing process. Going section by section makes waxing more manageable.
Wax in the direction of hair growth, not against it. Pulling in the same direction as hair growth minimizes pain and irritation.
Have all materials prepared and setup beforehand. This includes wax, applicators, cotton strips, cornstarch or powder, trimmers, and aftercare products.
Take a pain reliever if desired. Pop an ibuprofen or acetaminophen an hour before waxing to help with discomfort.
Exfoliating, trimming, powdering and properly prepping your skin beforehand allows for easier and less painful waxing at home.
Waxing Step-by-Step
Waxing at home takes some practice to get right. Here are the basic steps to follow for warm wax application:
- Prepare and clean the area to remove any lotions or oils. Trimming longer hairs can also help the wax adhere better.
- Heat up the wax according to product instructions until it is a spreadable consistency. Test a small amount on your wrist first to ensure it’s not too hot.
- Apply wax in the direction of hair growth, using a spatula or popsicle stick. Apply a thin, even layer of wax roughly 1/4 inch thick.
- Smooth a muslin cloth strip over the wax in the direction of hair growth. Rub firmly to ensure it adheres properly.
- Hold skin taut. In one quick motion, pull the strip off opposite of hair growth. Pull parallel to the skin, not upwards. This should remove the hair efficiently.
- Repeat as necessary to cover all areas. It may take a few strips for larger areas.
- Use wax removal wipes or baby oil to remove any excess wax.
- Apply aloe vera gel or hydrocortisone cream to soothe irritation. Redness is normal but should fade within 24 hours.
It may take a few tries to get the technique right. Be patient and always follow product instructions closely.
Waxing Different Body Parts
When waxing at home, there are some key tips to keep in mind for common areas like legs, arms, and bikini:
Legs
For legs, make sure the hair is at least 1/4 inch long before waxing. Exfoliate first with a scrub to remove dead skin. Use downward strokes on upper legs and upward strokes on lower legs. Hold skin taut while applying wax in the direction of hair growth. After waxing, avoid hot baths or showers which can irritate skin (Happy Waxing).
Arms
On arms, apply wax in direction of hair growth and flick wrist quickly to remove. Moisturize after to avoid irritation. Do not wax over varicose veins, moles or warts (Happy Waxing).
Bikini
For bikini waxing, trim longer hairs first for easier waxing. Take a pain reliever if desired prior to waxing sensitive areas. Apply powder to dry areas to help wax adhere. Pull skin taut while applying wax in direction of growth. Use small strips and remove quickly in opposite direction of hair growth (Happy Waxing).
Aftercare
Proper aftercare is crucial for avoiding irritation, ingrown hairs, and other issues after waxing. Here are some key aftercare tips:
Avoid sun exposure and tanning for at least 48 hours after waxing. The skin is sensitive after waxing and more prone to sunburn. Protect freshly waxed skin with sunscreen if going outside[1].
Exfoliate regularly with a gentle scrub containing ingredients like sugar, salt, or alpha-hydroxy acids. This helps lift dead skin cells and prevent ingrown hairs. Use an exfoliating cleanser or scrub 2-3 times per week[2].
Expect some tenderness and redness after waxing. This usually subsides within a day. Avoid irritating the skin by wearing loose clothing and skipping products with harsh chemicals, fragrance, and alcohol.
Moisturize daily with a fragrance-free lotion to soothe skin and prevent dryness. Look for soothing ingredients like aloe vera, chamomile, tea tree oil, or vitamin E.
Avoid hot showers, baths, saunas, and steam rooms for 24 hours after waxing, as heat can cause irritation[3]. Lukewarm water is best.
Let the wax technicians know if you have any allergies or skin sensitivities before your appointment. Follow their aftercare advice closely.
[1] https://waxcenter.com/pages/waxing-aftercare
[2] http://www.theremedyroom.co.uk/waxing-aftercare
[3] https://nkdwaxing.com/articlepost-waxing-aftercare/
Professional vs At-Home Waxing
One of the biggest considerations when deciding whether to wax at home or go to a professional is the cost difference. Professional waxing at a salon or spa typically costs more per session than buying an at-home waxing kit. However, professional waxing may be more cost effective in the long run if you need fewer repeated treatments. The precision techniques and higher quality waxes used by professionals can lead to longer lasting results.
There is also a difference in pain levels. Professional wax specialists are skilled at techniques to minimize discomfort during the process. The whole experience is generally quicker than doing it yourself at home. However, home waxing allows you to control the pace and stop if needed.
When it comes to risks, professional waxing from a licensed esthetician is safer. They are trained on proper sanitization methods and can recognize any skin complications. Doing it yourself poses additional risks if you don’t properly disinfect or unintentionally remove skin. Larger areas like the legs are easier for trained professionals to wax smoothly.
The results tend to be better from professional waxing as well. With the proper techniques, salon waxing removes more hair from the root for longer lasting smoothness. The staff can also recommend appropriate aftercare products for your hair and skin type.
Ultimately, professional waxing offers more benefits for safety, long term results and experience. However, waxing yourself at home can provide convenience and cost savings if done carefully.
Source: https://thebeautybrowparlour.com.au/the-benefits-of-professional-waxing-vs-at-home-waxing-kits/
Conclusion
When weighing the pros and cons of waxing at home versus going to a professional, there are good arguments on both sides. The main benefits of waxing yourself include saving money, convenience, and customizing your hair removal. However, the downsides are the learning curve, potential mess, and risk of injury if not done properly. Ultimately, waxing at home can work well for those who take the time to learn proper technique, prepare adequately, and proceed cautiously. For more sensitive areas or if you’d rather not deal with the hassle, seeking professional waxing may be preferable. With either option, be sure to care for your skin afterward to avoid irritation.
In the end, it comes down to personal preference. If you don’t mind taking on a DIY project and are willing to invest the time to do it right, waxing yourself can be rewarding. But for those who would rather leave it to the professionals, there’s no shame in booking a waxing appointment. Whichever route you choose, hair removal by waxing requires care and patience but can leave you smooth and stubble-free.


