How To Make A Candle Step By Step?
Making candles can be a fun and creative do-it-yourself project with many benefits. By making your own candles, you can customize the scents, shapes, colors, and sizes to your exact preferences. The popularity of candle making as a hobby reflects a growing desire for handcrafted, personalized items that can make your space smell heavenly.
The process of designing and producing your own candles allows you to unleash your creativity. With the right materials, techniques, and safety precautions, candle making can be an enjoyable hobby for crafters of all skill levels. The finished candle products also make great homemade gifts for friends and family.
In this beginner’s guide, we will walk through the entire process of making candles step-by-step, from gathering supplies to finishing touches. By the end, you’ll have the knowledge to create beautiful, aromatic, customized candles in your own home.
Gather Materials
Before you start making candles, you’ll need to gather the necessary supplies. Here are the most common candle making supplies you’ll need:
- Wax – There are many types of wax to choose from including paraffin, soy, beeswax, and palm wax. Paraffin wax is the most commonly used. Be sure to get enough wax for the number and size of candles you plan to make.
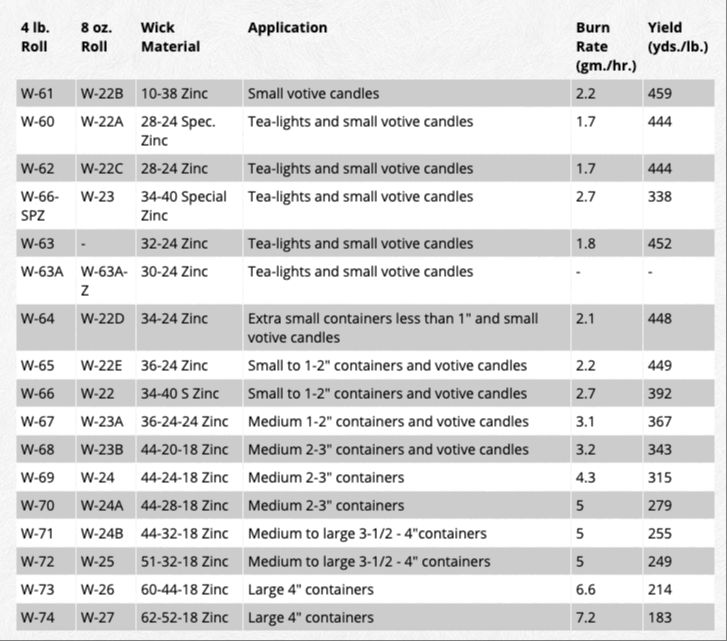
- Wicks – Wicks come in different materials, widths, and ply. Make sure to get the appropriate wick for the type of wax you are using.
- Containers – You can use glass or metal containers. Make sure they are heat safe. Choose containers that fit the size and shape of candle you want to make.
- Fragrance Oils – Use candle safe oils to add nice scents. There are many fragrance options like floral, bakery, fruit, etc.
- Dyes – Liquid or block candle dyes are available to color your candles. Use dye made for candles as other dyes may not mix properly.
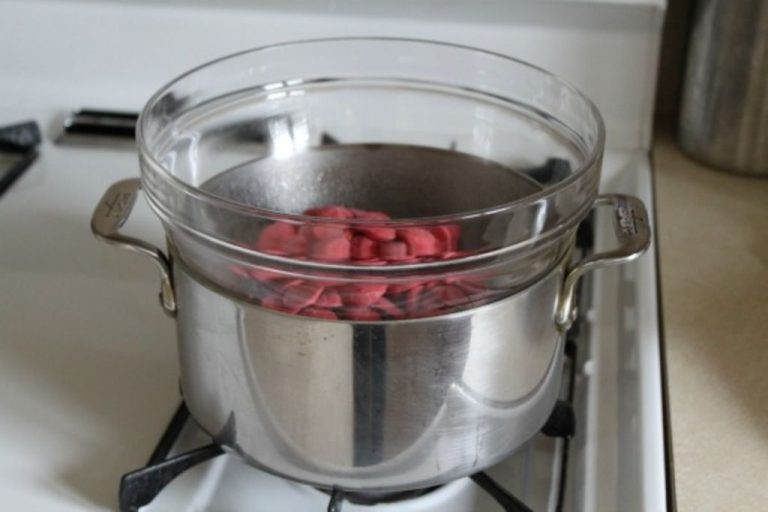
- Double Boiler – This allows you to safely melt wax at the proper temperature.
- Thermometer – You need to monitor the wax temperature as you work. Digital thermometers make this easy.
- Spoon – Use this for mixing in fragrance and dye.
- Pipette – A pipette helps you easily add drops of dye to get the right color.
You can find all the common candle making supplies at craft stores, online retailers, or specialty candle supply shops. Buying supplies in bulk can help you save money.(Source)
Prepare Workspace
Before beginning any candle making, it is crucial to prepare a safe workspace. According to Northwood Candle Supply (https://northwoodcandlesupply.com/blogs/news/5-candle-making-safety-tips-everyone-should-follow), you should clear a well-ventilated area for candle making. This allows wax fumes and heat to dissipate rather than concentrating in a small space. Make sure to cover your work surface with newspapers, a tablecloth, or wax paper to protect it and make cleanup easier. Lone Star Candle Supply (https://lonestarcandlesupply.com/candle-making-safety-tips/) also recommends having a fire extinguisher on hand before starting any candle project. Situate it near your workspace and know how to use it properly in case of emergency.
Melt Wax
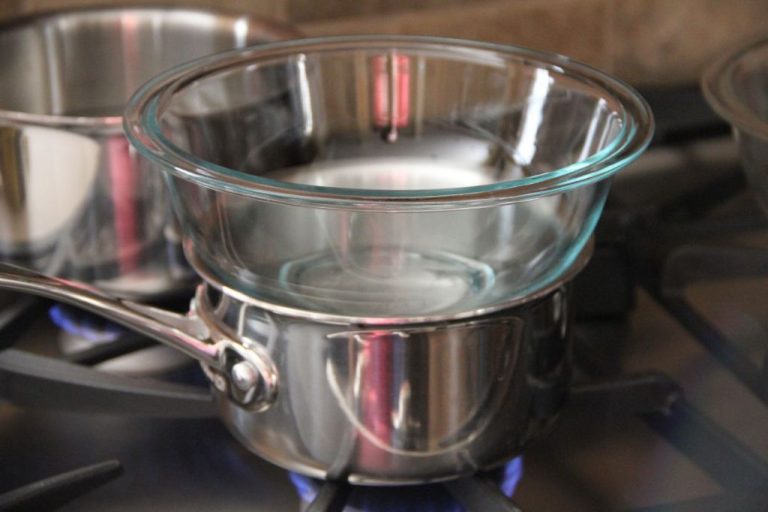
Melt wax properly according to the manufacturer’s instructions to avoid any hazards. Before melting, be sure to measure out the amount of wax needed for the candles and cut it into smaller chunks (Cxndle). This will help the wax melt faster and more evenly. Use a double boiler to melt the wax gently over low heat. Put the wax chunks into the top pot of the double boiler while the bottom pot contains an inch or two of simmering water. The indirect heat from the simmering water will allow the wax to melt slowly without overheating. Stir occasionally as the wax melts. Remove the wax from heat as soon as it is fully melted to prevent scorching the wax.
Add Color and Scent
Once the wax is fully melted, it’s time to add color and scent to your candle. Adding dye when the wax is liquid ensures it will mix and disperse evenly throughout the candle. Measure out the candle dye according to the manufacturer’s instructions, typically a few drops per pound of wax. Stir the dye into the melted wax until fully combined. See https://www.candleers.com/how-much-fragrance-oil/ for details on dye measurements.
Next, add your fragrance oils, again following the usage instructions provided. The standard ratio is approximately 1 ounce of fragrance oil per pound of wax. Be careful not to add too much oil, as this can cause issues like seepage or smoking. Stir thoroughly to incorporate the scents. At this point, your colored, scented wax is ready to pour into containers and jars!
Prepare Wicks
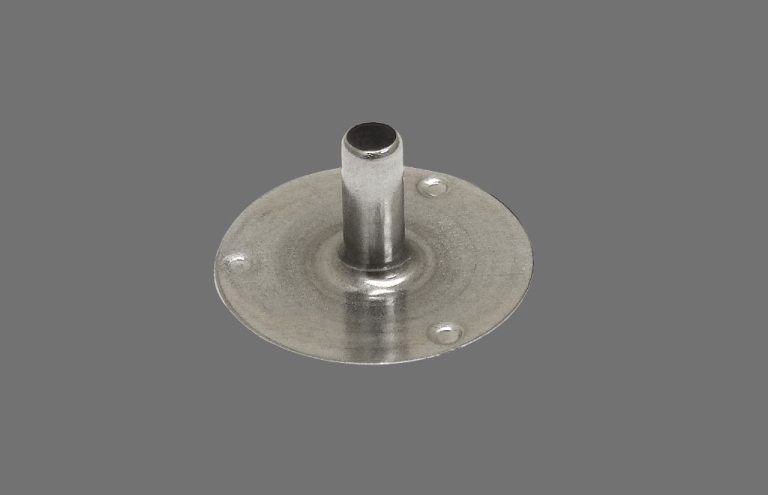
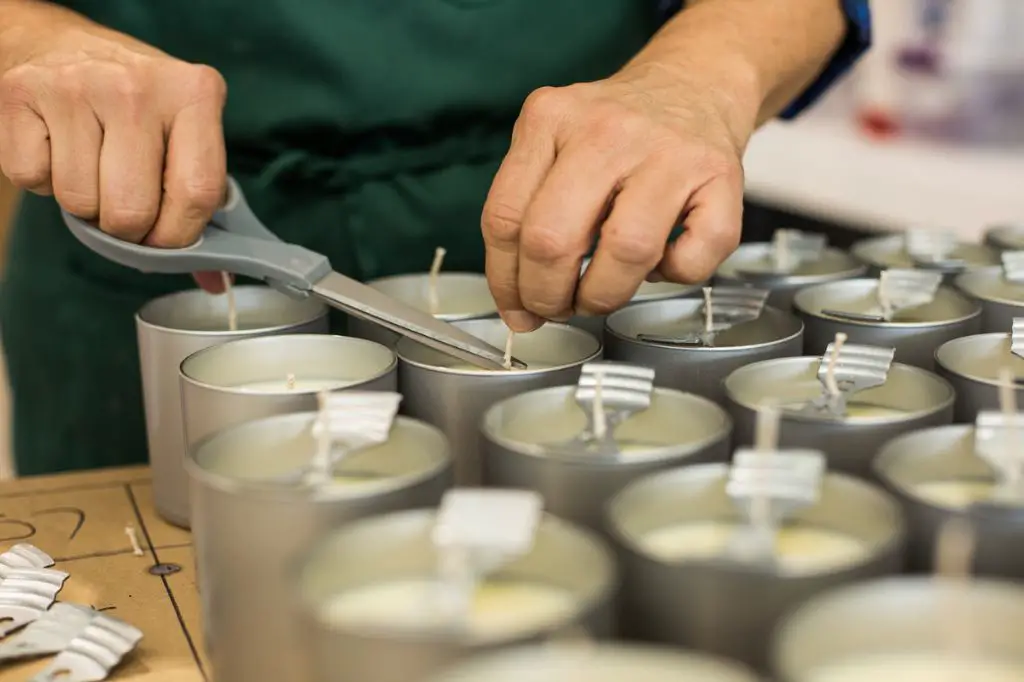
The right wick is crucial for proper candle burning. First, cut your wicks to size based on the depth of your candle container. As a general rule, the wick should be approximately 1/4 to 1/2 inch longer than the depth of the container to prevent tunneling. Attach wick tabs if needed to help center the wick in the container. Before pouring the wax, it’s important to prime the wicks by dipping them in the melted wax. This will help the wick adhere to the wax and prevent the wick from floating during the first burn. See this guide for help choosing the right wick type and size.
Pour Candles
Once the wax is fully melted, you are ready to carefully pour it into the containers. Make sure the containers are clean and dry first. Slowly pour the wax in a thin stream into each container, keeping the stream centered so the wick stays in the middle. Pour until the container is about 1/4 full on the first pour. This “first pour” seals the wick in place at the bottom of the container before doing the full pour.
Allow the wax to partially set for a few minutes until a thin layer of wax has solidified on top. This will help hold the wick in place when you do the full pour. As you pour the remaining wax, continue keeping the stream centered over the wick so it remains straight and anchored at the bottom. Fill the containers almost to the top, leaving just a little bit of room at the top for the melted wax to shrink as it cools and hardens. Make sure not to move or jostle the containers as the wax sets.
Here is a helpful video demonstrating proper candle pouring technique: Pouring slowly to help avoid air bubbles. #candlemaking #candletips
Second Pour
A second pour can help minimize sink holes and other imperfections in your finished candle. After pouring your candles the first time and allowing them to partially set up, you can top up the containers with more wax to fill in any holes or divots that may have formed as the wax cooled and shrank. Per the thread on Reddit (https://www.reddit.com/r/candlemaking/comments/144lhql/do_second_pours_really_work/), a second pour helps create a smooth, flawless top surface on your candles.
When doing a second pour, it’s important to wait until the candles have adequately set up from the first pour – usually a minimum of 4-6 hours. If you pour too soon, the candle may become overheated and lose its scent or discolor. Allow the candle to fully harden and cure after the second pour, at least 24 hours, before trimming the wick and lighting.
Finishing Touches
Once the candles have fully set, there are some finishing touches to add before they are ready to use. First, it is important to trim the wicks to 1/4 inch for best results. Sources recommend trimming the wick before each use, as this helps the wick curl as it burns and prevents excess smoke and drips (https://www.courtneyscandles.com/pages/wick-trimming-101). Trimming to 1/4 inch helps sustain an even burn and prevents mushrooming at the tip of the wick (https://www.harlemcandlecompany.com/blogs/journal/candle-care-101-how-to-trim-candle-wicks-the-right-way). Use either small trimmers made for candle wicks or small scissors to neatly trim the wick.
You can also add labels or decorative touches to the outside of the jars if desired. Soak printed paper labels in tea or coffee to stain them, or print directly on label paper. Affix labels neatly to the jars with a glue stick. For painted designs, use acrylic paint pens to hand letter or draw designs. Add ribbons around the jars, raffia bows, or other embellishments. Get creative with colors, textures, and designs to make your candle jars stand out.
Conclusion
Making candles at home is a fun and rewarding process. In this guide, we reviewed the key steps from gathering materials, prepping your workspace, melting wax, adding scents and colors, pouring into containers, performing a second pour, and adding any finishing touches. The end result is beautiful homemade candles that you crafted yourself!
Candle making allows you to customize scents and designs to your personal taste. It also makes for a relaxing, therapeutic hobby. Your homemade candles will make great gifts or home accents. We hope you enjoyed learning how to make candles step-by-step and that you’ll put your new skills to use.
Now that you’re familiar with the candle making process, get creative and make some candles to enjoy!

