How To Make A Candle Powered Heater?
A candle powered heater is a simple device that uses the heat from a candle flame to warm a small space. Unlike electric or propane portable heaters, a candle heater requires no electricity or fuel source other than plain candles. This makes them an economical and convenient emergency heating option during power outages.
Candle heaters are also very safe and eco-friendly. Since they don’t rely on combustible fuels, there is little risk of fire, fumes, or carbon monoxide poisoning. The only byproduct is a small amount of water vapor. Plus, candles can be made from renewable resources like beeswax or soy wax.
These compact heaters are ideal for warming small rooms around 100-150 square feet. Though they don’t offer as much raw heating power as an electric or gas heater, a well-designed candle heater can raise ambient room temperature by a few degrees, taking the chill out of a cold space.
With just a few basic materials and tools, you can build a simple but effective candle powered heater perfect for emergency backup or off-grid heating needs.
Materials Needed
To construct a candle powered heater, you will need the following materials:
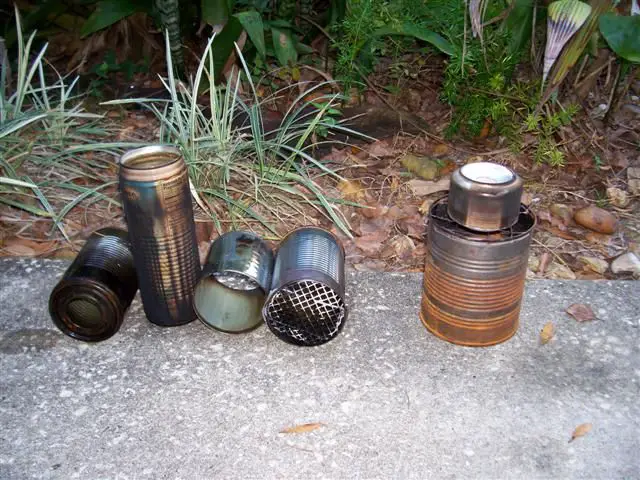
- 3-5 empty cans of various sizes (e.g. soup cans, bean cans, etc.) Make sure to remove any labels. You’ll need 1 larger can (like a 28 oz can) for the base, and 2-4 smaller cans for the candle housing and chimney.
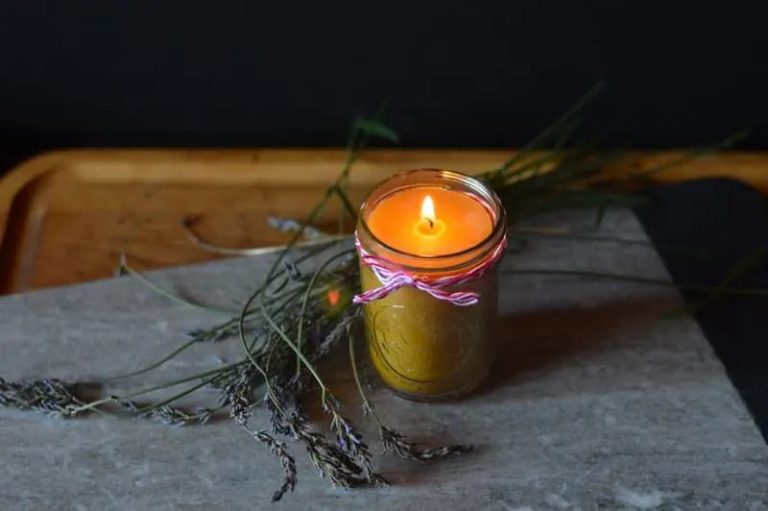
- A candle. Use a thick candle or a can of wax to allow for longer burn times.
- A metal punch or nail for making holes in the cans.
- A utility knife to cut holes in the cans.
- Heat resistant tape or glue (optional).
- Decorative material like paint, stickers, ribbon etc to customize the look (optional).
Make sure to have all materials on hand before beginning construction.
Tools Needed
To construct a candle powered heater, you will need a handful of basic tools. Here is a list of the tools required:
-
Drill – Used for drilling holes in the metal cans and wooden base.
-
Jigsaw or Tin Snips – For cutting openings in the cans.
-
Sandpaper – For smoothing any sharp edges.
-
Screwdriver – For assembling the wooden base.
-
Hammer – Optionally used for flattening the cans.
-
Metal File – For filing down metal edges.
-
Tape Measure – For measuring the cans and materials.
-
Utility Knife – For cutting and scoring materials.
-
Safety Goggles – Important for eye protection.
-
Work Gloves – To protect your hands.
These basic tools should be sufficient to construct your own candle powered heater. Always use caution and wear protective gear when operating power tools and cutting metal.
Heater Design Options
There are a few different design options to consider when making a candle-powered heater:
Open vs. Enclosed – An open design does not fully enclose the candle flame and allows some heat to escape, while an enclosed design traps more heat but can also be a fire hazard. Enclosed designs often have a glass surround.
Portable vs. Stationary – You can build a portable tin can style heater or a more permanent design made out of ceramic materials. Portable heaters are easier to move around.
Shape – Common shapes are cylindrical, box-shaped, or curved volcano/igloo style. The shape impacts air flow and heat distribution.
Single vs. Multiple Candles – Using multiple candles can increase heating power. A series of small candles may be safer than one large candle.
Chimney Design – The chimney carries hot air upwards and helps improve air circulation. You can use cans, pipes, or other materials to create a chimney.
Base Size – A larger base retains more heat but takes up more space. Consider the room size you are heating.
Constructing the Base
The base of the candle heater provides stability and raises the chimney to an optimal height for heat circulation. Here are step-by-step instructions for constructing a sturdy base:
Gather your materials. For the base you’ll need thick cardboard, empty cans, sturdy wire, and a utility knife. Cans with both ends removed work best.
Cut the cardboard into pieces that can be folded into a box shape. Use the knife to cut flaps on the edges so the pieces interlock.
Assemble the cardboard by slotting the flaps into place to form a box. Use tape on the inside joints to reinforce them. The box should be big enough to house 1-4 cans stacked inside.
Place the open cans (horizontal or vertical) inside the cardboard box. Position them to form columns that will hold up the chimney.
Use wire to reinforce the shape of the box and affix the cans firmly in place as columns. Wrap wire around the box and can tops and bottoms to stabilize the structure.
The sturdy wire and can columns inside the cardboard box will form the base of your candle heater.
Adding the Chimney
The chimney is a crucial component of the candle heater as it allows the heat to properly ventilate. Follow these instructions when installing the chimney:
Cut a hole at the top of the base slightly smaller than your chimney’s diameter. Make sure to cut the hole centered above where the candle housing will go.
Insert the chimney pipe into the hole, pressing down firmly until it fits snugly. You may need to sand or file the edges of the hole to allow the chimney to slide in smoothly.
Use a non-combustible sealant like high-temperature silicone around the chimney opening to seal any gaps between the chimney and the base. This will prevent smoke or heat from escaping through cracks.
If your chimney has an adjustable length, extend it to your desired height above the base. Generally, taller is better for allowing the candle’s heat to properly vent.
Make sure the chimney is vertical and secure. Consider using metal strapping or brackets to stabilize it if needed. The chimney should not shift or move when the heater is in use.
Your chimney is now installed and ready to ventilate the heat from your candle safely out of the heater.
Installing the Candle Housing
Properly housing the candle is crucial for safety and optimum heat output. Here are the key steps:
Step 1: Measure the diameter of the candle you plan to use. This will determine the size of the housing needed.
Step 2: Cut a hole in the metal base, slightly larger than the candle diameter. Center the hole where you want the candle placed.
Step 3: Secure a metal cylinder or empty can into the hole. Make sure it is tall enough to cover the entire candle height. This will be the candle housing.
Step 4: Place the candle into the housing, being careful that it stands upright and fits snugly. The candle should not rattle around inside the housing.
Step 5: If needed, place aluminum foil or metal washers into any gaps between the candle and housing. This prevents drafts from blowing out the flame.
Proper housing provides safety by isolating the candle flame and containing melted wax. It also allows heat to rise efficiently up through the chimney. Follow these steps carefully for best results.
Safety Tips
When using a candle-powered heater, there are some important safety considerations to keep in mind:
Make sure the heater is placed on a stable, flat surface where it cannot be knocked over accidentally. Do not put it on carpets or rugs where it could catch fire.
Keep the heater at least 3 feet away from curtains, furniture, bedding or any other flammable items. It should not be used in an area where children or pets could knock it over.
Never leave a lit candle heater unattended. Always blow out the candle before leaving the room.
Make sure to use a candle that is meant for a candle heater. Do not use regular candles, as they will burn too quickly and hot.
Do not place anything on top of the heater and allow proper air flow around the unit.
Be very cautious if using more than one candle in the heater, as multiple flames increase the risk of fire. Never use more candles than recommended.
Check the heater frequently while in use for proper candle melt, wick height and flame size. Trim wicks as needed to maintain 1⁄4” length.
Allow the heater to cool completely before moving or handling it.
Inspect regularly for damage or issues. Discontinue use if any problems are found.
Have a fire extinguisher readily available any time the candle heater is in use.
While very useful for supplemental heat, candle heaters should never be a sole heat source. Maintain your regular heating system for primary warmth.
Lighting and Using
Lighting and using your candle powered heater properly is important for both safety and optimal heat output. Here are some tips:
Use long-burning candles – Look for candles specifically marketed as “long-burning” as they will provide heat over a longer period of time. Pillar candles often burn longer than taper candles.
Allow adequate ventilation – Make sure the candle has enough oxygen to burn properly. Don’t block the chimney or openings at the base of the unit.
Trim wicks – Trim candle wicks to 1⁄4 inch before lighting to prevent smoking and promote steady, even burning.
Use fire-safe practices – Place on a stable, nonflammable surface away from drafts. Never leave a burning candle unattended.
Monitor candle level – Add new candles before the previous one burns out to maintain continuous heating. Snuff out candles completely before replacing.
Adjust for space size – Use more candle units or larger candles for heating bigger spaces. Each candle provides roughly one square foot of heating.
Supplement as needed – Candle heaters work best to take the chill off smaller rooms. Use in conjunction with other heat sources as needed.
Maintenance
Properly maintaining your candle-powered heater is important for safety and performance. Here are some tips:
-
Allow the heater to completely cool before cleaning. Never clean a hot heater.
-
Use a dry cloth to wipe down the exterior surfaces. Avoid using cleaning products which can leave residue.
-
Periodically inspect the chimney for buildup of soot or blockages. Use a chimney brush to clean if needed.
-
Check that ventilation holes are clear of dust or debris. Use a pipe cleaner to clear blockages.
-
Examine the metal surfaces for rust or corrosion. Sand and repaint damaged areas to prevent further wear.
-
Replace any damaged parts like the chimney or housing. Do not use the heater if any component is cracked or broken.
-
Always refer to the manufacturer’s instructions for proper maintenance procedures.
With regular cleaning and inspections, your candle-powered heater will provide safe and efficient warmth for years to come.