How Long Does It Take To Dip Candles?
Candle dipping is an age-old craft with evidence of candle making dating back over 5,000 years. The earliest candles were made from animal fat rendered into tallow.
These primitive candles consisted of dry plant materials embedded in tallow to create a wick. The first evidence of true dipped candles comes from Qin Dynasty China where they rendered oils from whales, sheep, and cattle into candles. Candle dipping technology spread to ancient Greece and Egypt. The Romans advanced candle making by creating wicked candles dipped in tallow around 100 BC (https://candles.org/history/).
Gathering Materials for Dipped Candles
There are several key materials needed to hand dip candles successfully. Beeswax is the most traditional and recommended wax for dipping candles. You’ll need about 1 lb of wax per candle you want to make. Wicks specifically designed for dipping candles perform the best, as the wicks need to be stiff enough to stand upright when dipped repeatedly. Molds or pillars are used to hold the wicks in place while dipping. A tall form mold, double boiler, and thermometer are needed to melt the wax properly at the ideal temperature. Finally, dyes can be used to color the wax if desired.
Here is a full list of recommended supplies to have on hand before starting the candle dipping process:
- Beeswax – 1 lb per candle planned
- Pre-tabbed wicks made for dipping candles
- Wick stick or metal mold to hold wicks upright
- Double boiler or makeshift double boiler
- Candy or wax thermometer
- Dye blocks, liquid dyes, or wax crayons for coloring wax (optional)
Gathering high quality supplies will help ensure you can dip attractive, long lasting, and safe candles successfully.
Preparing the Wax
The first step in dipping candles is preparing the wax. Beeswax is commonly used for dipping candles as it has a high melting point that allows the candles to burn longer. To prepare beeswax for dipping:
Melt the beeswax in a double boiler or old crockpot dedicated for candle making, aiming for a temperature between 150-160°F. Beeswax melts at temperatures between 144-147°F, so maintaining it above 150°F keeps it in a liquid state for dipping. Do not overheat the wax, as higher temperatures can cause beeswax to lose its aromatic properties (Underatinroof.com, 2022).
Once melted, add candle dye as desired to achieve your preferred color. Use wax-safe dyes and mix well to fully incorporate the color. Popular options are liquid candle dyes or fine dye blocks that melt into the wax. Limit dye to 1⁄8 to 1⁄4 tsp per pound of wax to avoid excessive bleed or fading as the candle burns (Simplylivingwell.com, 2021).
Maintain the temperature throughout the dipping process. The wax needs to remain hot so it adheres well with each dip and creates a smooth finish. Use a thermometer to regularly check the temperature. Reheat in a double boiler as needed if it starts dropping below 150°F (Farmhouseonboone.com, 2021).
Preparing the Wicks
Choosing the proper wick is crucial for a quality dipped candle. The wick must be wide enough to support the candle wax without bending or drowning in the melted wax pool. But it also can’t be too wide or it will create an overly large flame and produce excess soot.
For dipping candles, it’s recommended to use flat braided cotton wicks that are approximately 1/4-inch wide. These provide a good balance of rigidity and flame control.
Before dipping, the wicks need to be cut to the proper length. A good rule of thumb is to cut the wick approximately 1/2 inch shorter than the finished candle height. This prevents the wick from sticking out too far above the melted wax pool.
It’s also important to prepare “wick tabs” at the base of each wick before dipping. These are extra pieces of wick that extend perpendicular from the main wick. They anchor the wick onto the bottom of the candle and prevent it from falling out during the dipping process. Most wick suppliers provide stick-on wick tabs for convenience.
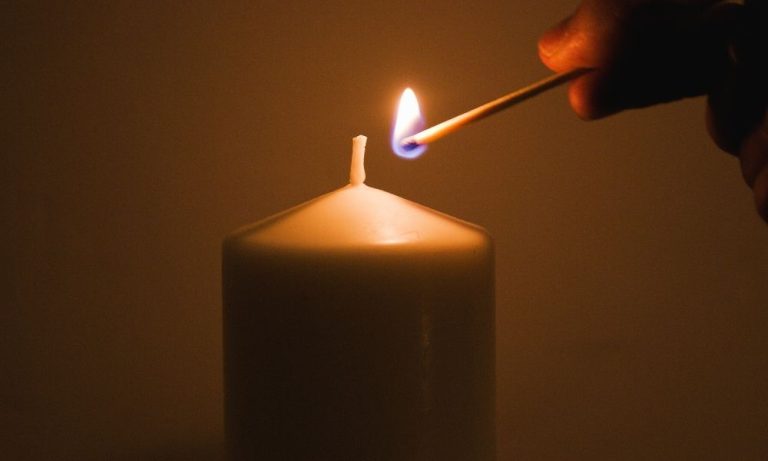
Dipping the Candles
Once the wax and wicks are prepped, you can begin dipping the candles. This is the main event! The dipping process requires patience and care. According to Ouroilyhouse.com, you’ll need to dip the wicks into the wax a number of times to build up the candle. Most candles require at least 8-12 dips.

The dip time can vary based on wax type and desired thickness. Paraffin wax only needs a 3-5 second dip, while soy or beeswax may need 5-15 seconds. It’s important not to over-dip, as this can lead to air bubbles in the candle. Allow the candle to cool slightly between dips, around 1-2 minutes. Cooling helps set the wax before the next layer.
One key tip from Wilder Companion is to dip deeper each time, building up to the full depth but not exceeding the wick length. Pull the wick straight and slow each dip. This will prevent thin spots and drips. Take care not to get wax up the wick, as this impacts burn quality. With patience and precision, dipping candles can be a relaxing, rewarding process.
Achieving Desired Finish
Once your candles have reached the desired thickness, you can start thinking about the finishing techniques. There are a few options to give your hand-dipped candles a smooth or textured look.
For a smooth finish, continue dipping the candle in wax until the surface is free of imperfections. According to Woodlark Blog, “Repeat the dipping process until each candle reaches your desired thickness and hang on the drying rack to set” (source). This will create an even, polished exterior.
You can also try “pulling” the candles for a smooth look. As Whole Hearted Eats explains, “To pull a candle, gently roll the base over the top of the dipping pot after coating it with wax. This helps smooth out drips and bumps” (source). Pulling evens out the wax coating.
For a textured finish, you have options like adding wax designs, carving, or impressing objects into the surface while the wax is still warm. Get creative with textures like stripes, swirls, or patterns. The texture possibilities are endless!
Drying and Cooling
After candles are dipped, they need time to dry and harden before the next coat of wax can be applied. Drying times will vary based on the size and shape of the candle, as well as environmental factors like temperature and humidity. In general, drying times can range from a few hours for thinner candles to overnight or longer for thicker candles.
Proper drying is important to prevent cracking or deforming of the wax. The candle should be dried in a dust-free area with adequate airflow. Cooling racks designed for dipping are ideal, as they allow 360 degree airflow around the candle. The racks should be tall enough that the bottom of the candle does not touch any surface while drying.
One source recommends at least 4-6 hours of drying time between coats for standard tapers. Thicker pillar candles may require 12-24 hours of drying time between dips.1 The drying area should be around 70-80°F with low humidity. Drafty areas should be avoided, as air circulation should come from all sides rather than one direction.
Allowing adequate drying time prevents drips, runs, and other imperfections. Rushing the drying may compromise the finish and appearance of the final candle. With proper drying racks and drying times, dipped candles can cool and harden perfectly between coats.
Troubleshooting Issues
Making candles does not always go perfectly. Some common issues when dipping candles include discoloration, sinkage, air bubbles, frosting, cracking, poor adhesion, and more. Thankfully these problems can often be prevented or fixed with some troubleshooting.
To prevent air bubbles, pour wax slowly and tap the dipping rod against the side of the melting pot to release trapped air before inserting into wax. Let each coat set up between dips. An air bubble remover tool can eliminate bubbles on the candle surface. Sinkage happens when wet layers are too hot and heavy, so allow proper cooling time between dips. Using thicker wax can also reduce sinkage. If sinkage still occurs, a heat gun on low can gently remelt the top layer to fill it in while the candle sits on a cold surface like a freezer pack (cite: https://www.lifenreflection.com/how-to-fix-candle-problems/).
To avoid discoloration, maintain a clean melting pot. Filtering wax through a dipping filter removes debris. Work quickly and don’t hold wicks in melted wax too long. If discoloration still develops, scrape off top layer with a knife and redip. Properly priming wicks before use curbs many issues like poor adhesion, frosting, cracking, etc (cite: https://villagecraftandcandle.com/blogs/news/top-10-candle-making-problems-and-how-to-solve-them).
Storing Dipped Candles
Proper storage is crucial for maximizing the shelf life of hand dipped candles. After the candles have completely dried and cooled, store them in a cool, dry, dark place like a cupboard or drawer away from direct sunlight and heat sources. Temperatures between 60-75°F are ideal.
Exposure to light, heat, and fluctuations in temperature can cause the wax to soften, slump, sweat, or crack over time. Storing candles in a temperature controlled environment helps preserve the wax and fragrance.
Wrap each candle in tissue or craft paper to protect the exterior coating. This prevents dust build up and scratches. Do not tightly wrap in plastic or foil as this can cause condensation.
Candles stored properly can last 1-2 years. Write the dipping date on the bottom of each candle to keep track. In general, the older the candle, the faster it will burn as the fragrance diminishes over time.
If wax bloom appears on the surface, simply wipe it off. Bloom is a harmless, cosmetic white film caused by temperature fluctuations during storage. It does not affect burn quality.
With proper storage, hand dipped candles can be treasured for years to come. The time and care put into the dipping process will be evident with each beautiful burn.
Source: https://www.motherearthnews.com/diy/crafting/make-hand-dipped-candles-at-home-zbcz2202/
Conclusion
Hand dipping candles is a fun and rewarding process, but it does require patience. From gathering materials to the final drying time, the entire process takes around 3-4 hours total. The actual dipping itself takes about 20-30 minutes. You’ll need to dip the wicks into the wax 20-25 times to achieve the desired thickness and finish. Working in small batches allows you to reuse the wax. Reheating the wax periodically maintains the ideal dipping temperature. Allowing 1 hour for the dipped candles to fully cool and harden is important to prevent defects. While hand dipping candles takes time, the end result is well worth the effort. The handmade, homemade look is part of their charm.