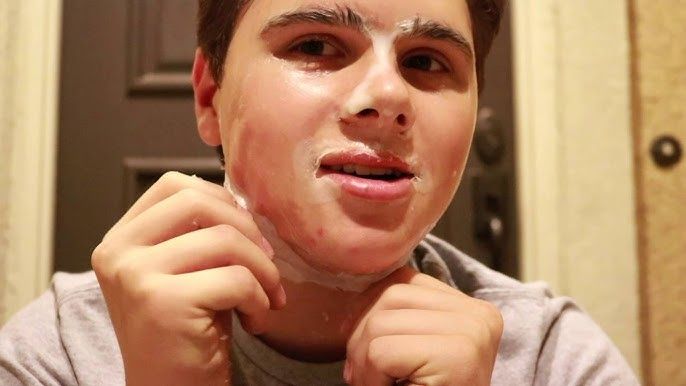
How Do You Wax Your Upper Lip Without Getting Spots?
Many women struggle with unwanted facial hair, especially on the upper lip area. This hair can appear darker and more noticeable due to hormonal changes, heredity, and ethnicity. While it’s a common issue, the hair can cause embarrassment and lower self-confidence. Fortunately, there are effective ways to remove upper lip hair and keep it under control. One of the most popular methods is waxing, which can provide smooth skin that lasts for weeks. However, waxing the sensitive lip area does require some caution to avoid irritation, ingrown hairs, and bumps. By properly preparing the skin, using the right techniques, and caring for skin afterwards, waxing can be done safely with optimal results.
Prepare Your Skin
Before waxing your upper lip, it’s important to properly prepare the skin to help minimize irritation and allow for easier hair removal. One key step is to exfoliate the area one to two days before waxing. As explained by Biosoft, exfoliation removes dead skin cells and allows wax to adhere closely to hair follicles for more effective results.

Exfoliating also helps prevent ingrown hairs by clearing away debris that could block hair growth. You can exfoliate gently with a washcloth, use a scrub with fine particles like sand or sugar, or try chemical exfoliants with ingredients like glycolic acid. Just be careful not to scrub too aggressively right before waxing, as this can lead to skin irritation.
It’s also helpful to apply a warm, damp washcloth to the upper lip area for a few minutes before waxing. As explained by Star Pil Wax, the heat helps open pores and soften skin so hairs release more easily. Opening pores ahead of time can make for a smoother, less painful waxing experience.
Select the Right Wax
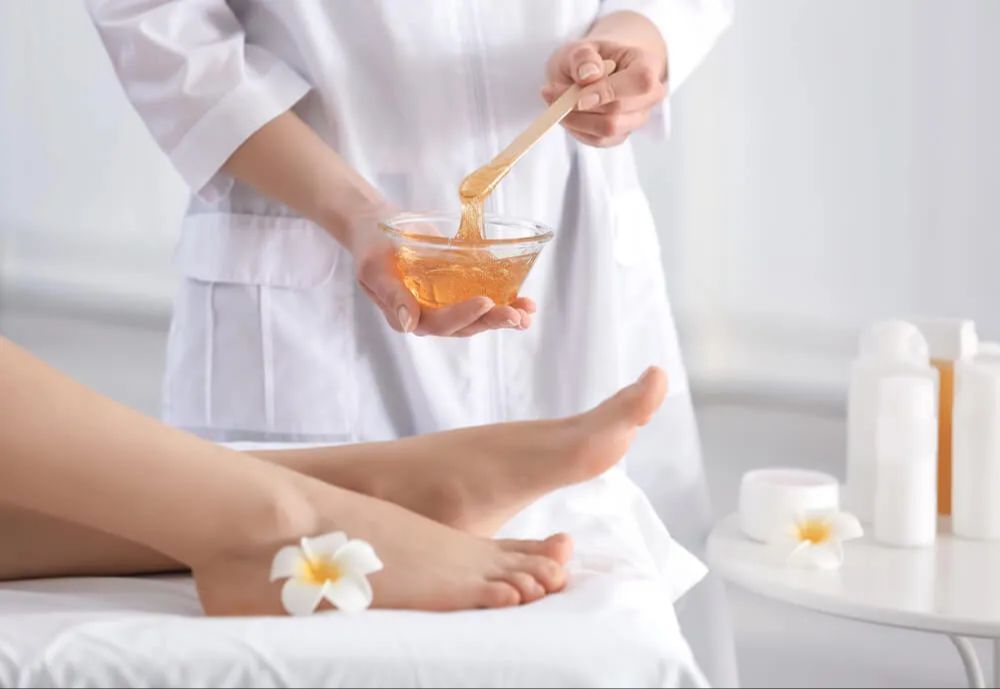
When waxing the upper lip area, it’s best to use a hard wax rather than a soft wax. Hard waxes are formulated to adhere to the hair and not the skin, making them ideal for delicate facial areas Differences Between Hard and Soft Wax. Soft waxes require a cloth or paper strip to remove, which can result in irritation and breakouts. Hard waxes harden and shrink wrap around the hairs, allowing you to remove the wax in one piece without strips Waxing 101: What’s the Difference Between Soft and Hard. This makes hard wax gentler on sensitive skin like the upper lip.
Opt for a hard wax formula specifically designed for the face. Avoid soft waxes that utilize cloth strips as they can damage the delicate facial skin. Hard waxes allow for a more precise application and removal, resulting in less irritation.
Test the Temperature
One of the most important steps when self-waxing is to test the temperature first. Wax that is too hot can cause severe burns. Before waxing any sensitive areas like your upper lip, it’s essential to test the wax temperature on your wrist or inner forearm.

Allow a small drop of wax to cool on your wrist for a few seconds. It should feel warm, not hot. If it starts to burn or sting, it is too hot and needs to cool down more. The ideal wax temperature range is 105-125°F.
Hard wax may need temperatures around 120-140°F to reach the proper consistency. Soft wax can use lower temperatures around 85-115°F. Refer to your specific wax instructions.
Only once the wax feels warm but not painfully hot on your wrist should you proceed to apply it to your upper lip. Testing first helps avoid painful burns and irritation.
If needed, turn down your wax warmer or give the wax more time to cool before use. Properly heating the wax is one of the most crucial steps for safe, effective hair removal.
Apply Thin Layers
When waxing the upper lip, it’s important to apply the wax in thin, uniform layers. As recommended by experts from the American Academy of Dermatology, “Apply the wax to a small section of your skin with unwanted hair. For the best results, always spread the wax in the direction of hair growth.” (Source). Applying the wax in the same direction as the hair growth allows for more complete adherence.
Using a wax applicator, spread a thin layer of wax over a small area of the upper lip in the direction your hair grows. As advised by TotalBeauty, “Always apply wax in the direction of hair growth, as it allows the wax to adhere more completely.” (Source). Avoid using thick blobs of wax, which can be messy and ineffective for hair removal. The key is to apply the thinnest uniform coating needed to grip the hairs.
Remove Quickly
When removing the wax strips, it’s important to pull them off in the opposite direction of hair growth. This allows the wax to remove more hair effectively. Go slowly and avoid repeating areas, as this can lead to irritation and ingrown hairs. According to Flamingo, you should “Pull skin taut at the base of the strip with your non-dominant hand. Then pull the strip quickly and close to skin.” Removing the strips properly is key to getting a smooth upper lip without breakouts or spots.
Clean the Area
After waxing, it’s important to properly clean the area to avoid irritation. First, use a cotton pad or cloth to gently wipe away any excess wax residue left behind. Be thorough but gentle. According to professional waxing experts like WaxCenter, you’ll want to avoid rubbing too harshly as this can lead to inflammation (https://waxcenter.com/pages/waxing-aftercare).
Next, apply a soothing aloe vera gel to the area. The cooling effect can help provide relief from any redness or inflammation. Products like Starpil’s Post Wax Ingrown Hair Serum contain aloe along with other soothing ingredients to calm the skin post-wax (https://www.starpilwax.com/blogs/news/post-wax-care-tips). The aloe vera will also act as a protective barrier for the freshly waxed skin.
Being diligent about cleaning the waxed area properly will help minimize the chances of irritation and ingrown hairs developing afterwards.
Avoid Irritation
It’s important to avoid irritating the skin for 24 hours after waxing your upper lip. Makeup, sun exposure, hot water, exfoliants, and tight clothing can all lead to irritation, redness, and bumps. Allow your skin to heal by avoiding the following:
- Makeup – Skip makeup for 24 hours, as it can clog pores and lead to bumps. Allow your skin to breathe.
- Sun – Protect freshly waxed skin from sun exposure for 24-48 hours. The sun can lead to irritation and hyperpigmentation.
- Hot water – Avoid long hot showers or baths, as the heat can inflame follicles. Lukewarm water is best.
- Exfoliants – Don’t use any scrubs, masks, toners, or chemical exfoliants until your skin has fully healed.
- Tight clothing – Tight collars, scarves, or turtlenecks can rub against tender skin. Opt for loose comfortable clothing.
Giving your skin 24 hours to heal will help prevent irritation and ingrown hairs after waxing the upper lip area. Be patient and allow the skin to fully recover before introducing any products or irritants.
Watch for Reactions
After waxing your upper lip, be on the lookout for any negative reactions. Redness, irritation, and swelling are common and usually subside within a few hours (1). However, more severe reactions can sometimes occur.
Look for signs of redness, swelling, bumps, pimples, or rash near the waxed area. This may indicate an allergic reaction or infection. Seek medical attention right away if you experience severe swelling, oozing, blisters, or trouble breathing (2).
Less serious side effects like ingrown hairs and dark spots may show up within 24-48 hours. Apply aloe vera gel and avoid irritation to help calm the skin (3). If any reaction persists longer than 2-3 days or seems to worsen, it’s best to contact your dermatologist.
With proper aftercare and gentle treatment, your skin should recover quickly from waxing your upper lip area. But recognizing potential problems early allows you to address them before they become severe. Monitor the waxed region and don’t hesitate to call your doctor if you have concerns.
(1) https://www.healthline.com/health/face-wax-side-effects
(2) https://www.verywellhealth.com/dealing-with-the-side-effects-of-waxing-2616682
(3) https://www.byrdie.com/how-to-avoid-and-treat-the-side-effects-of-waxing-1717224
Maintenance Tips
To maintain smooth skin between waxing appointments, be sure to follow proper aftercare. According to https://www.truesugaring.com/how-to-maintain-a-brazilian-wax, exfoliating too soon after waxing can cause irritation. Wait 24-48 hours before using any scrubs or exfoliators on the waxed area. After that, gently exfoliate once a week to prevent ingrown hairs.
You can also tweeze any stray hairs that may have been missed during the wax. Just be careful not to over-tweeze or irritate the skin. To stay smooth, plan to get waxed again every 3-6 weeks. The more frequently you wax, the easier it will be on your skin over time. According to https://depilbrazilwaxing.com/b/3-Tips-To-Maintain-Your-Wax-Between-Appointment/27, maintaining your wax schedule is key for the best results.