How Do You Use Candle Wax Beads?
What Are Candle Wax Beads?
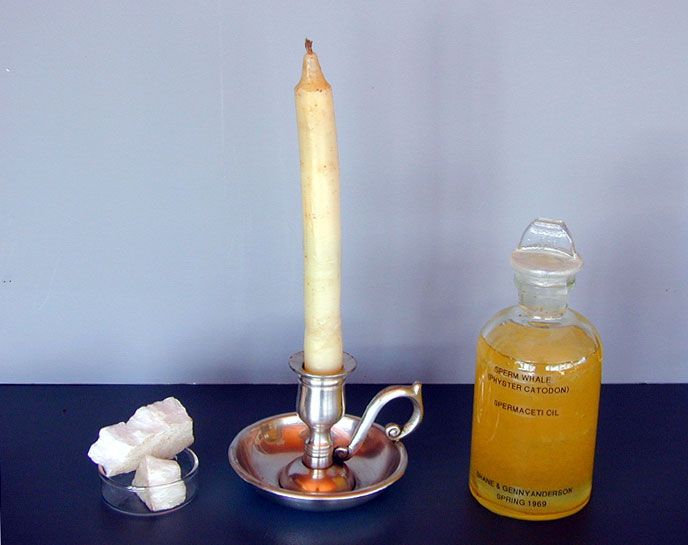
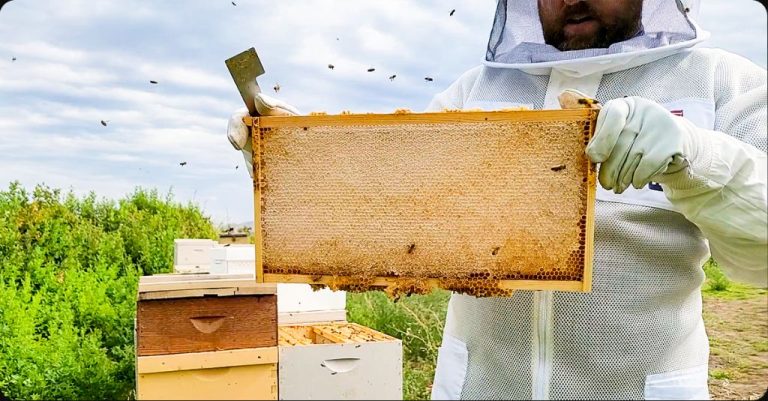
Candle wax beads are small, round pellets of wax that are specially formulated for candle making. They are typically made from paraffin wax, although soy wax beads and beeswax beads are also available. Candle wax beads have a smooth, uniform shape and size that allows them to melt quickly and evenly.
The beads are about the size of a pea or smaller. This small size gives them a high surface area to volume ratio, which helps them melt fast. Their smooth, rounded shape also eliminates sharp edges that could lead to air pockets in finished candles. The consistency in size helps the wax melt at an even rate.
Candle wax beads are hard at room temperature. Their composition is 100% wax, without any additives. The beads melt at temperatures between 130°F and 145°F. This allows them to liquefy easily in a double boiler, slow cooker, or wax warmer without getting too hot. The melted wax has a smooth, viscous consistency perfect for candle making.
The uniform shape and reliable melting properties of candle wax beads make them an excellent choice for home candle crafting and commercial candle production. Their small size provides flexibility in melting only the amount needed per project. Candle wax beads deliver consistent results with fewer frustrating variables like uneven melting.
Benefits of Using Candle Wax Beads
Candle wax beads provide several advantages over traditional blocks of candle wax. The small, uniform beads melt faster and more evenly than large blocks of wax. This allows you to get your candle making project underway quickly without waiting for large chunks of wax to melt. The beads also make it easy to measure out precise amounts of wax for custom blends and mixing colors. You’ll have full control over the wax mixture without guessing how much of a big block you’ve added.
With beads, it’s simple to melt small batches of wax as needed for multiple pourings. There’s less waste since you can melt the exact amount required. The beads provide flexibility and convenience compared to chopping wax off a large block. You’ll gain confidence using consistent beads to create candles precisely how you envision. Whether going for a simple single color or an elaborate multi-layered swirl, the beads make customized candle making easy.
Melting Candle Wax Beads
To get your candle wax beads into liquid form, you need to melt them. There are a few different methods you can use to melt wax beads safely and effectively:
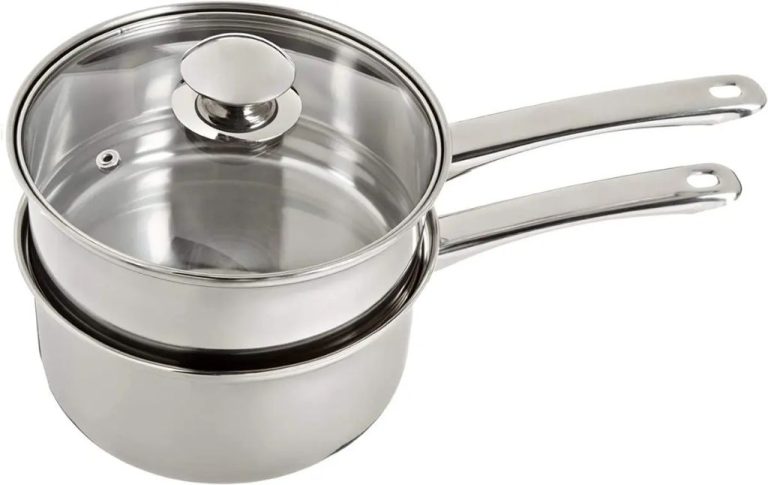
Double Boiler
A double boiler evenly heats the wax without risk of scorching or overheating. Fill the bottom pot with a few inches of water and place your pouring pot on top. Heat the water slowly until the wax melts. Make sure the bottom pot does not boil dry.
Slow Cooker
Slow cookers make excellent candle wax melters. Add your wax beads to the slow cooker, set it to low or warm, and your wax will be melted in no time. Use a dedicated slow cooker to avoid getting wax in your food crockpot.
Microwave
You can melt wax beads in the microwave in short intervals, stirring between each session. Melt the wax in a microwave-safe glass or ceramic container. Start with 30 second bursts, stirring well before reheating. This prevents overheating. Do not microwave plastic containers.
Safety Tips:
- Never leave melting wax unattended
- Keep wax away from open flames, sparks, and heat sources
- Work in a well-ventilated area
- Protect your hands and skin when handling hot wax
Once your candle wax is entirely melted with no remaining beads, it is ready to pour into containers and add scents or dyes.
Adding Fragrance Oils
One of the best parts of making your own candles with wax beads is choosing your favorite scents by adding fragrance oils. When adding fragrance oils to candle wax, it’s important to follow some guidelines to end up with properly scented candles that smell great and burn cleanly.
Most fragrance oil suppliers recommend adding 0.5-1 oz of fragrance oil per pound of candle wax. Exceeding 1 oz per pound can lead to issues like fragrance throw being too strong, residue on the inside of the glass jar, and the candle not burning cleanly. It’s best to start with a lower amount like 0.5-0.7 oz per pound, test how it smells, and gradually increase if needed.
When adding the fragrance oil, make sure the wax is fully melted. Slowly pour the measured fragrance oil into the melted wax while stirring continuously for 2-3 minutes to fully incorporate it. Avoid splashing or stirring too vigorously which can introduce air bubbles. Stirring gently prevents cold spots and ensures even fragrance distribution.
Some fragrances like citrus or spice oils may accelerate how quickly the wax starts to harden. Work swiftly after adding these types of oils. Have candle jars ready nearby so you’re prepared to pour quickly once the fragrance is added.
Coloring Candle Wax
Adding color to candle wax beads allows you to create candles in any shade you desire. Here are some tips for coloring candle wax:
Use liquid candle dye – Liquid candle dyes are concentrated oils that evenly distribute color through melted wax. Start with just a few drops of dye per pound of wax and mix thoroughly before adding more as needed.
Achieve an even color – Make sure your wax is fully melted before adding dye. Stir slowly and thoroughly after adding dye to evenly distribute the color. If needed, melt wax again to help blend the dye.
Match dye and wax type – Be sure to use dye specifically formulated for the type of wax you are coloring. Soy, paraffin, and beeswax dyes are not interchangeable.
Avoid crayons or oil paints – While tempting for their color options, art supplies like crayons and oil paints should be avoided. They may contain waxes or oils that interfere with candle making.
Consider blending colors – You can create custom colors by blending two or more dyes together in the melted wax. Mix small test batches first to perfect your color.
Add dye sparingly – A little dye goes a long way. Start with a small amount of dye and increase gradually until you achieve the desired color intensity.
Following these tips will help you easily color candle wax and create perfect colored candles every time.
Preparing Candle Jars and Containers
Proper preparation of candle jars and containers is an important step before pouring in melted wax. You want to make sure the vessels are clean and ready to hold the wax. Here are some tips for prepping candle jars and containers:
Cleaning – Wash candle jars thoroughly with hot soapy water to remove any dust, oils or residue. Rinse and dry the jars completely. You can also run the jars through the dishwasher on the hot wash and dry cycle to sanitize them.
Remove Labels – Peel off any existing labels or glue from reused jars. Use a scraper if needed to get rid of glue residue. The jars need to be clean and label-free before pouring in wax.
Wicks – Prepare wicks by cutting them to size and attaching them to the bottom of the jar using wax or glue dots. The wick should be centered and straight. Allow glue to fully dry before pouring in wax.
Sealing – If you want to prevent wax from sticking to the jar interior, brush the inside of the jar with rubbing alcohol. This will seal the surface. Or use a soy wax container sealant for a more effective barrier.
Pre-Waxing – For a smooth finish, apply a light coat of wax inside the jar and allow it to fully harden before pouring in the main wax. This pre-wax layer will help the main pour release from the glass easier.
With clean, prepared jars you are ready for the next step – pouring your melted candle wax to create the perfect candle!
Pouring Candle Wax
Proper pouring temperature and technique are important for achieving the best results when making candles with wax beads. Here are some tips:
Temperature – The wax should be poured between 150-165°F (65-74°C). Any hotter and you risk scorching the wax or causing sinkholes. Any cooler and the wax may start to solidify too soon. Use a thermometer to check the temperature before pouring.
Pouring Technique – Pour the wax slowly and steadily in a thin stream from high above the jar, at least 6 inches/15 cm. This helps prevent air bubbles. Move the stream around to evenly coat the sides. Top off each jar a little at a time to get a smooth finish.
Cooling Time – Allow the candles to cool undisturbed for at least 6 hours. Cooling too quickly can cause cracks or sinkholes. Ideal cooling temperature is around 65°F/18°C. Once cooled, trim wicks to 1⁄4 inch before lighting.
Following proper pouring methods will help you end up with flawless, professional-looking candles every time. Allowing adequate cooling produces candles that burn evenly with no tunneling.
Troubleshooting Issues
Candle making may seem straightforward, but there are some common issues that can arise. Here are some troubleshooting tips for fixing problems with your homemade candles:
Wet Spots
Wet spots, or uncured wax, occur when some areas of the candle fail to completely harden. This can lead to the candle tunneling or forming a crater as it burns. Wet spots are often caused by pouring candles at too high of a temperature or moving candles before they fully set up. Allow your candle wax to fully cool and harden for at least 24 hours before moving or lighting candles. If wet spots still persist, you may need to add more fragrance oil to fully harden the wax.
Frosting
Frosting is when white spots form on the surface of poured candles. It is typically caused by pouring the wax at too low of a temperature or by moisture interacting with the wax. To prevent frosting, make sure your candle wax is around 150-165°F when pouring the candles. Also pour candles in a dry environment without humidity. If frosting occurs, use a heat gun to gently remelt the spots and smooth over the surface.
Poor Scent Throw
If your finished candles have little to no scent throw, there are a few ways to strengthen the fragrance. First, make sure you added enough fragrance oil – approximately 1 ounce per pound of wax is a good starting amount. Second, give the wax more time to fully cure and harden, as this helps scent throw develop. Lastly, using hotter wax around 175-180°F when pouring will also boost scent throw. Avoid pouring wax that is too hot though, as this can burn off scents.
Storing Leftover Candle Wax
Properly storing unused candle wax beads is important for preserving the wax so it can be re-melted and used again. Here are some tips for storing leftover wax:
- Allow the wax to fully harden and cool before storing. Attempting to store soft or warm wax can cause it to lose its shape.
- Store wax in an airtight, sealed container. This prevents the wax from absorbing odors and oils that can impact fragrance and burn quality.
- Glass jars or metal tins work very well for storing wax. Plastic containers can also work as long as they have an airtight seal.
- Keep stored wax away from heat sources like stoves, ovens, and direct sunlight which can melt the wax.
- Label the container with the type of wax, color, and any scent. This makes it easier to identify what’s inside.
- Store wax beads in a cool, dry area like a pantry cupboard or closet. Temperature and humidity fluctuations can negatively impact wax.
- Use stored wax within 1-2 years. Older wax may lose its scent and performance.
When ready to reuse leftover wax, simply break off a piece of the desired size and re-melt it using a double boiler or candle wax melter. The stored wax beads should melt and perform just like new!
Creative Uses for Candle Wax
Candle wax beads open up a world of possibilities for crafters and DIY enthusiasts. Once you have mastered the basics of candle making, you can start to get creative with unique candle containers and wax craft projects.
Some ideas for creative uses of candle wax beads include:
- Making candles in repurposed containers like cups, bowls, jars, and vases. This is a great way to upcycle items around your home into beautiful, one-of-a-kind candles.
- Filling hollowed out seashells, stones, or geodes with wax to make natural-looking candles.
- Using silicone molds to create shaped candles like stars, hearts, or animals.
- Embedding dried flowers, herbs, spices, or glitter into the wax for decoration.
- Stacking multiple sized containers to make tiered candles.
Aside from candle making, candle wax beads can also be used for crafts and DIY projects like:
- Making custom wax melts, tarts, and cube for warmers and electric burners.
- Coating the inside of glass bottles or vases with wax to create a frosted effect.
- Adhering photographs and keepsakes to glass or wood with a thin layer of melted wax.
- Making homemade wax stamps and seals.
- Coating thread or cord with wax to make it waterproof.
With candle wax beads and a little creativity, you can make boutique-quality candles, wax melts, and more at home. Not only are these projects fun to create, but they also make wonderful handmade gifts!